The process of creating do-it-yourself bunk beds, how to avoid mistakes
Owners of small apartments have to solve the problem of saving space. The standard layout with a small area of the rooms makes it necessary to look for compact, functional furniture to make the environment as ergonomic as possible. A successful option is a bunk bed with your own hands, which will free up space for games in the children's room.
Content
Development and detailing
Before making a bed of wood, you need to determine the size and placement of furniture in the bedroom. In addition, you need to determine how the stairs will be installed to climb the upper tier. It can be on the side or on the front of the bed. The total length of the structure will be approximately 80 mm longer than the sleeping place, and the width will be more than 100 mm. You also need to consider that the side with the vertical staircase increases by another 45 mm, so it is important to correctly calculate the placement of the bed in a small nursery.
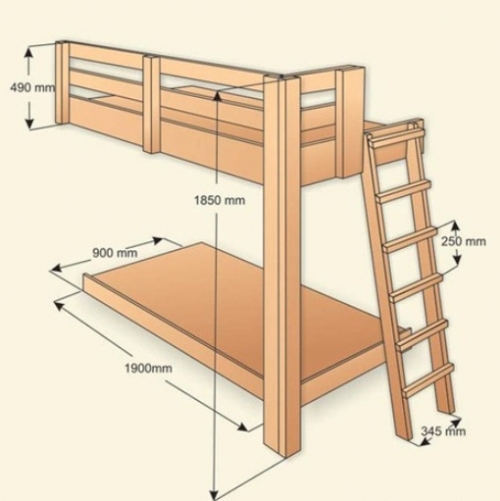
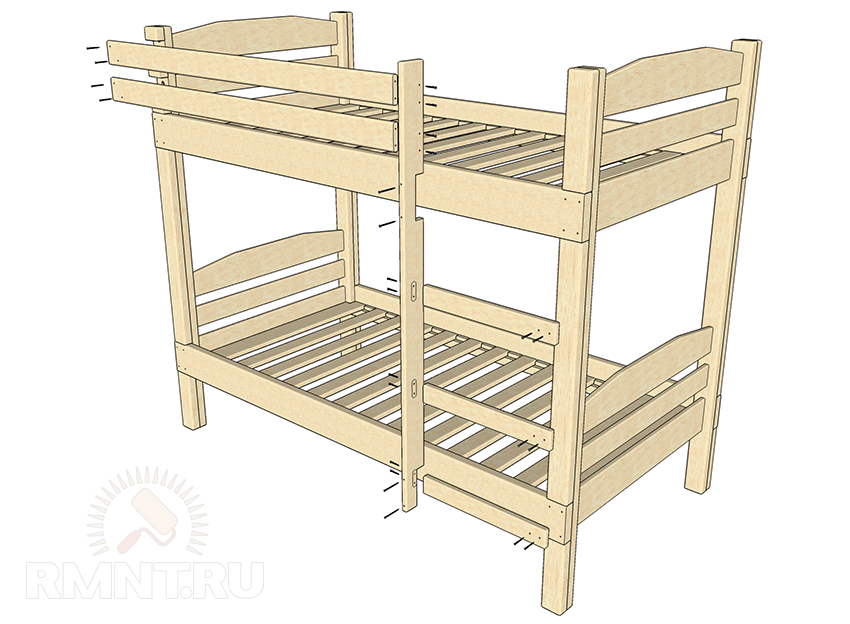
To understand how to make a bunk bed, you need to prepare a set of drawings - examples are presented below. For a standard design designed for two teenagers, you can select the following options:
- total height - 1850 mm. It is not recommended to make the second tier too high, since under the ceiling the child will be stuffy and uncomfortable;
- the height of the side of each tier is 490 mm. This is a guarantee of protection, thanks to the side the child will not fall;
- berth length - 1900 mm. This is usually enough even for a tall teenager, when calculating the length, the dimensions of the mattress are taken into account;
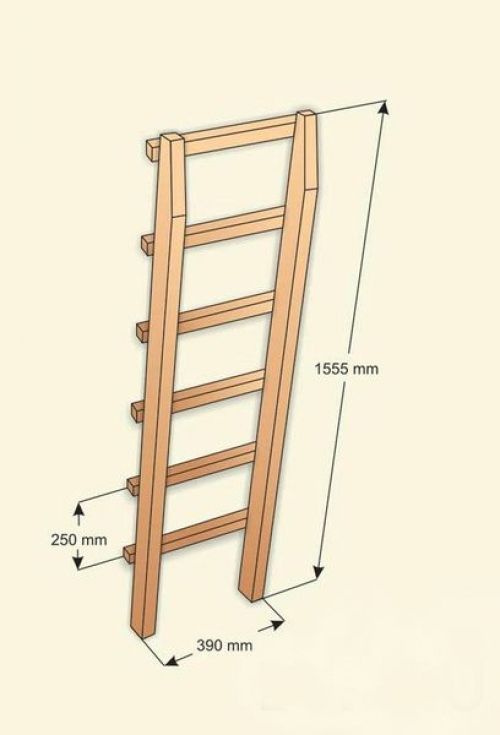
- the width of the berth is 900 mm. The width of the stairs is 345 mm, the distance between the steps is 250 mm.
The optimal location of the upper tier is determined so that the one sitting on the first tier does not touch the second head. The bottom should be comfortable to sit, while the height should be optimal. Please note that the thickness of the mattress is about 200 mm. At the end of the article, a drawing of a bunk bed with dimensions is presented, it will allow you to create a general idea of the design.
All dimensions and drawings are given taking into account the fact that a two-story bed for children will be placed in a room with a ceiling height of 2500 mm. When designing a bed, you need to take into account the standard size of the mattress, it is selected taking into account the age and height of the child. It is recommended to provide a stock, as the furniture should last more than one year.
What is required for work
Before you make a bunk bed with your own hands, you need to prepare the necessary materials and tools. The best solution for assembly is durable pine boards, wood must be checked for defects.The table shows the list and amount of materials that are needed to make a children's bunk bed from wood.
| room | Part Name | number |
| 1. | Pine bar vertical racks | 4 |
| 2. | Outer pads for attaching to uprights | 4 |
| 3. | Side planks of the frame - drawers | 4 |
| 4. | Planks for longitudinal installation on the drawers on the inside. The frame boards are fixed on them | 4 |
| 5. | Panels for installation at the foot and head | 4 |
| 6. | Central slats for attaching the head and foot | 4 |
| 7. | Stair rail | 1 |
| 8. | Stairs | 3 |
| 9. | Security guards | 2 |
| 10. | Cross rails on which the mattress is installed | 24 |
| 11. | End boards of the frame | 4 |
A bunk bed made of solid wood, assembled by yourself, will require considerable labor costs. However, whole wood can be replaced with laminated chipboard - there will be less problems with edge processing. As a basis for a mattress, you can use not a frame of wooden battens, but sheets of durable plywood, their thickness should be at least 9 mm. Screws 3.5 to 40 mm are used as fasteners, decorative caps for masking hats will also be required, a set of tools must also be prepared. A home foreman will need a drill with a set of drills, a jigsaw, a countersink, a surface grinder. The assembly also uses 8 mm dowels and carpentry glue. Measurements will require a tape measure and a pencil. You can tighten the screws manually, but to speed up the process it is better to use a screwdriver.
Procurement of parts
How to make a bunk bed with your own hands? Having prepared everything you need, you can start preparing the components of the bed and assembling furniture. The first step is to measure the mattress, the shape and configuration of the future bed depends on it. On each side, 2 cm is added to the obtained values, so that in the future it would be convenient to make bedding. All external edges of the bed must be chamfered, as there should be no sharp corners on children's furniture. To solve this problem, a plow is used. When choosing materials, you need to pay special attention to quality: children like to jump on the bed, testing it for strength.
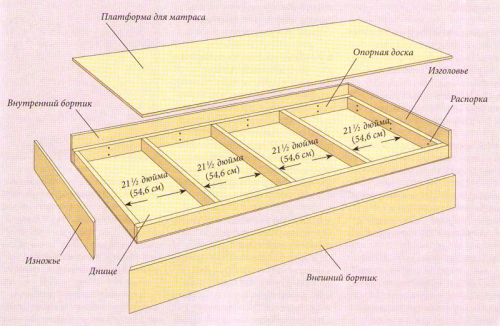
Frame
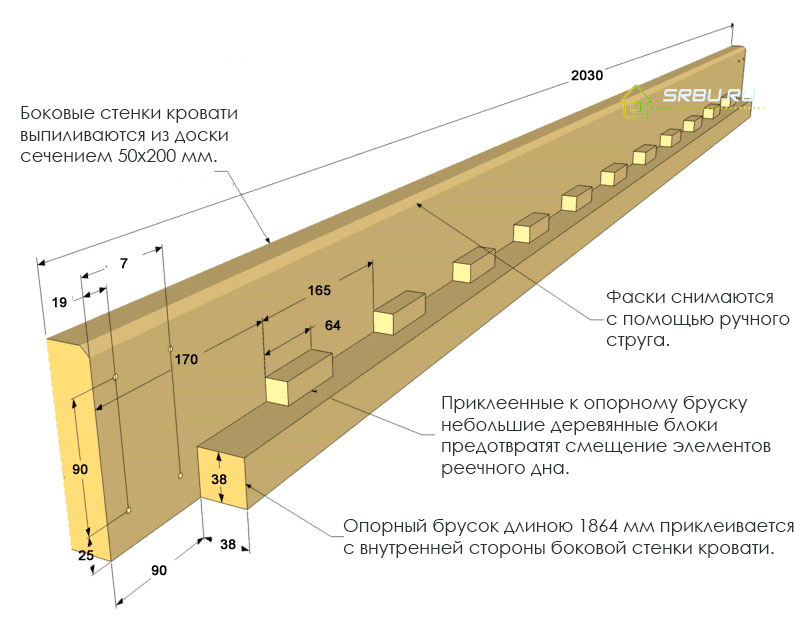
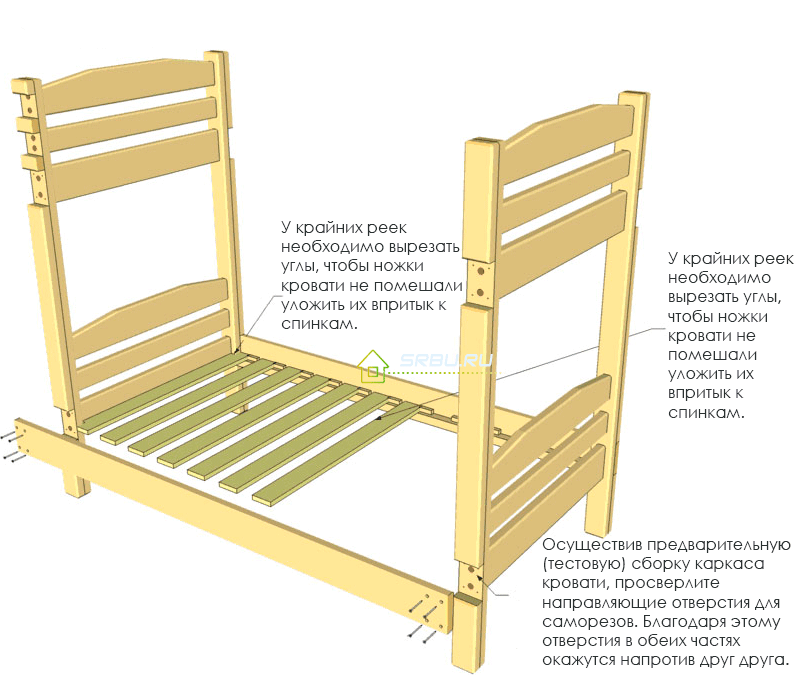
The basis of the frame is 4 side parts - drawers. They are side boards to which longitudinal strips are attached to support the mattress and bars are packed. Between these bars will be held transverse rails on which the mattress is placed. The chamfer is necessarily removed from the upper inner side - the drawers must not have an acute internal corner, as this can lead to scratches. The bars hold the boards of the mattress, not allowing them to move to the sides, so the lamellas need not be screwed on with screws.
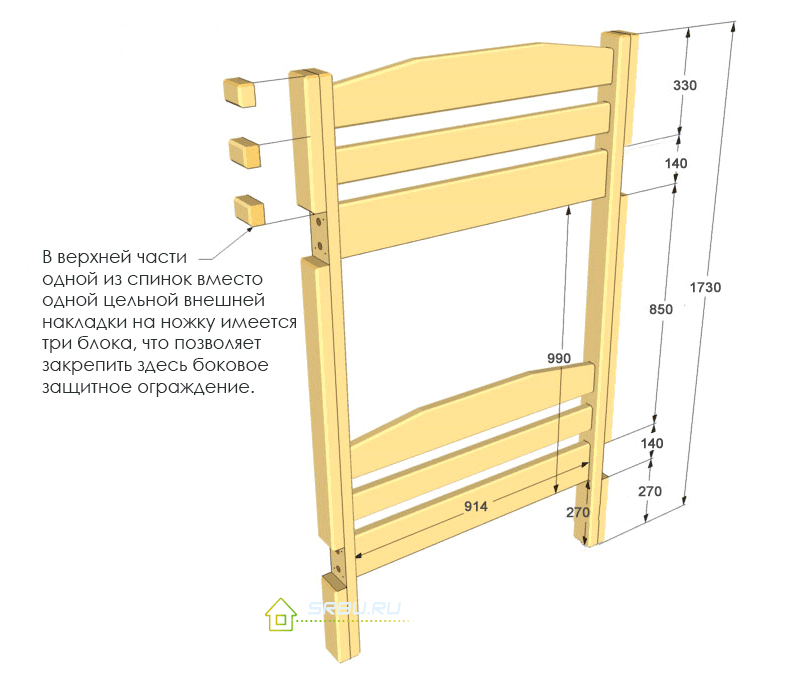
Next, you need to assemble the frame of the headboards, that is, the foot and head. The ends are assembled from timber support racks and crossbars, the assembly instructions will help to do this correctly:
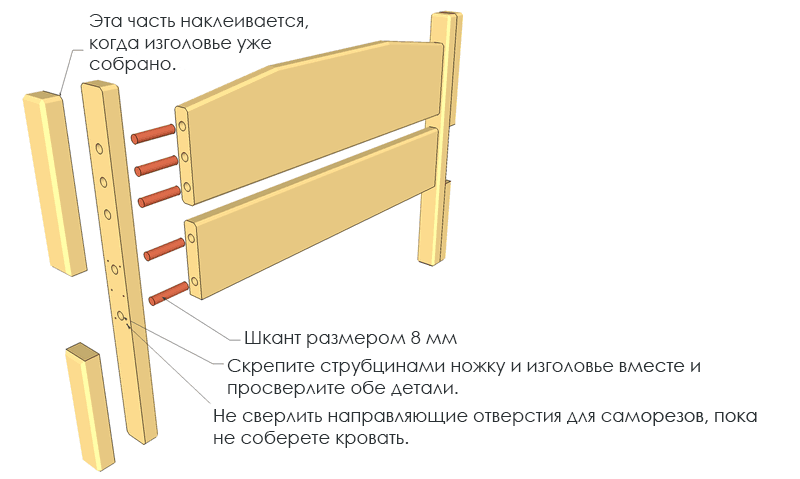
- drill holes in racks and crossbeams for installation of dowels;
- connect the support stand and the headboard with dowels impregnated with wood glue. The glued frame is tightened with clamps for complete drying to guarantee strength;
- stick the outer pads to close the fasteners;
- at the top of the headboard, attach three decorative pads to which the fence will attach.
Legs
The role of the legs in such a bunk bed is played by the vertical racks of the frame, the assembly is carried out using screws or other types of joints. The lower part of the legs can independently give any decorative shape. Carved wood looks beautiful: processing of legs can be pre-ordered in a turning workshop. Round curly legs of the bed will become an important element in the decor of the nursery.
If you want to make a do-it-yourself double bed with a sofa installed in the box, use strong bars for the legs.They are fixed on the outside or inside, and they can also be inserted into the box.
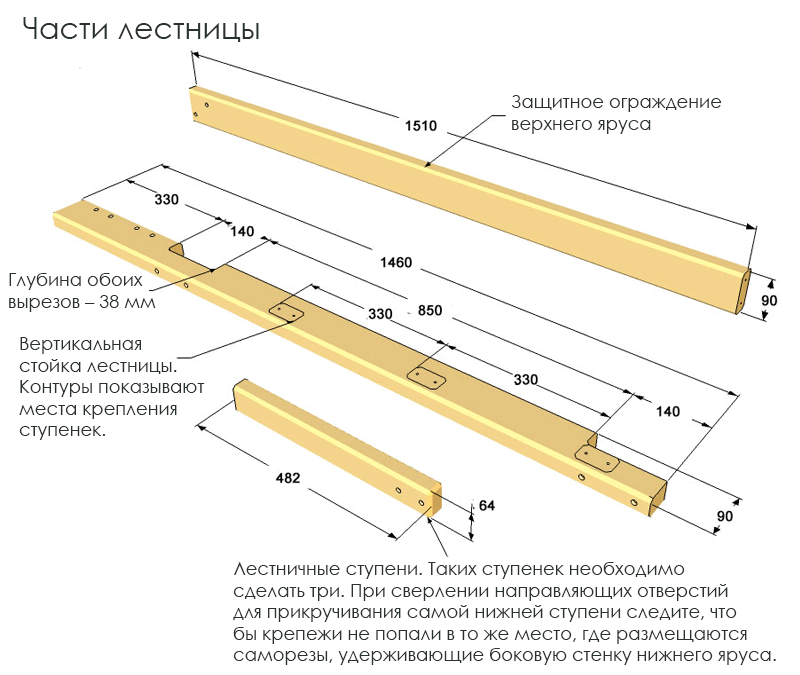
Stairs
It is necessary to make and assemble a staircase with three steps. To do this, vertical racks are used, in which it is necessary to make cutouts with a depth of 38 mm for attachment to the frame. Guiding holes for attaching steps are drilled in the racks. When placing the lower stage, it is important to ensure that the fasteners do not fall into the same place where the fastening of the lower tier board is located.
If the ladder is mounted obliquely, rather than vertically, it is advisable to provide it with a railing for maximum safety. For this, a beam of small thickness is used, it is selected in accordance with the girth of the child’s hand. The railing is firmly fixed with screws.
Assembly process
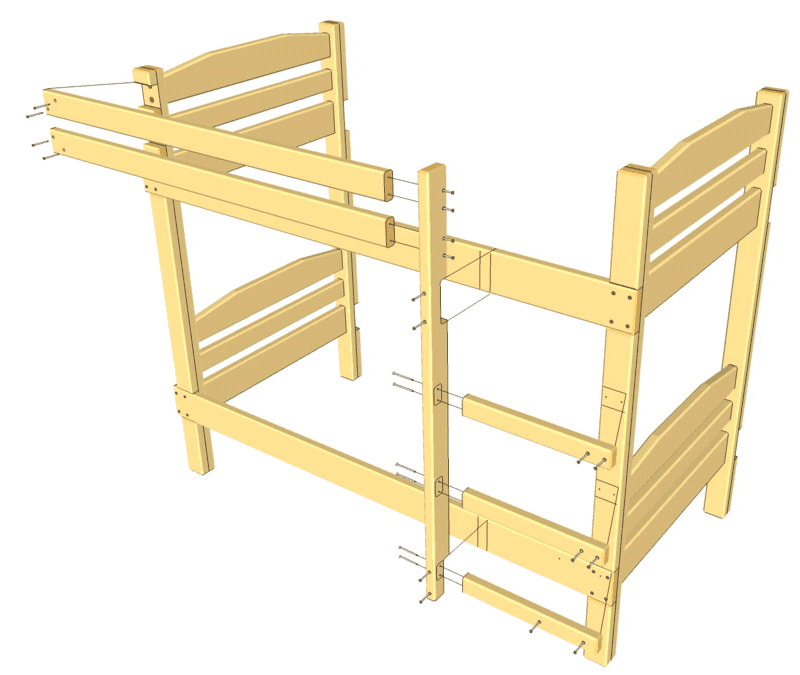
Let's consider in more detail how you can make and assemble a bunk bed for children yourself with the help of prepared frame elements: there are many design options, but most are assembled according to a single principle. Assemble the kings according to the instructions, then go in for the frame of the head and back. Next, do the following:
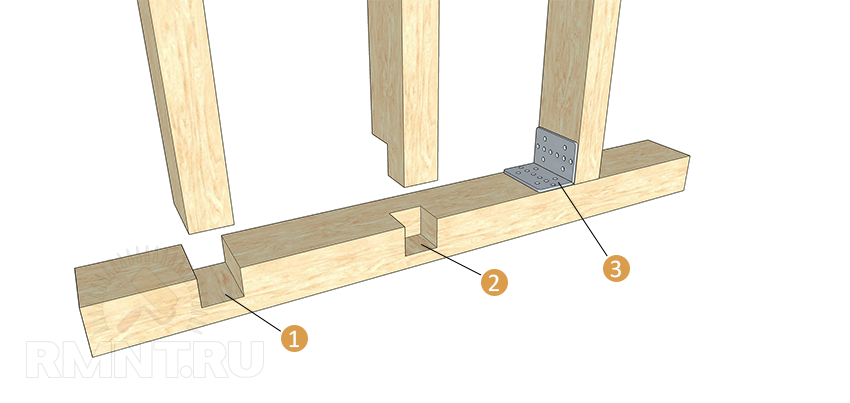
- install the drawers in the gaps left between the side plates of the uprights. Attach them on each side with four screws. This can be done manually or with a screwdriver;
- install the structure on the floor and attach a handrail, a ladder with steps, and also a protecting crossbeam with screws;
- screw the slats (lamellas) on which the mattress will fit. This is an optional step: the lamellas are held by bolted bars on both sides, which should fit snugly against the rails;
- Sand the entire structure to make the boards as smooth as possible. This can be done manually, to reduce labor costs it is better to use a grinding machine. Sanding helps prevent scratches, the surface should be perfectly smooth;
- treat all wooden elements with an impregnation or stain to protect against decay. After that, it can be painted or varnished to give an aesthetic appearance. The color is selected depending on the overall interior design, it is undesirable to use too bright paints.
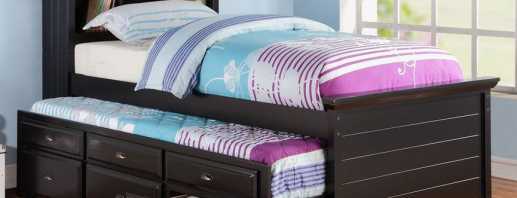
The drawer bunk bed assembly guide includes several additions. Drawers are placed under the lower tier, which allows you to store various useful items and bedding. Boxes are assembled from boards or more affordable fiberboard boards and are mounted on metal rails. For ease of use, they are equipped with handles, or holes can be made into them for easy extension. The self-made version looks originally, the boxes in which play the role of a ladder. They guarantee safety when lifting, and allow you to allocate space for storing toys and other things.
Any home-made bunk beds must be additionally attached to the wall, unless it is made of drywall. This precaution prevents the structure from toppling over during too noisy children's games. The fastening should be as reliable as possible, it will have to withstand a large load.
Methods of joining wooden knots
How is it more convenient to make a bunk wooden bed with your own hands for a novice master? There are several ways to connect wooden knots:
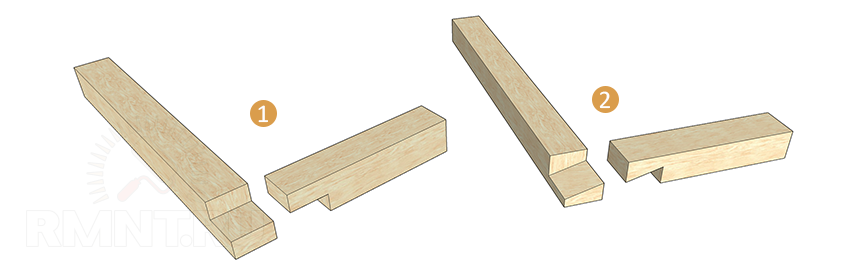
- self-tapping is the easiest option with which the boards are connected at right angles. The screws are screwed so that the caps do not stick out above the surface, the joints are closed with decorative overlays;
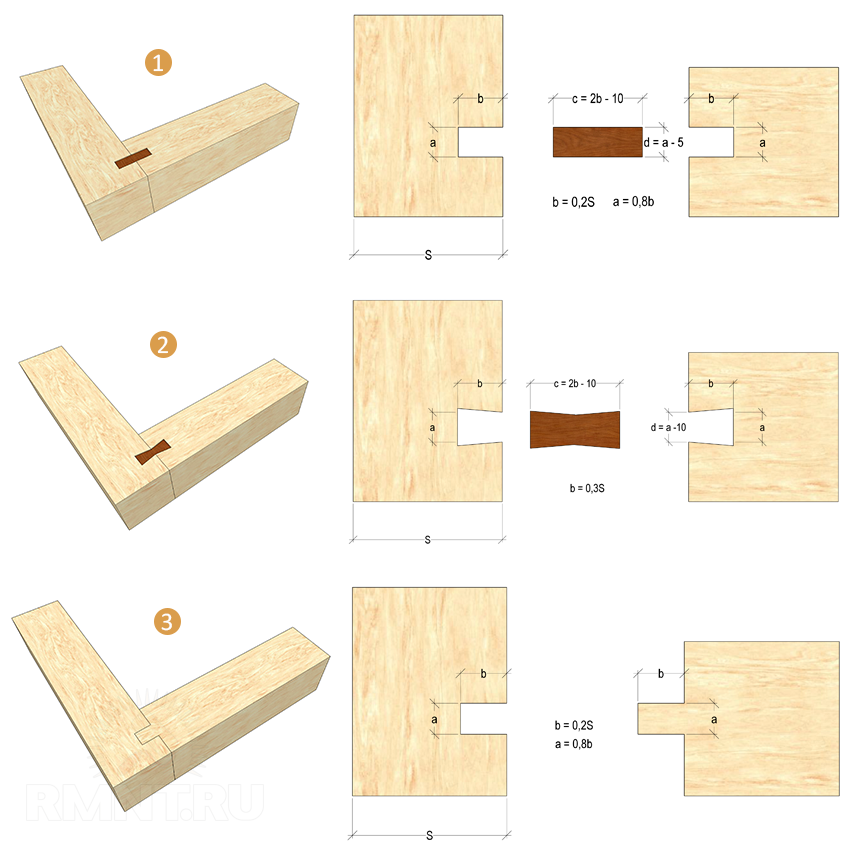
- connection with dowels - they can be round or rectangular. Furniture dowel allows you to connect parts from any materials, including solid wood, chipboard, fiberboard. It is not visible from the outside. It does not spoil the appearance of furniture;
- glue joint - carpentry glue is used to attach linings that increase the strength of the support posts.This connection option can be further strengthened with self-tapping screws.
To create the curly elements of the back and foot of the bunk bed with your own hands, the project is initially developed on paper. The finished paper template is applied to the workpiece, after which the part of the desired shape is carefully cut out with a jigsaw.
If a wooden single-tier children's bed is installed at home, you can turn it into a bunk with your own hands. An existing box will become the basis for a new frame, which is built according to the previously described scheme. It is only important to make sure that the legs will withstand the additional load, if necessary, they can be further strengthened. This solution will save space and provide children with more space for games.
A more complicated design to manufacture is a bed for a large family. It consists of two combined double beds, which will equip 4 beds and occupy a minimum of space in the children's room. This solution allows you to make room for games even in a small apartment.
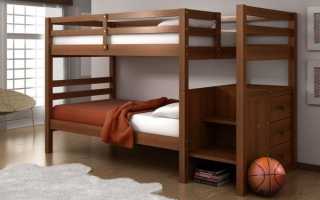
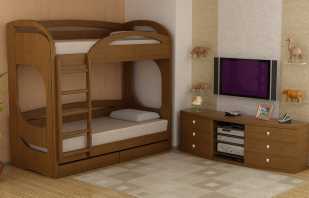
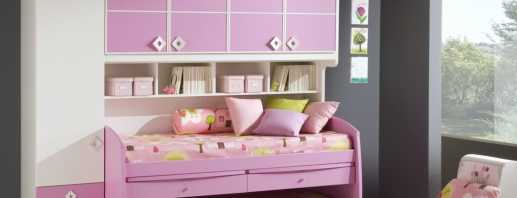
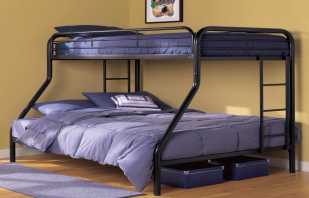
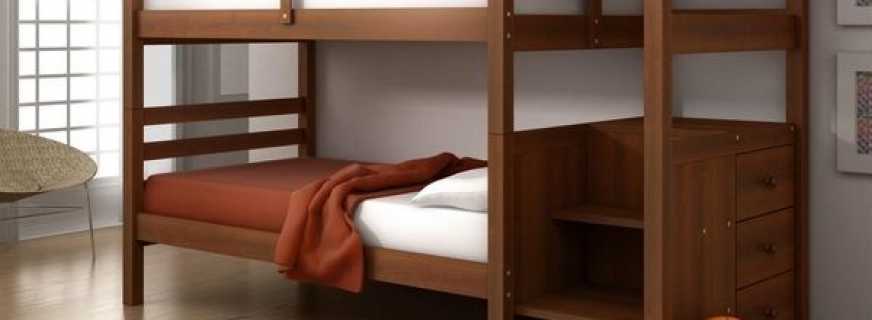
The models of bunk beds shown in the photo will allow you to appreciate the variety of such furniture. It can be combined with a sofa, with drawers and more. The model of the attic bed is very popular, which combines both the bed and the student’s workplace. On the lower tier you can equip a desktop or cabinets with drawers, the upper tier turns into a comfortable sleeping place. Below are options for photos, drawings and dimensions of a bunk bed, which you can assemble yourself.
Video