Recommendations for the assembly of a crib, depending on its type

With the advent of a small child in the family, a new life begins, full of joy and pleasant troubles. The kid needs not only love, care, but also the creation of favorable conditions for full development. Healthy sleep is of great importance for the crumbs, therefore, after acquiring the appropriate furniture, a logical question arises - how to assemble a crib, having done it correctly, taking into account the specifics of its design. Of course, it is easiest to turn to the help of professionals, but not all families have the service available. And sometimes a similar opportunity is simply swept away by a man, because self-assembly is direct proof that "dad can do anything." Despite the complexity of the process, the task is feasible, the main thing is to follow the sequence of steps laid down in the instructions.
Content
Installation Preparatory Phase
Although the design of the children's pendulum bed is somewhat different from the model of the transformer, rocking chair or children's furniture on hinges, the assembly process of any of these products consists of two stages: preparation and installation work. To create comfortable working conditions and improve its quality, you will first need:
- Remove unnecessary things from the nursery, move the furniture, freeing up the area necessary for ease of installation. Correctly perform the assembly in the room where the crib will later stand, in which case you will not need to drag it to another room after completion of work.
- Carefully study the available accessories. Their number should correspond to the data reflected in the instructions. If a shortage is found, you must immediately call the store and report it.
- Check for defects. To do this, all furniture elements are carefully inspected for their integrity. If chips or cracks are found, it is better to issue a return, as this threatens the safety of the child.
- Sort the components. All walls, planks, sidewalls, as well as fittings are assembled in separate groups, starting from their shape and size.
If the assembly scheme for the crib is not available, you need to find its electronic counterpart on thematic resources - this will help to avoid many difficulties, especially for people who are faced with similar works for the first time.
Each item described in the assembly instructions for the crib should be strictly followed. A certain model has its own characteristics, therefore, its installation does not always comply with the basic rules. It is always recommended to start with the connection of the largest elements.

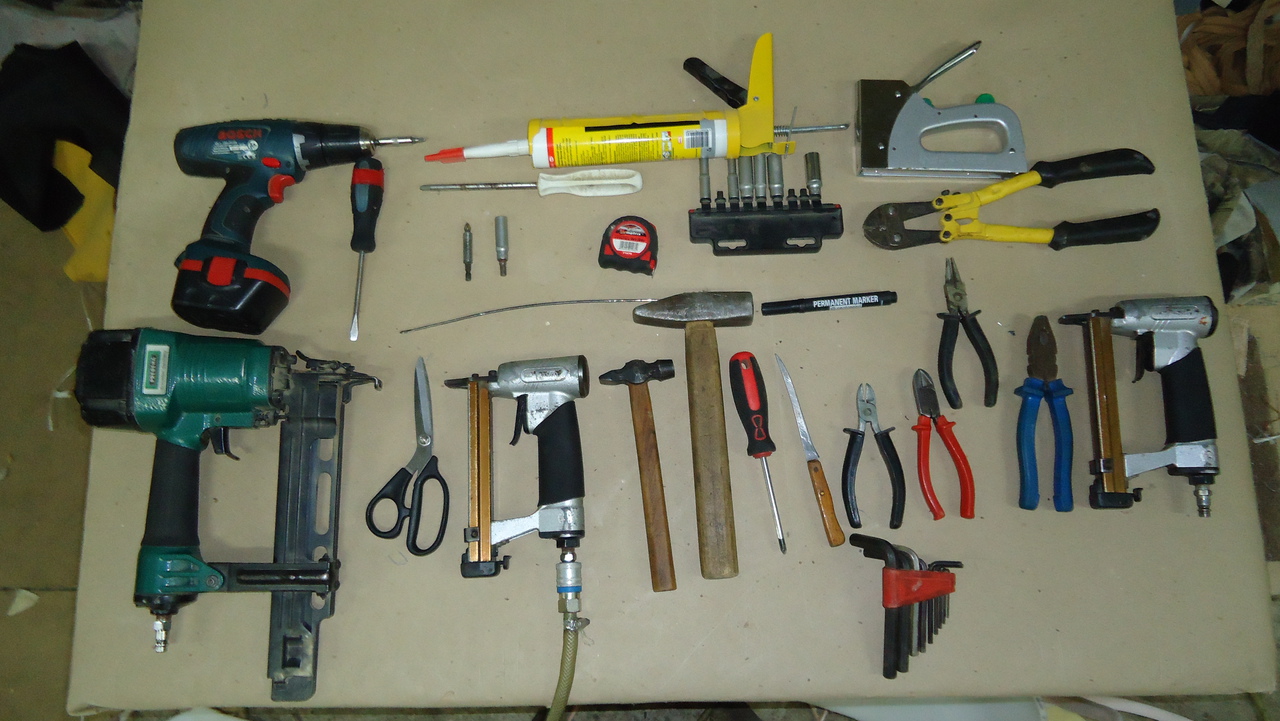
Necessary tools
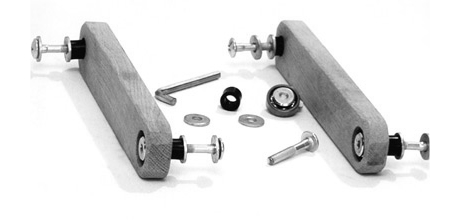
To correctly and accurately assemble the crib, you will need to prepare the tools:
- scissors or stationery knife - for unpacking boxes;
- a set of screwdrivers and a wrench (a convenient replacement will be a screwdriver with a set of nozzles);
- durable snap, hexagon, cross bit;
- tape measure for accurate sizing;
- pliers to remove improperly inserted fasteners.
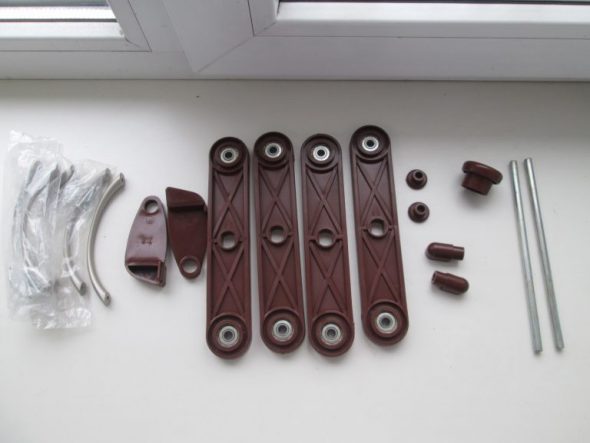
Many modern cribs are equipped with Euroscrews with hidden heads and internal hexagons, so special keys are useful when assembling them. The level will help achieve perfect evenness of the connected parts. Depending on the type of children's furniture, the components vary, so the composition of the tool kit may vary.
Assembly steps depending on the type of crib
Features of installation are completely dependent on the type of furniture. The most popular crib designs for today are a pendulum, a transformer, a rocking chair, and hinged models. Next, a step-by-step process of assembling each of these types will be considered.
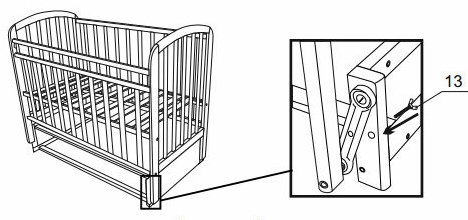
Pendulum
The main feature of the model is the special oscillatory movements, which are very similar to the baby's motion sickness in the arms of the mother. The mechanism starts independently at the slightest movements of the baby, which contributes to its rapid falling asleep.
Before installing furniture, it is important to ensure that no other objects stand next to it.
There are several varieties of the pendulum:
- Longitudinal. The most popular option, perfectly imitates motion sickness. Scientific studies prove that such movements normalize intracranial pressure.
- Transverse. The shape of the product resembles a traditional cradle, rocking from side to side. If necessary, you can lock the model in a fixed position. Assembling a children's pendulum bed of this type is also possible in small rooms.
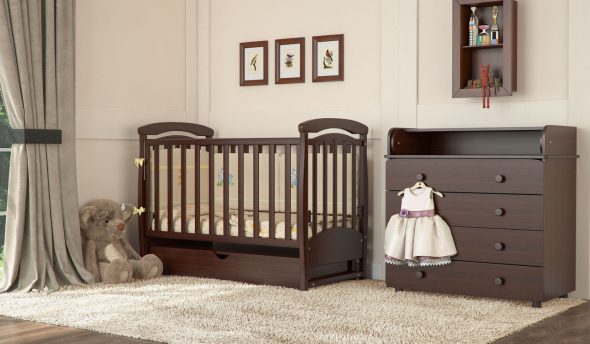
- Universal. Models are able to change the direction of motion sickness and purpose. First, babies sleep in the cradle, and when they grow up a bit, the berth is lengthened, the walls are removed. Many products are complemented by a convenient changing table.
Crib pendulums are made from natural, environmentally friendly wood, and are varnished on a water basis.
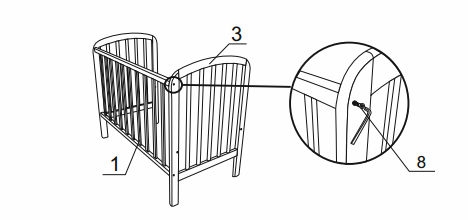
The model includes a frame, a bed, legs, backs, a pendulum mechanism. Many products are complemented by drawers, changers, chests of drawers for storing things. In what sequence to assemble a crib with a pendulum according to the instructions:
- The back is connected to the side slats with screws.
- The berth is first mounted on screws, then on the guides that are on the sidewalls.
- The design is inverted to install a pendulum mechanism.
- Linen boxes are inserted, the side wall of the pendulum is fixed with screws.
- All plugs are closed.
The rear and front walls of the structure are almost the same. It is necessary to carefully consider this feature when assembling a children's pendulum bed. If you mix them up, the mechanism will not work. To prevent damage to the flooring and furniture parts during assembly, cover the work surface with a soft cloth. It is desirable that it be light, then all the components will be clearly visible.


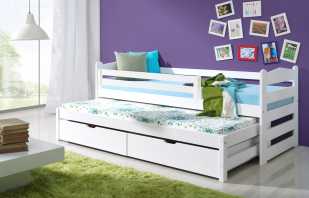
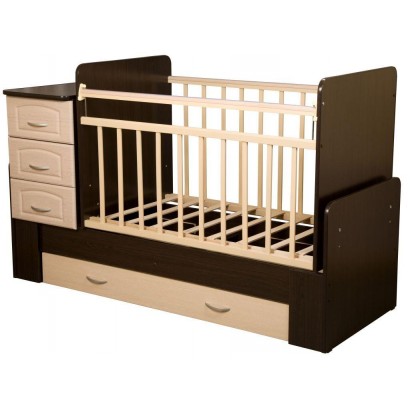
Convertible bed
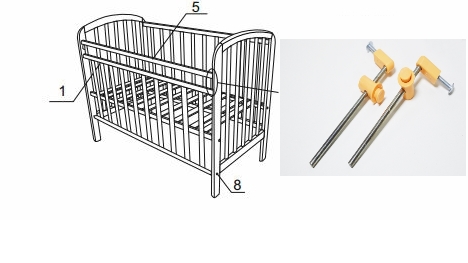
This model is optimal for baby's sleep from birth to school age. Installation is as follows:
- The lower sides and backs are connected.
- Screws fixed wall.
- The bed is assembled, then inserted into the grooves on the side panels, fixed with screws.
- A fixed front wall is installed.
- A stand is mounted, and then connected to the side.
- The bottom of the product is assembled, side grilles are attached.
Transformer increases as the child grows. The cabinet, which is attached to the base of the furniture, can be removed by adding 50 cm of length. The standard width is 60 cm, it remains unchanged.

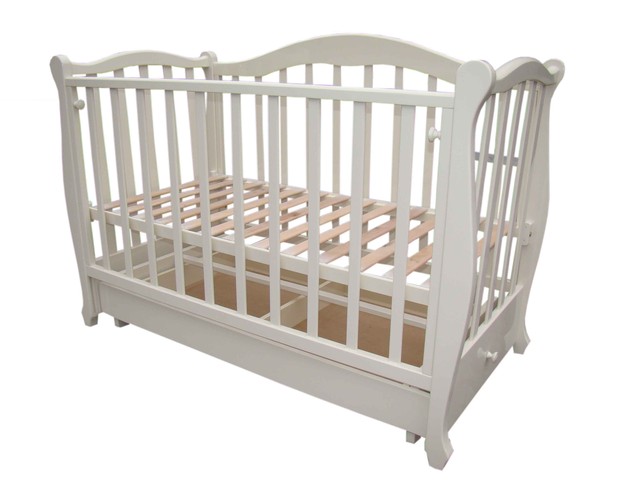
Rocking chair
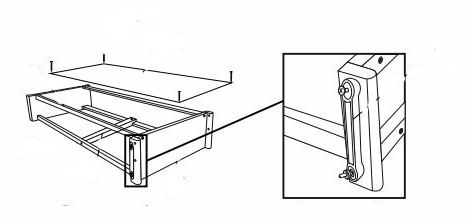
A popular model that sways with the movements of the child due to curved supports. Installation of such a crib does not take much time, if you follow the rules:
- All boxes are assembled using self-tapping screws.
- The bottom and side panels are mounted. At this stage, you will have to make some physical effort.
- The back wall is screwed to each sidewall with self-tapping screws.
- The front model is installed in the grooves on the side panels, is securely fixed.
- The lower linen box is installed.
Many models are complemented by wheels, which are mounted at the request of the parents.
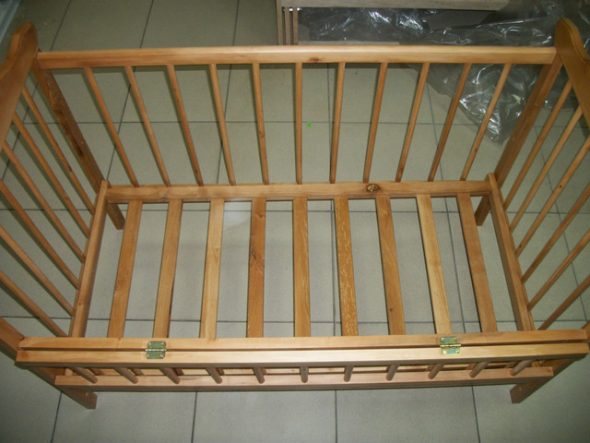
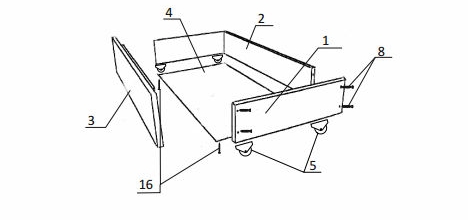
Assembling a children's bed with drawers does not require drilling, all the holes for fasteners are made at the stage of furniture production.


Hinged
Cribs provide monotonous smooth swaying, which contribute to the rapid falling asleep of children. The berth usually has two levels, has orthopedic properties. The assembly rules are as follows:
- The base of the product is mounted. All 3 rails are attached to the bottom of the chassis.
- Screws fix the front and rear backs.
- The bottom is installed, two mounting options are possible, which allows you to change the depth of the crib.
- The side walls are screwed on, all moving parts are connected to the base.
If necessary, the rocking chair can be in a stationary position, for this special clamps are used located at the bottom of the side panels.
According to the instructions, the assembly of the Dolphin children's bed involves the installation of a frame from the sides, front and back, the installation of an orthopedic bed, laying the mattress on special slats. Although this model is not able to swing, it is still in demand among young parents.

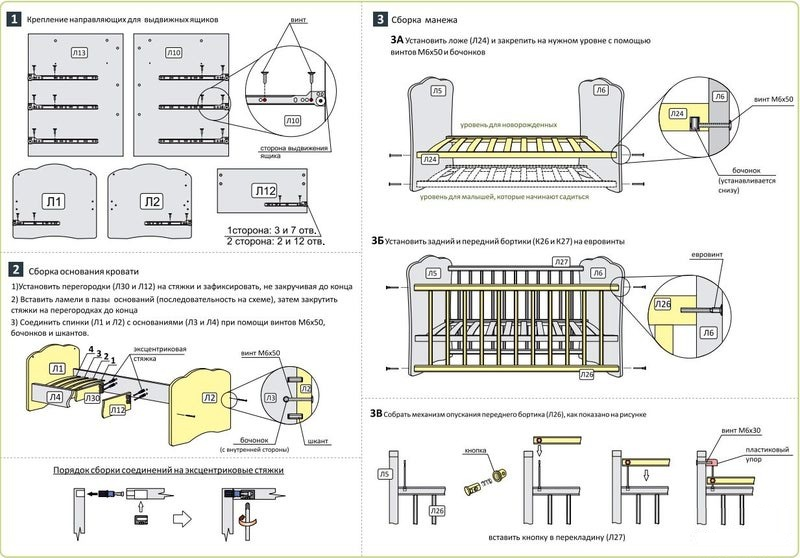
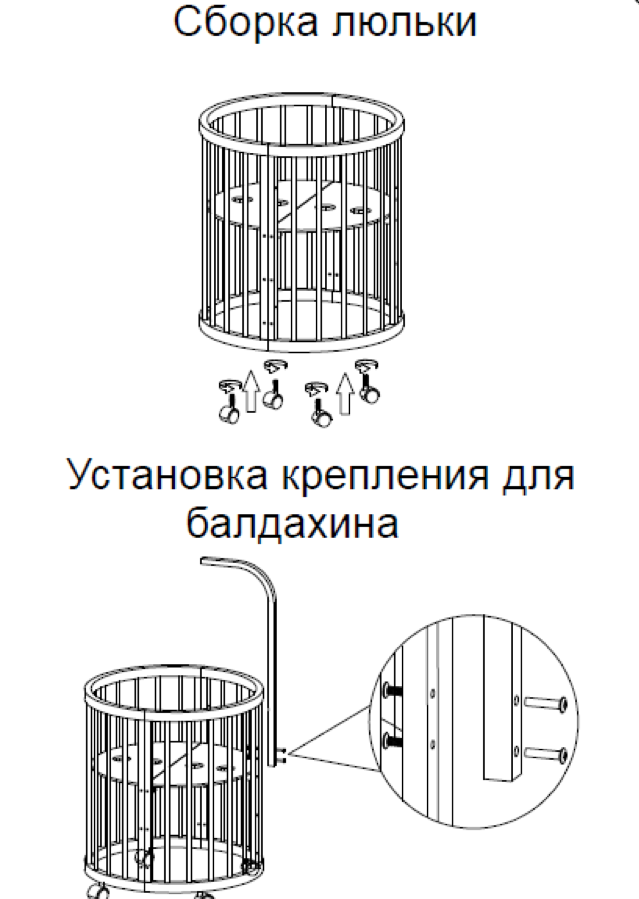
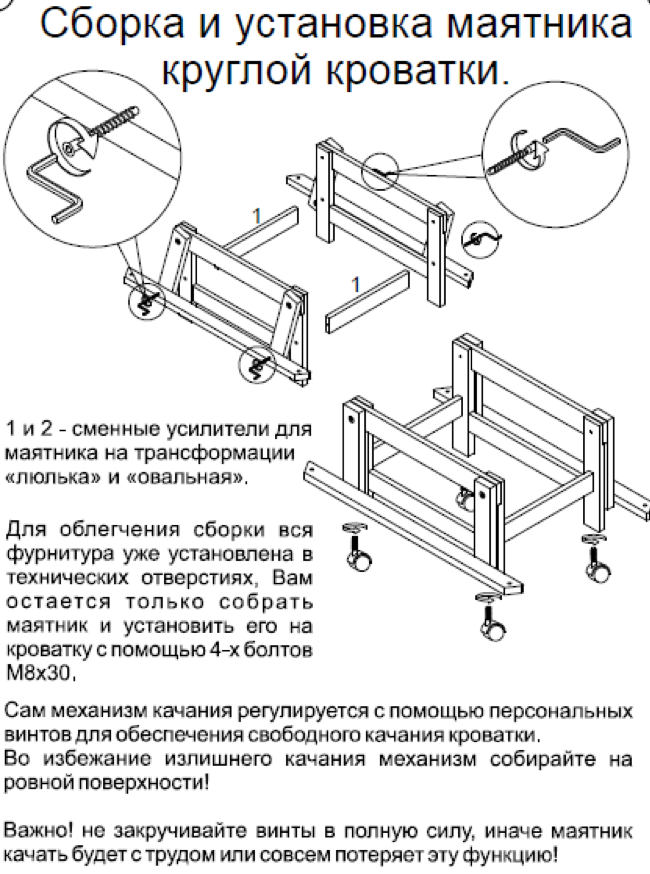
Features of decoding of drawings and instructions
Schemes for assembling cots - the main document that is attached to the furniture. It is important to correctly understand all the notations in order to prevent mistakes, otherwise the work will have to be redone, otherwise the child’s safety will be in question.
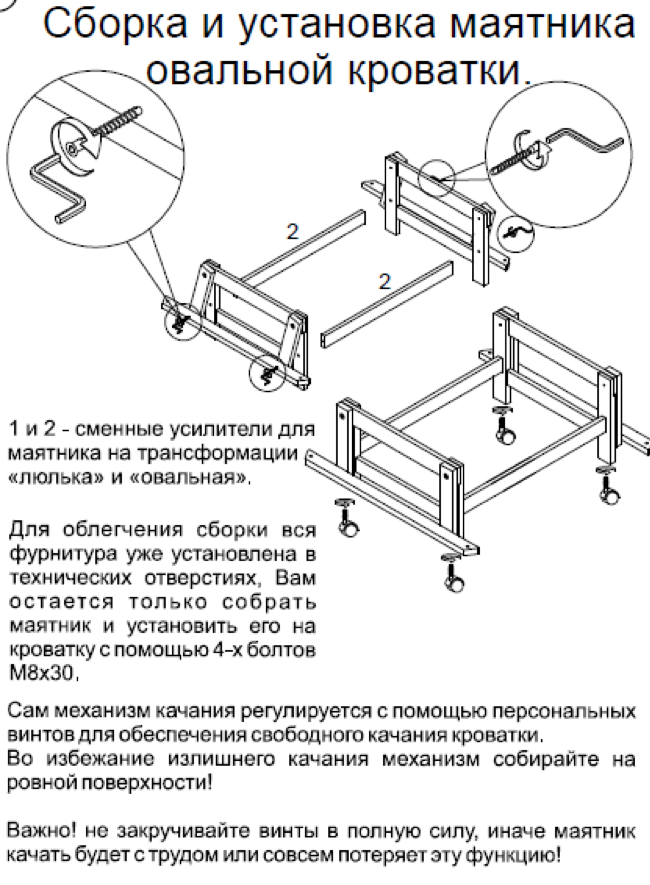
Assembly instructions for a children's bed with a pendulum clearly shows how to connect all the elements together. The backrests, the guardrail, the bed, the base, as well as the details of the boxes are marked with numbers, so they are easy to recognize on the diagrams. Accessories and fittings also have their own designations.
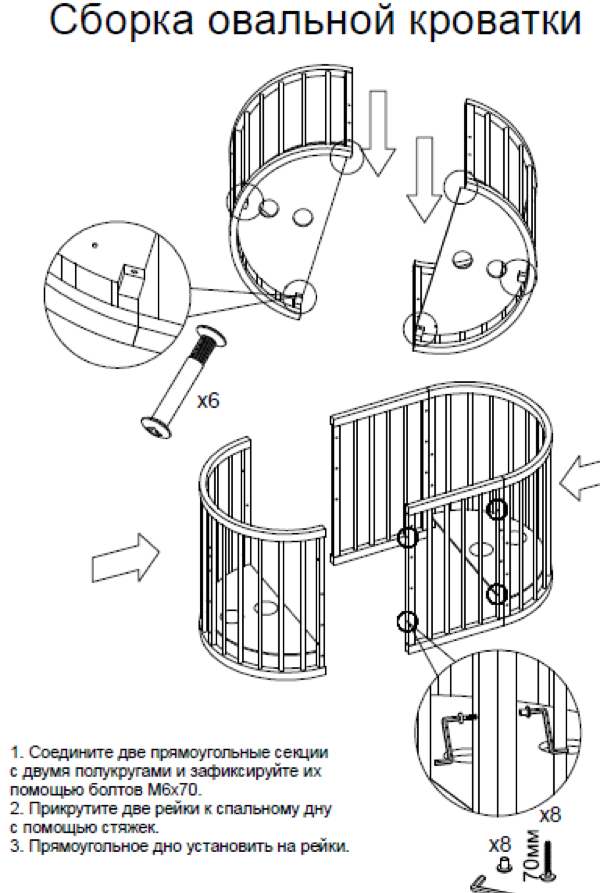
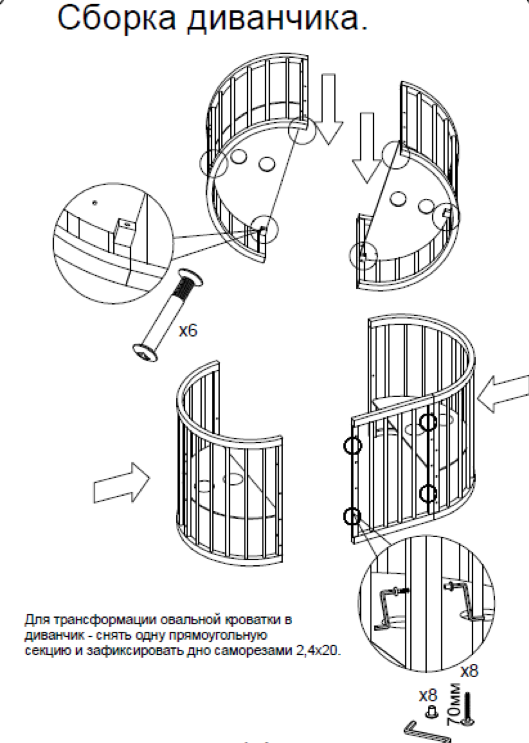
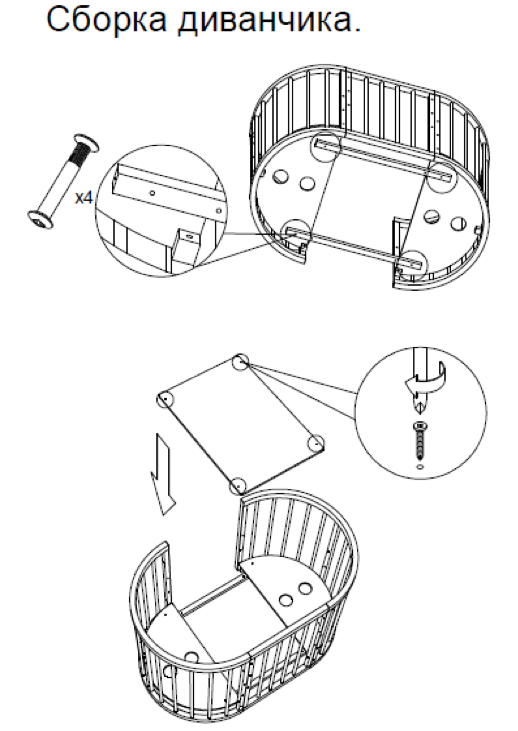
The installation process of a popular model with a pendulum mechanism can be demonstrated by drawings. They show how the half arcs are installed, the sidewalls and the back wall are connected, the bottom is fixed, the front part is fixed. Schemes are provided that show proper bottom mounting and box assembly. Often their reading causes certain difficulties. To understand the main stages, to understand what a particular image conveys, it is necessary to correlate the drawings with the text of the instruction - each type of furniture has its own characteristics that must not be forgotten.
The process of assembling cots must be carried out in compliance with all the rules of the attached printed manual. During the installation, do not rush, and after its completion it is important to check the quality of the installation, the compliance of the furniture with safety standards.

Video