Modern designs of garden benches, DIY

Garden benches are not just furniture that is designed for relaxation. With the help of such products, you can decorate the site, create harmonious compositions that perfectly fit into the surrounding space. If a bench is made with your own hands, then it will fully comply with the requirements of the owner. The creative process is simple, does not take much time. The main thing is to choose the right design, location, material.
Content
Product Features
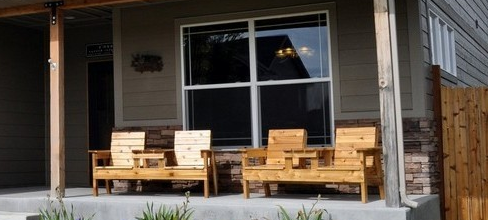
Modern garden benches are an architectural element of landscape design. These are comfortable, practical, multifunctional products. Serve for rest and relaxation after busy workdays or work on the site.
A bench with a back, installed in a secluded quiet corner near a pond or flowering flower beds, will be a great place for solitude and reflection. Often furniture is located in gazebos, on verandas, summer picnic areas. It is not recommended to place products so that they have a view of garages and fences. The ideal background is flower gardens and front gardens that will delight the eye. Benches in playgrounds, at the main entrance or pool are appropriate. Another placement option is next to the beds in the garden. It is better if the bench is in the shade.
Benches for a summer residence or garden should be comfortable. Ergonomic designs are optimal, which you can not only sit on, but also sit back comfortably. Of great importance is the safety of products, as well as the ability to withstand high loads. That is why with self-production it is worth giving preference to high-quality materials and accessories.
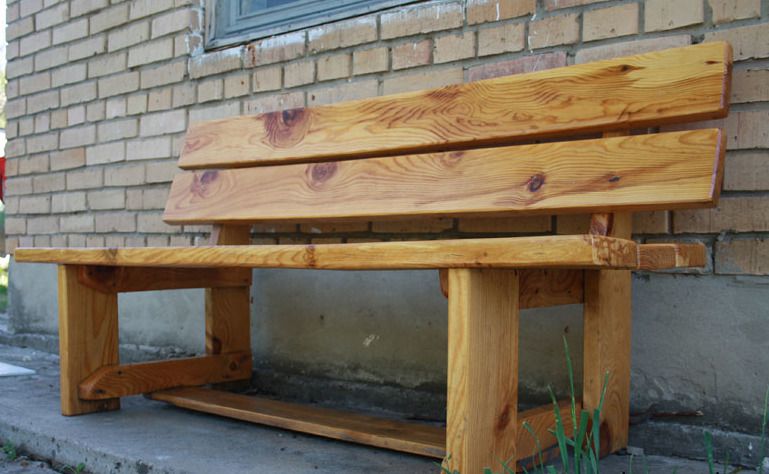
The bench should have an attractive appearance and design that will be in harmony with the design of the entire garden.


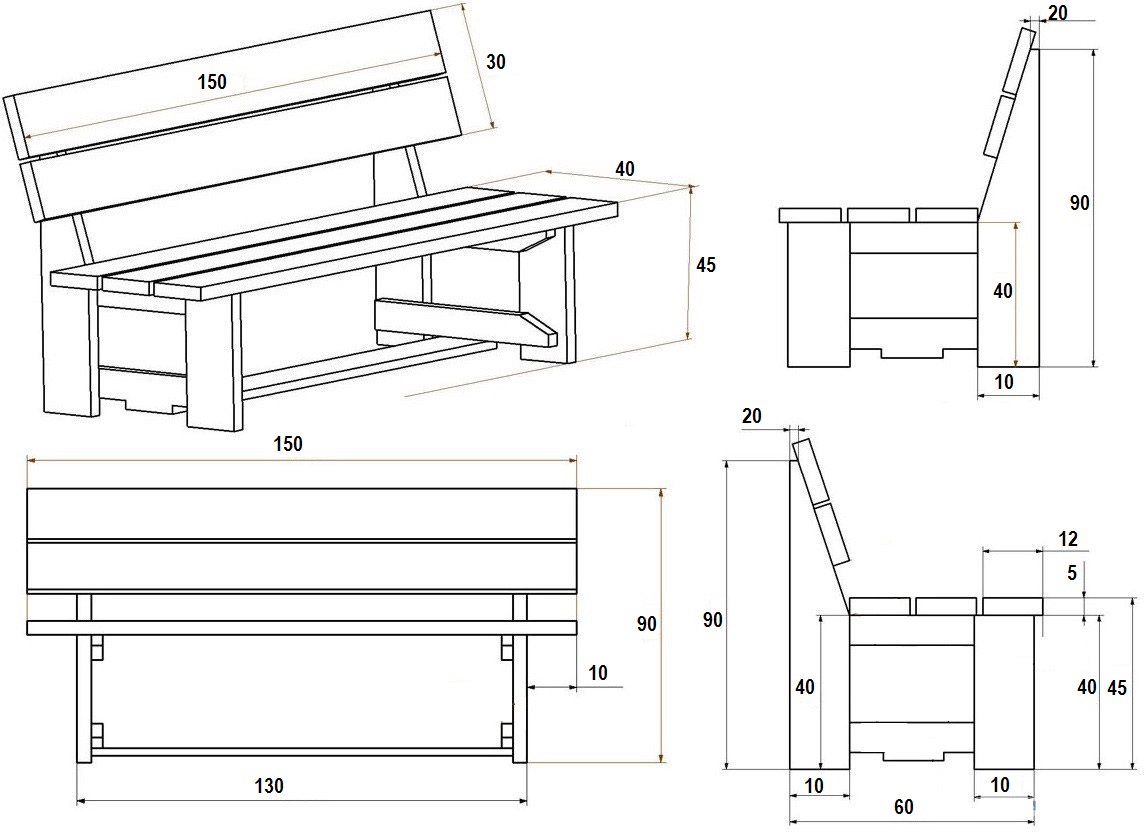
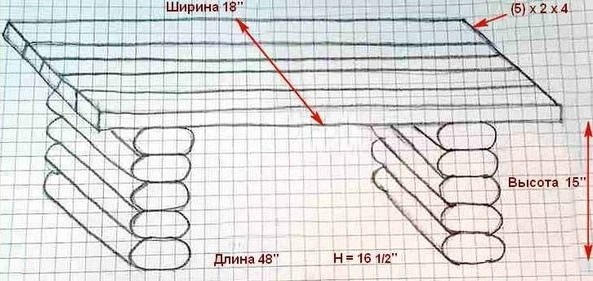
Drawings and Dimensions
When drawing up drawings of garden benches, the capacity of the products must be taken into account. Standard models are designed for two to four people. For beginners, ready-made schemes with sizes are useful, but if necessary, they can be changed depending on individual preferences.
To create comfortable furniture, you can use the standard parameters. The optimal length of the bench is 150 cm, it allows three people to comfortably accommodate. Height from the ground - 45 cm, backs - 90 cm, it is recommended to place it at a small angle, about 20 degrees. The width of the seat is 40 cm.
To create a diagram, it is necessary to sketch the proposed design on paper. All elements of furniture and dimensions are marked on it.If you plan to create a product with a backrest with your own hands, the drawings should reflect the method of attachment to the seat. The legs of stationary models are tightly fixed in the ground.
How to do it yourself
Making benches with your own hands is an interesting creative process that allows you to implement a variety of design ideas. Today, classic wooden and combined models, without a back, are in demand. Many craftsmen decorate the plots with benches from pallets, old chairs, logs, complement the products with tables or flower beds.
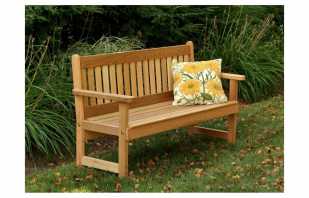
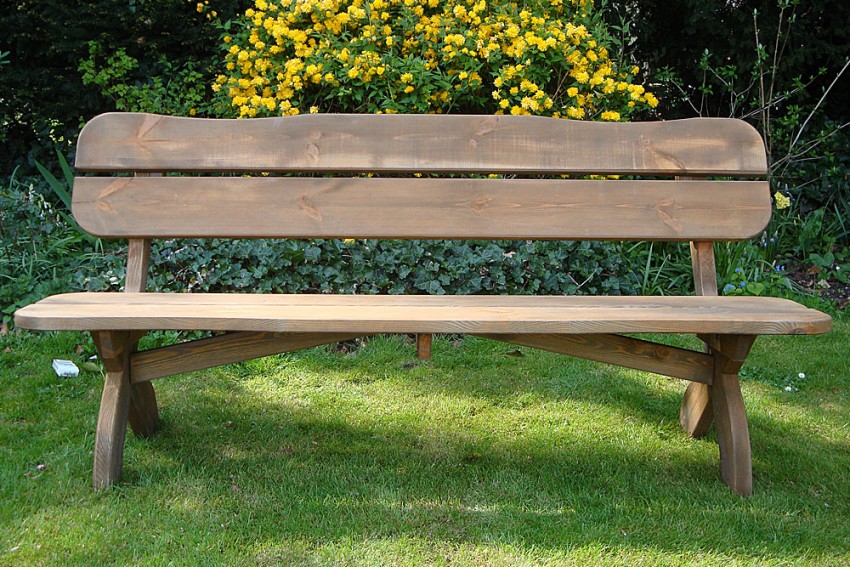
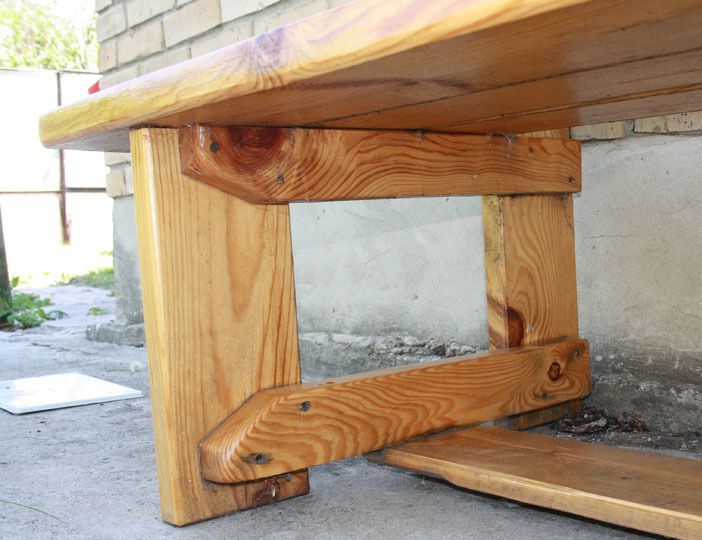
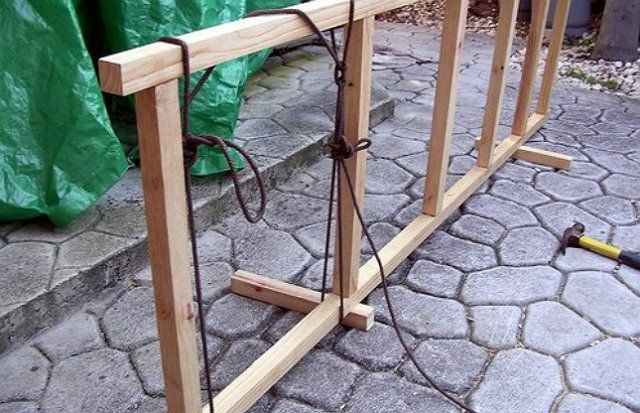
Simple classic design
To create a bench, you will need wooden boards 150 x 150 cm, the thickness of which is 30–40 mm, blanks for legs and back holders, elements for making seats. A beam of 40 x 40 mm is needed to strengthen the structure. Self-tapping screws are used as fasteners. Of the tools you will need a screwdriver, jigsaw, planer, sandpaper for grinding.
- All details are cut and cut with an electric jigsaw.
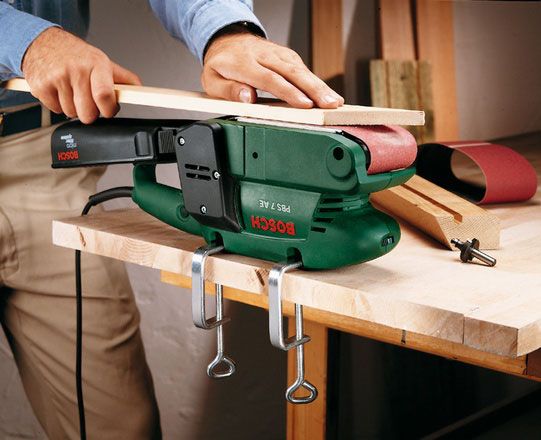
- The surface of the elements is ground, the ends are treated with a plane to give a rounded shape.
- The legs are first collected, the distance between the front and rear elements should be 28 cm. They are connected using a beam, the strapping is done on both sides.
- Finished sidewalls are fixed to each other with boards designed for seating.
It is important that between the workpieces the same gaps remain - no more than 2 cm. They serve to circulate air masses and remove moisture. After that, a bench made of boards is subject to reinforcement and installation of the back. For the finish coating, impregnation is applied, then varnish.
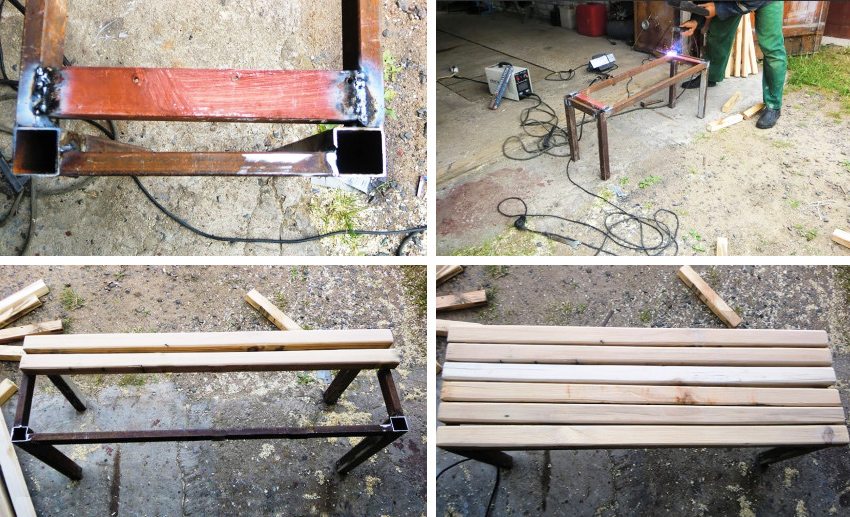
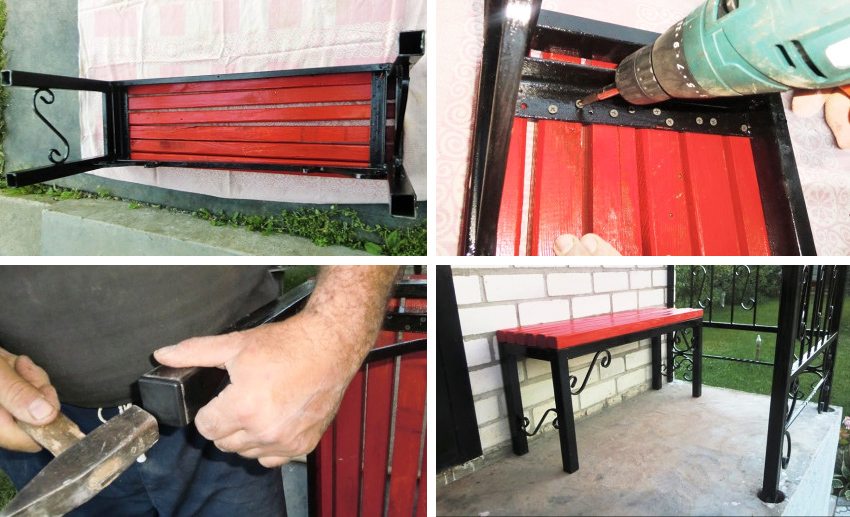
Metal and wood
To make a garden bench with your own hands, you will need tools for welding and cutting metal: a grinder, a welding machine, as well as consumables for them. From materials it is necessary to prepare profiled pipes, boards. In the process of work come in handy: building level, tape measure, file, plane, paints, pliers, hammer, bolts, nuts.
Metal profiles are also used to create a variety of designs for the garden. It can be fences, arbors, arches, frames, canopies, swings.
Simple, but elegant benches for giving from metal can be made independently, without a drawing, guided by step-by-step instructions.
- 3 rectangles are formed of pipes, which are connected by guides and create a frame for seating.
- In each element, symmetrical holes are drilled for attaching the boards.
- The frame is treated with coloring compositions intended for metal.
- Wooden parts are covered with stain.
- After the elements have completely dried, assembly is carried out.
Iron benches are reliable, simple design. The most convenient and practical will be a folding bench, for the manufacture of which you need experience.

Shop without back
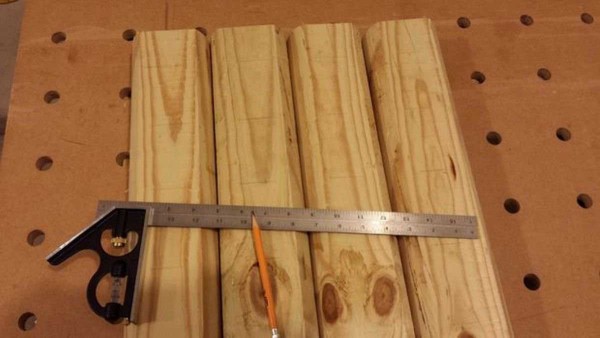
To make a garden bench with your own hands, you need a beam, 40 mm boards, pins. Of the tools - a jigsaw, a screwdriver, a milling cutter, a grinding machine. The model will be small, only 120 cm in length, suitable for 1-2 people.
- Boards for the manufacture of seats are cut and processed, the edges are rounded.
- The bars for the legs are cut the same length, pre-marking for fasteners.
- Drill holes for the pins, depending on their diameter.
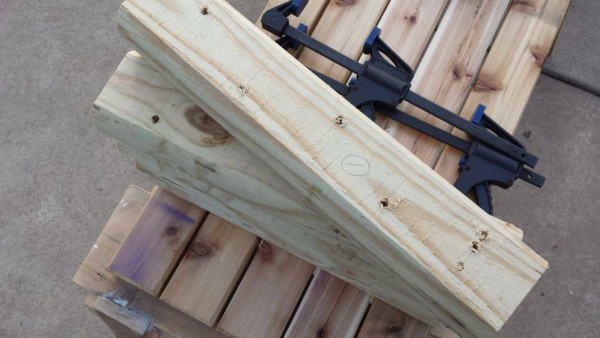
If the seat is fastened with nails, then the joints can be easily masked with mastic mixed with sawdust. After drying, the material is leveled with a sandpaper to a smooth state. A layer of paint or varnish is applied on top.
Benches made of timber will be less comfortable compared to benches that allow you to lean on the back. But when installed near the wall of the house or in the gazebo, you can solve this problem.


Garden bench with pallets
One of the simplest options is a garden bench with a back of pallets. Before starting work, it is necessary to prepare materials and tools: screws, a saw, bars for armrests and legs, boards or plywood, corners, tape measure, drill, screwdriver. Personal protection will require construction glasses and gloves.
When creating a bench with your own hands, you may need varnish or paint, pillows. At the preparatory stage, the pallets are dismantled, cut into two parts so that the narrow side serves as a support, the wide side - as a seat. The surface is ground to eliminate all roughness.
- All elements are cut out on the basis of the optimal dimensions of the bench, fastened with screws.
- The halves of the seat are connected and tightened together with self-tapping screws.
- The legs should not be too high, the standard is 45 cm. Metal corners are used for their fastening.
A garden bench with a back covered with paint lasts much longer. If the surface is varnished, the product is in perfect harmony with flowers and green spaces.

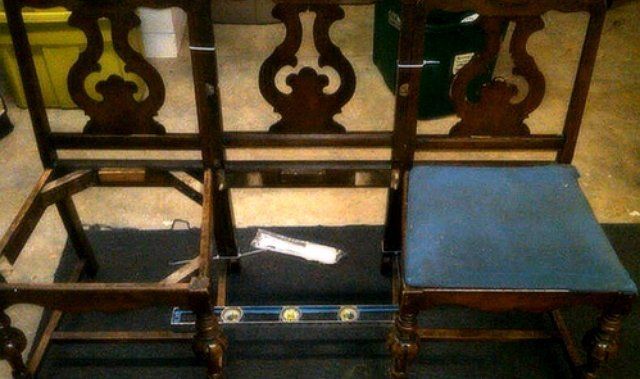
From old chairs
To create a bench with a wooden back, you will need 2-3 unnecessary chairs, wide boards (1-2 pieces), bars, sandpaper, saw, drill. Fastening of elements is carried out with self-tapping screws, building glue, finishing - with varnish or paint. All actions are performed according to the instructions:
- upholstery and armrests are removed from all chairs, wood and metal parts are cleaned;
- remove the seat frames, if necessary, trim to the same leg length;
- a frame is assembled from the bars, fixing with screws to the base of the seats;
- boards are fixed on top of the finished frame, a layer of filler is laid on them, which is then covered with upholstery;
- after assembly, all openings are closed with putty, sand the product and covered with paint.
The drawing of the bench in this case is not needed. The design is decorated with pillows, installed in the shade of trees or in an open area.


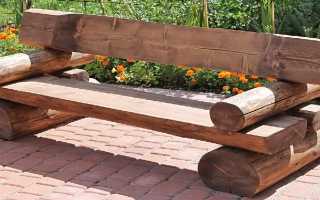
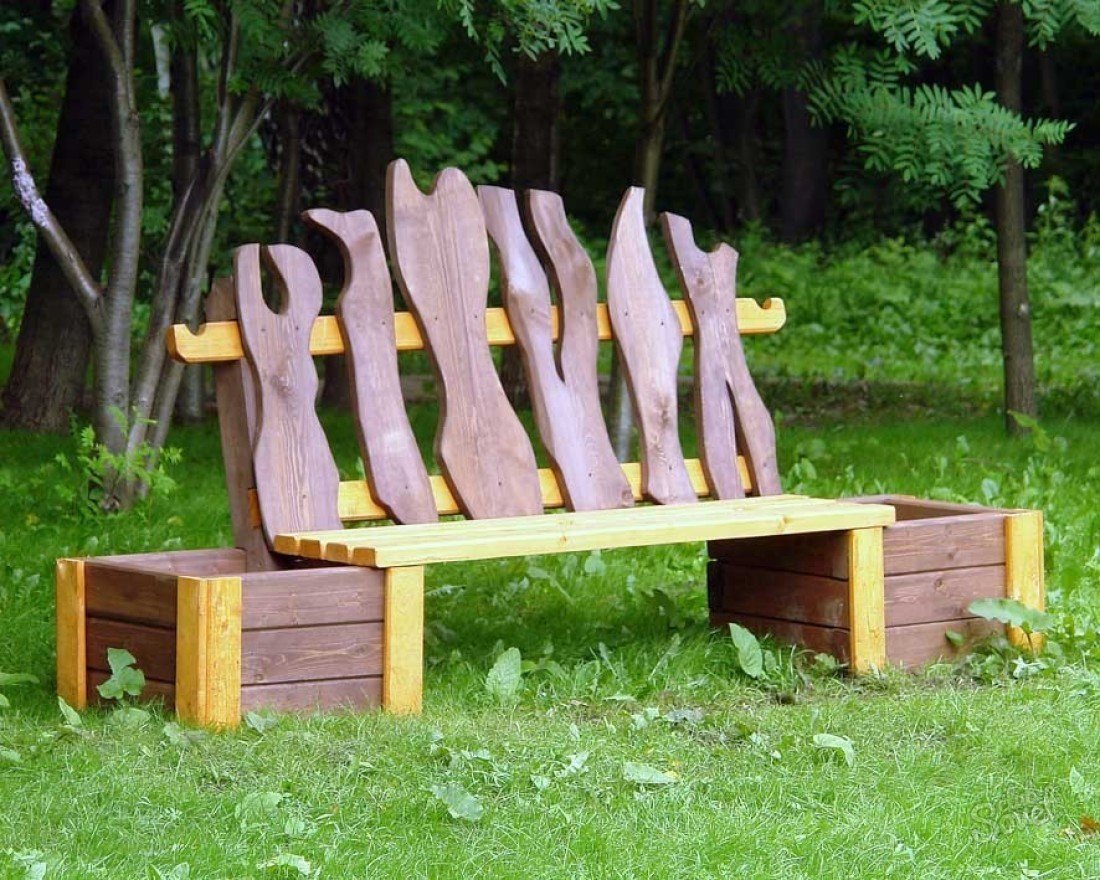
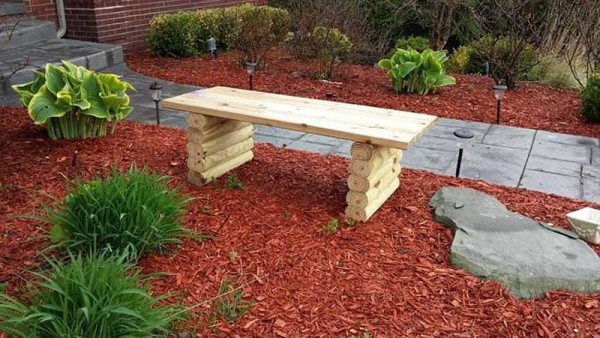
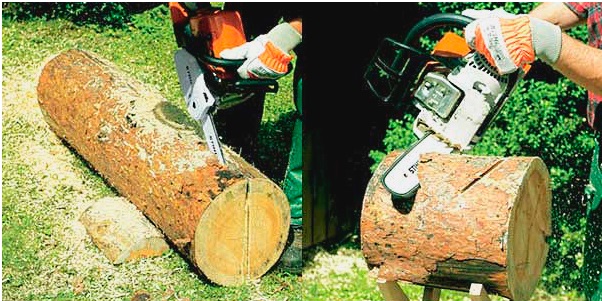
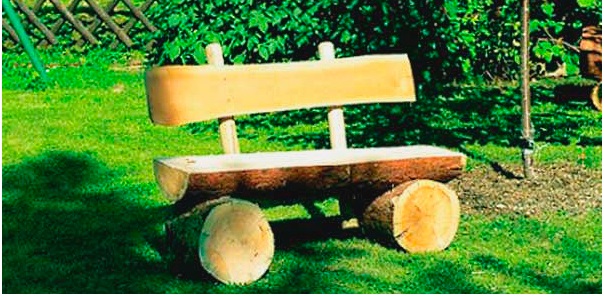
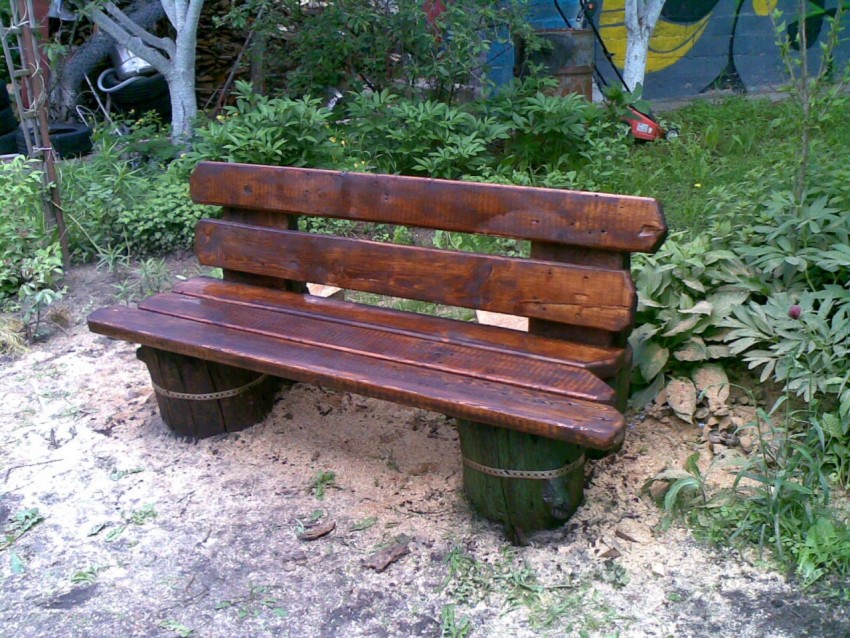
From logs or curved branches
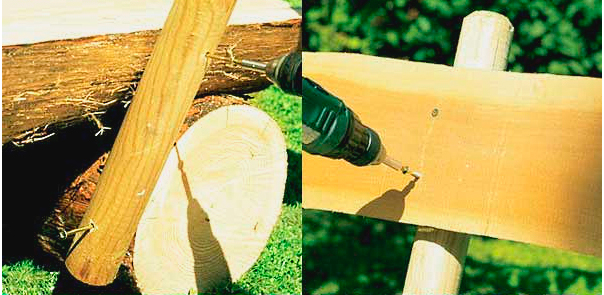
To make a bench for a summer house yourself, you need to prepare a log, suitable branches, a saw, pins, tape measure, a hammer. Wood preservatives are also required. The workflow includes the following steps:
- The trunk of a tree is cut along. This is done exactly in the middle or with a slight offset.
- A thick element serves as a seat, a thinner one serves as a back.
- At the joints, make holes for the installation of pins.
- The back is mounted on the base and hammered.
If desired, a comfortable bench is complemented by a back made of curved branches with different diameters. Before assembly, the parts are cleaned of bark and polished, then fixed with self-tapping screws or nails.
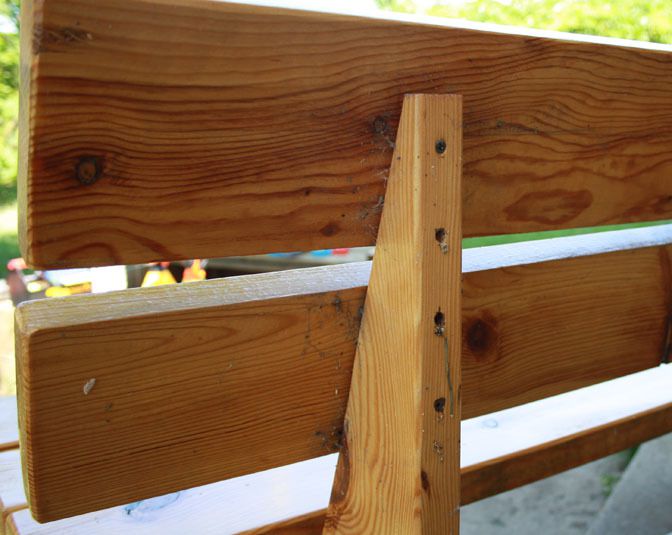
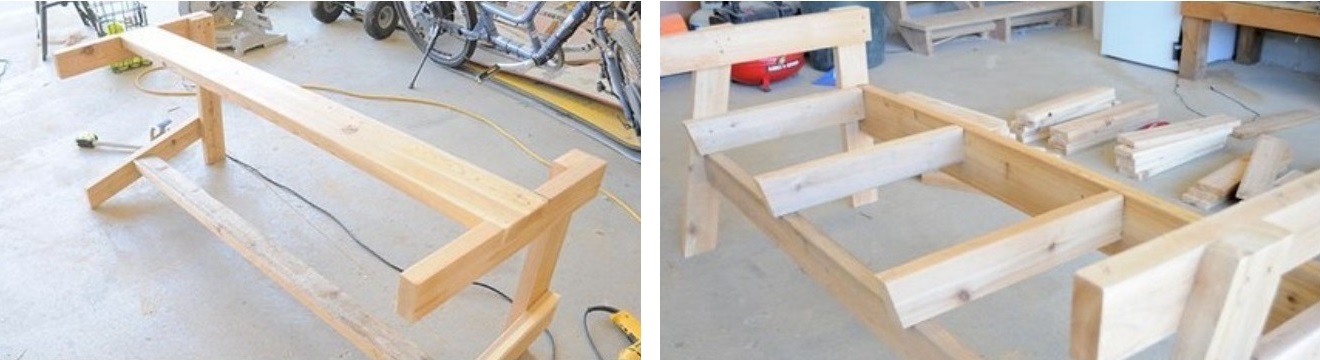
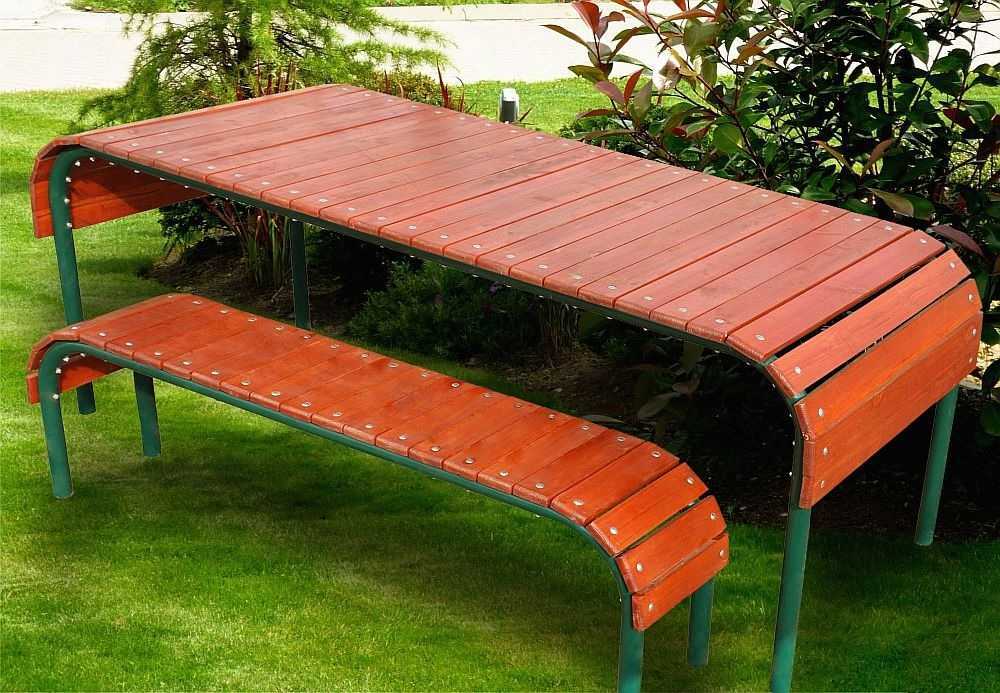
Bench with table
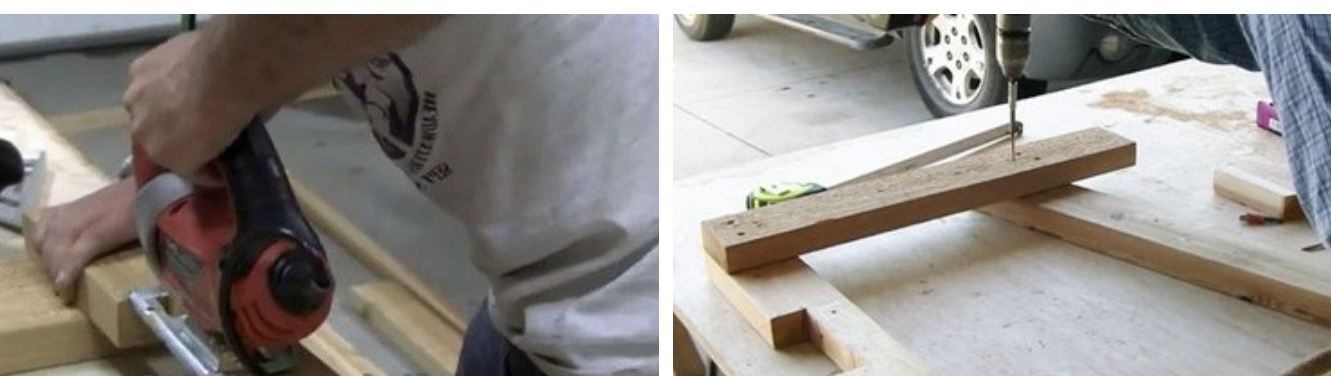
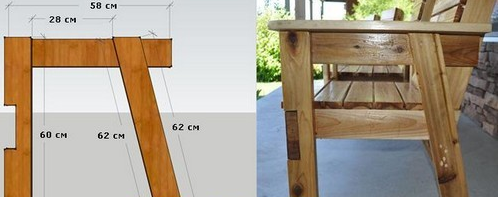
It is necessary to start the work of creating a wooden bench with a back and a table with your own hands with the selection of tools and materials. You will need boards with the parameters 40 x 140 mm, 25 x 80 mm, 40 x 80 mm, a miter saw, a drill, an electric jigsaw, a screwdriver, a tape measure, nails 50 and 80 mm, construction glue. All actions are performed in stages.
- Two elements 60 cm long are cut out from the boards and two more - 58 cm.
- Grooves are cut out in the blanks, with the help of which the parts are connected and fixed with screws.
- The resulting L-shaped racks are attached to two boards.
- 4 identical crossbars are cut, which are fixed to the side supports.
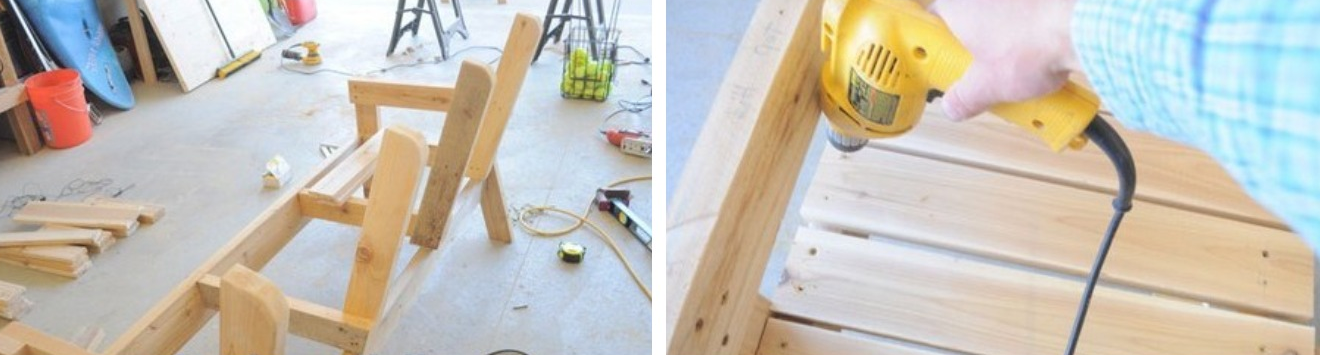
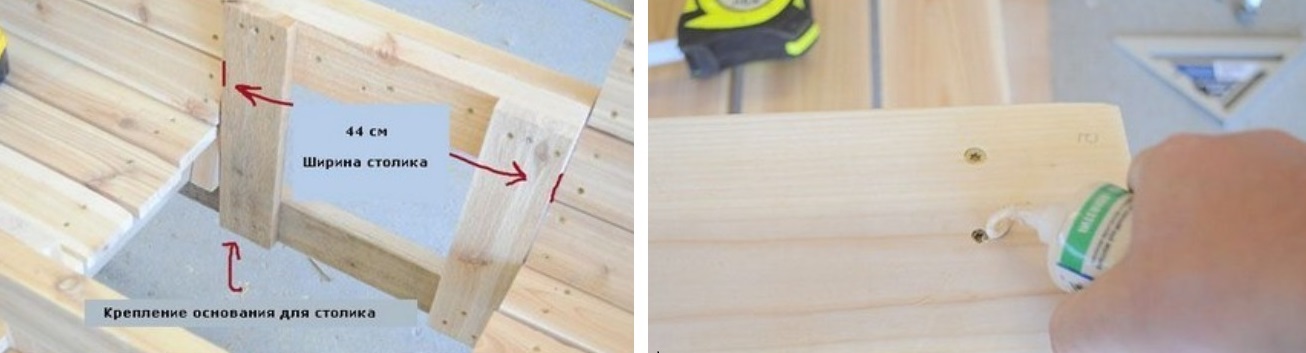
- For the back, 4 pieces of 600 mm are sawed off, which are fixed on the base of the seats.
- Sheathing of the frame is made with slats or lining.
When creating a product, it is important to adhere to the recommended angle of inclination of the back of the bench: 15–40 degrees. The finished structure is treated with protective impregnation for wood.
Custom solutions
To make a bench with a back made of wood with your own hands, it is enough to use the available skills, recommendations of specialists, ready-made drawings. But there are original solutions that allow you to transform a standard design into a convenient and unusual decorative element.
Benches around a tree are one of the most attractive options. Products look spectacular, organically fit into the surrounding landscape, can accommodate a large number of people. Under the shadow of the crown you can hide from the scorching sun, take a break from working in the garden. The design is often installed around a beautiful flowerbed or fountain.
It looks interesting mini-bench with flowerpots instead of legs. Flowering plants will be the best decoration for garden furniture. Another similar model is a product with small drawers that are inserted into special holes. Soil is poured into them, then flowers are planted.
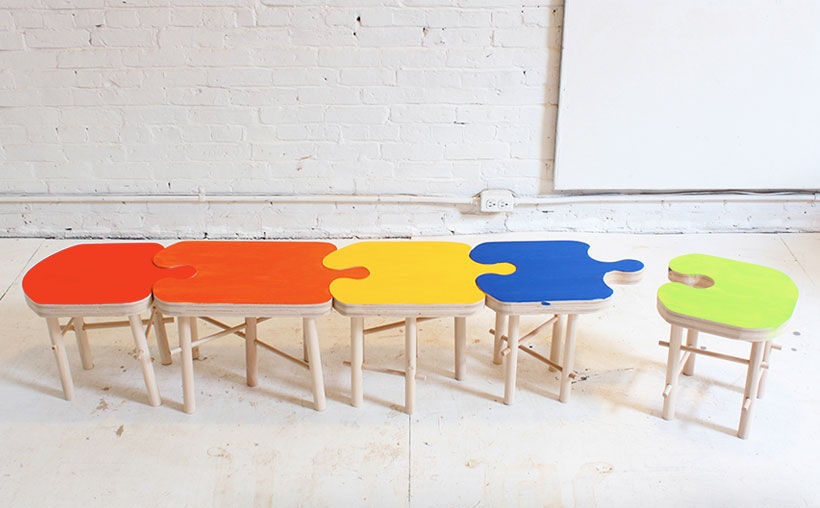
Children's bench can take the form of a puzzle. Curly seats are cut out in the form of mosaic details that can be connected into a single structure and disassemble into separate chairs. Products are painted in bright cheerful colors.
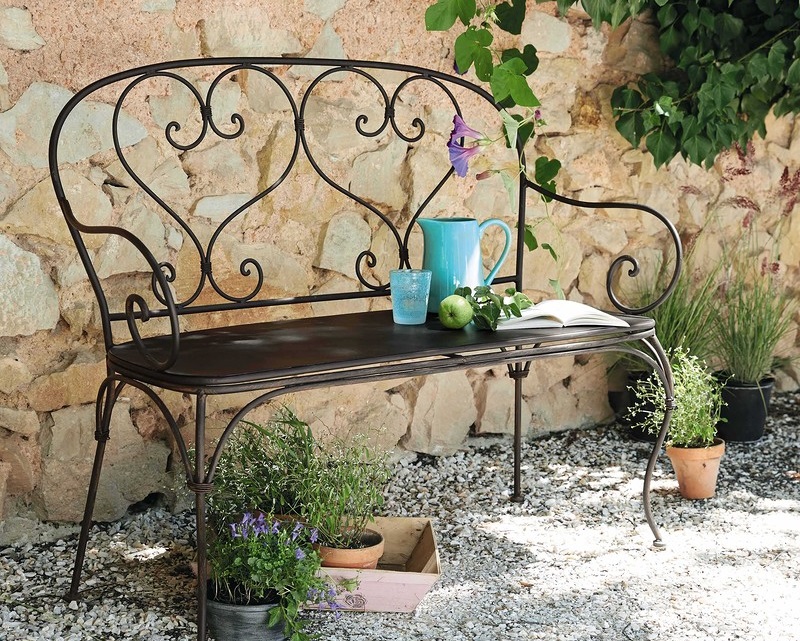
A simple bench made of timber will become elegant and sophisticated, if you complement it with forging elements. Metal parts are used to create handrails or legs that are in harmony with a wide variety of design designs. Models with storage drawers are practical and convenient. You can hide household supplies or children's toys in them.


Useful Tips
To make a wooden bench with your own hands, drawings, as well as materials and tools, should be prepared in advance. If you are planning a construction made of plywood or boards, the surface is carefully examined for flaws. Be sure to take into account the percentage of losses when cutting elements.
Specialists always begin to cut parts from the longest boards. All corners are rounded to reduce the risk of injury. The back of a bench made of wood should not be made from a continuous canvas, since it will dry for a very long time after rains. Optimal individual planks nailed parallel to each other.
The standard bench height is from 40 to 50 cm. To give the frame more stability, a profile pipe is used instead of wood. Before installation, it is necessary to prepare the site. The surface must be flat and dense. An ideal option would be cobblestone or coarse gravel.
Wooden benches are covered with coloring compounds. When choosing, it is worth considering not only color, but also properties. Resistance to external factors is of great importance.
People who like to go to the dacha and look after the garden should not forget that you should not set up a bench under fruit trees. Falling apples and pears will spoil the appearance of the product. All wooden elements are varnished or varnished to protect against the vagaries of the weather.
Before you make a bench from improvised materials, it is worth getting acquainted with the features of such products, design options, useful recommendations. Garden furniture can be not only comfortable, but also practical, durable, aesthetically attractive.

Video
 (no ratings yet)