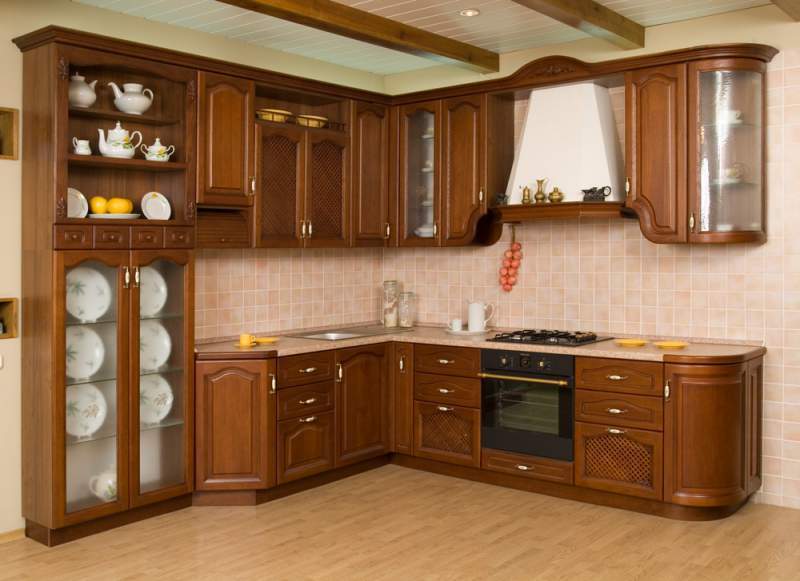
Making DIY kitchen furniture, the subtleties of the process

In order to make a high-quality set yourself so that your own made kitchen furniture will become a special pride immortalized by photographs, you must at least have an idea of where to start. We suggest that you familiarize yourself with the stages of work and what is required for this.
Content
Material selection
Materials for the manufacture of kitchen furniture with their own hands should maximally correspond to the conditions for the further operation of the headset. What do you plan to use for the furniture case:
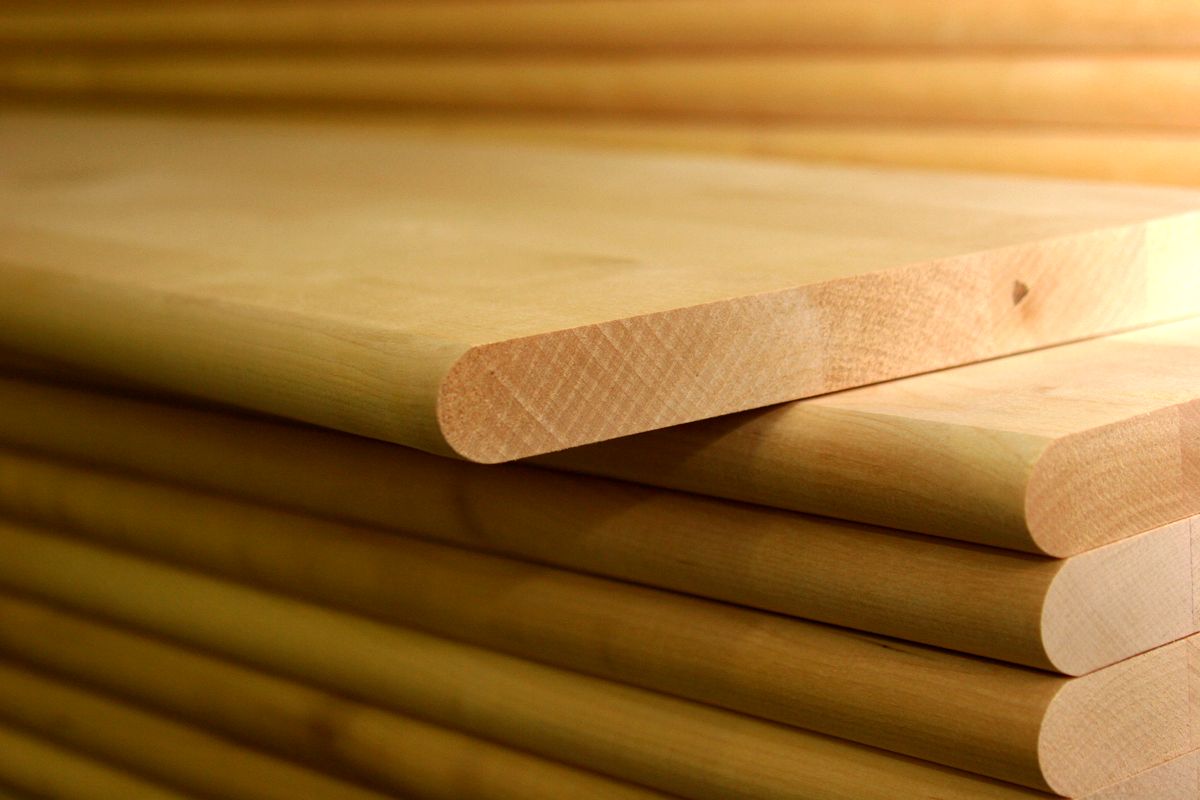
- solid wood version - a classic of the genre;
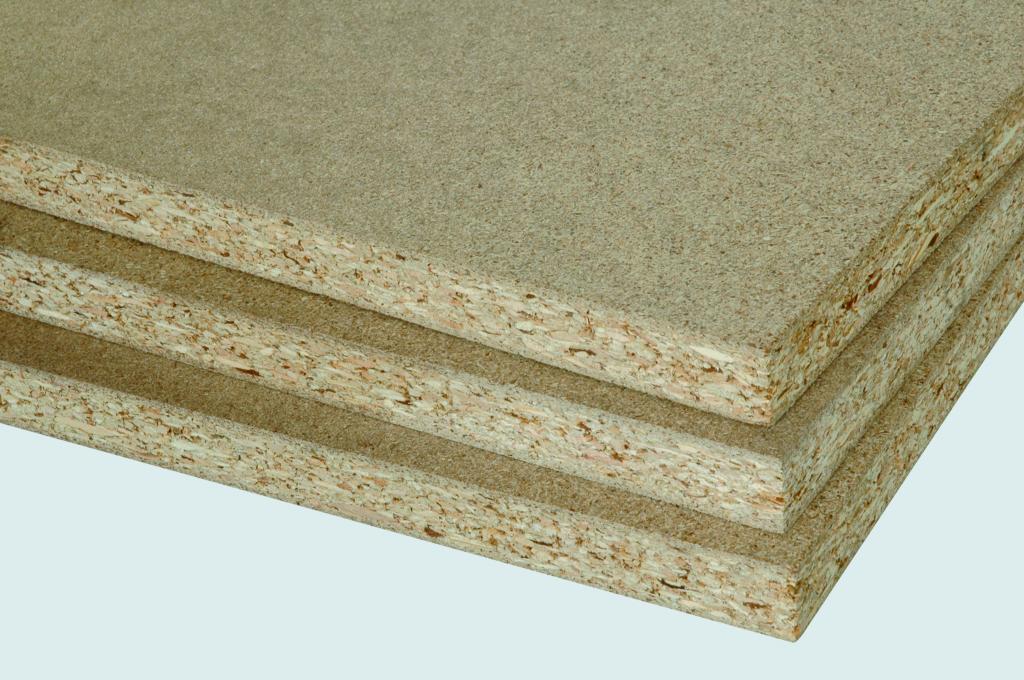
- from chipboard - budget;
- from old furniture, with the proper skill, it can turn out to be practically free, not counting the costs of new fasteners and accessories.
Whatever materials you agree to take as a basis for the manufacture of furniture, before you begin, be sure to read the instructions on how to make the headset items from this material. Everywhere there is a specificity for each type of furniture.
| Material type | Features | Advantages | disadvantages |
| Solid wood | Natural, environmentally friendly material with a unique texture and color. | Durable - depending on the type of rock, the service life is from 15 years to several tens. | The material is sensitive to changes in humidity and temperature. It requires treatment with impregnation, antiseptics of all details. |
| Chipboard | The density of European samples is superior to domestic samples. It contains more glue and paraffin. | Low cost version of the material, easy to process. It is easy to carve out details from it. | With low quality, it may have low strength and exude an unpleasant odor. |
| Chipboard | The surface is covered with a protective film during the manufacturing process (laminated). | Cheaper than MDF, resistant to harsh operating conditions. | If the moisture-resistant layer was applied by caching, then the film may lag. |
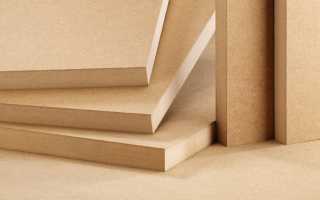
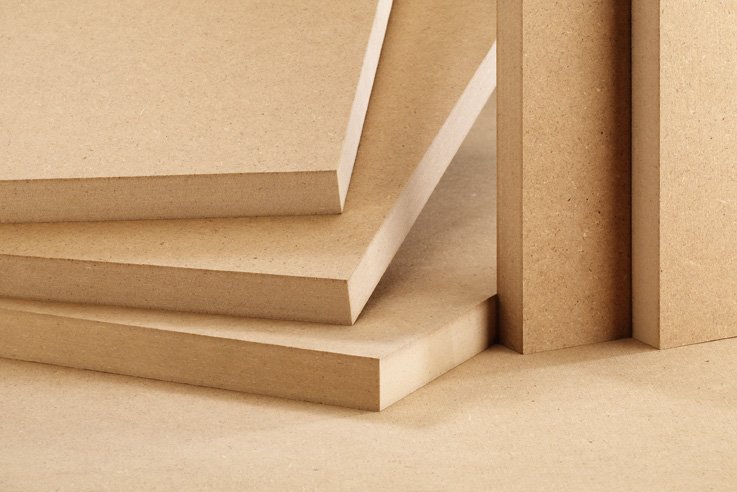
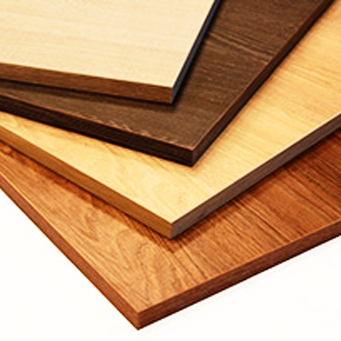
| MDF | Density can exceed natural wood. | Surpasses chipboard in terms of strength and flexibility. Convenient for molding. Suitable for decorative elements. | Requires painting, more expensive chipboard. |
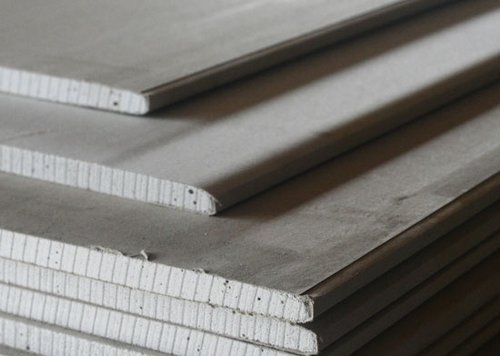
| Drywall | It is a sheet of layers of construction paper with a layer of gypsum dough with various additives. | Practical, resistant to loads, long life of structures. It is possible to manufacture a variety of designs. | Fragile, may crack during operation. Not intended for very heavy weight. |
Having decided on the material from which you will make furniture for the kitchen with your own hands, carefully approach the choice directly on the spot.
The solid wood should have a uniform, dense pattern of annual rings. Be sure to check for cracks and chips, delamination of the fiber. Avoid wood with knots.In the future, this material defect will affect the quality of the parts.
Wood chipboards must be flat, free from defects. Do not take sheets that are too thin, as the frame of the furniture box will carry a sufficient load. If there is a protective film, then it is better to take the lamination, and not the cached version. The ideal option is MDF.
Do-it-yourself kitchen furniture made of drywall can be an excellent option, since it has been made moisture-resistant sheets for a long time. Furniture made from this material can become a real decoration of your home. However, this material requires the presence of a wooden or other frame on which the metal profile and parts will be mounted.
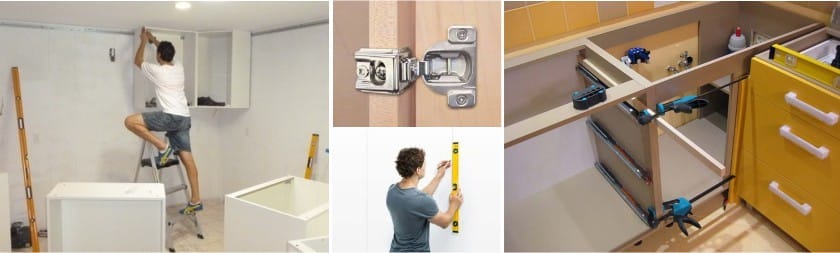
Stages of making kitchen furniture
The idea of home-made furniture is very relevant in homes where the kitchen is small or has a non-standard layout. If you make furniture for specific dimensions to order, it may turn out to be more expensive than its standard counterparts. In addition, when it comes to furniture for the country kitchen, it is tempting to use the details of old furniture in order to spend less on the purchase of materials.
The manufacture of furniture, whether it is wood, chipboard, drywall, after the cutting of parts that you could do yourself or order from specialists, will be carried out, contains 3 mandatory steps:
- work on the preparation of furniture parts - edge processing, impregnation with antiseptics and other protective compounds;
- direct assembly of furniture modules;
- finish installation of the furniture set as a whole.
To make home-made furniture to truly transform the kitchen, and you would proudly show a photo of a headset made by yourself at home, watch a detailed video of the step-by-step reflected process to understand the specifics of each step.

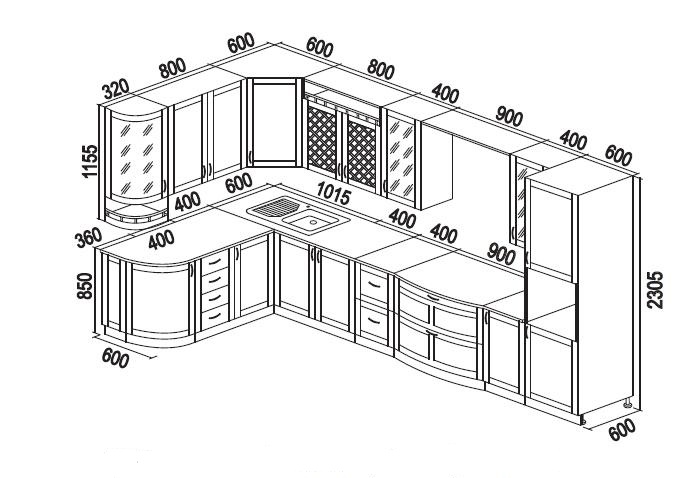
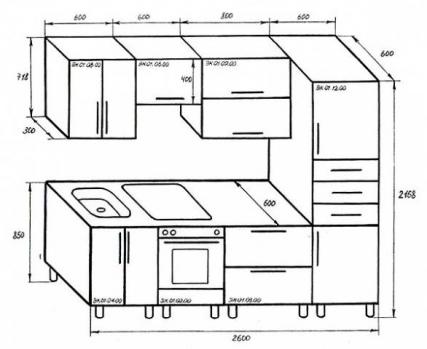
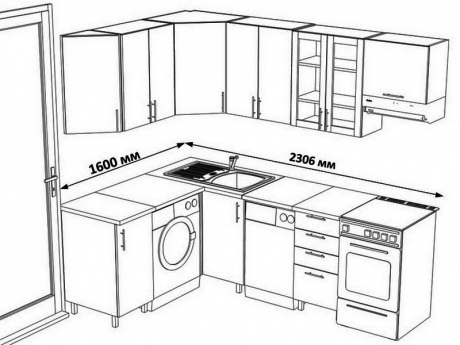
Measurements and project creation
Kitchen furniture is made on the basis of the project. For those who have begun cutting parts without fulfilling this point, the result will most likely be unusable. Answer yourself honestly, whether you can do the drawings and schemes with your own hands accurately and competently, taking into account all the necessary nuances.
If someone you know recently bought a headset that fits into the dimensions of your apartment, do not hesitate to ask a visit and thoroughly examine all the details and take measurements on the spot. You can go to the store with ready-made headsets. Of course, you will have to withstand the increased attention of the consultants, but you can study the assortment of kitchen furniture made of drywall with your own hands and you will get an original and high-quality layout.
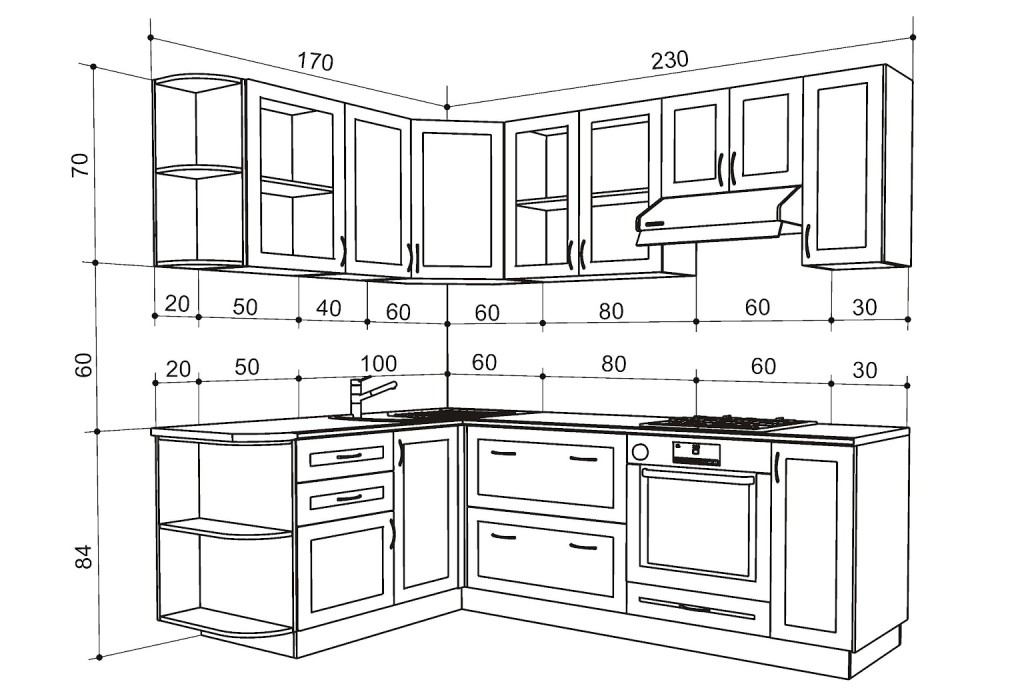
The drawing should be clear, accurately show the location of the front nests and drillings. Important: 1 mm is taken as the unit of measure - this is a fundamental point!
In addition, consider the allowances for edge cutting and between cut parts:
- edge - 2 mm;
- individual parts - 5 mm.
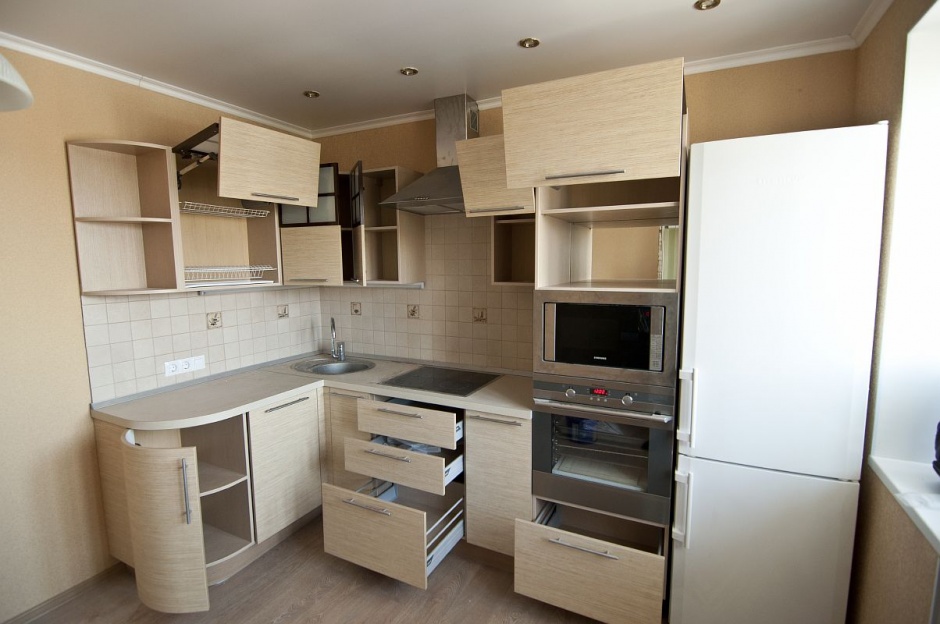
Measure in an area free of furniture. Keep in mind that the error will be in any house - whether it is Soviet or more modern. Use a simple pencil to mark on a chipboard sheet or other material. The marker can even appear through a decorative coating. Be sure to number before assembling the part. Consider the location of large household appliances - a refrigerator, stove, sink. Do not forget about the pipes. Leave a space of at least 650 mm between the drawers and the worktop.
Decide which type you will use - straight or angular. You can make furniture for the kitchen on the basis of a ready-made drawing. You can choose an option on the Internet or order a project, for example, students of recent courses. It will come out cheaper than the professional work of the designer, but they will use high-quality programs to calculate the project.
After drawing up the drawing, do not forget about the cutting map.This document will help to see the location of parts on sheets of material, to calculate the required quantity. Leave certain stocks:
- from the edges of the sheet - 10 mm;
- cut - 4 mm;
- at the place of cut - if necessary.
It is important to position the parts in such a way as to ensure a good through cut. It is better to use special programs for cutting, but you can also manually, although this is longer.

Calculation of necessary furniture
After preparing all the drawings, proceed to the calculation of the details. You can correctly make kitchen furniture by creating a sketch of the module on separate A4 sheets - you need to write out everything you did, their number, parameters. Remember to consider the thickness of the material used. Moreover, if a plate or sheet can be produced in different thicknesses, calculate the material for several options:
- to calculate the parameters of the inner shelf, subtract the double sheet thickness from the module width;
- remove the back wall of chipboard with your own hands 3 mm from the width and height of the future module;
- for facades - the total width is divided in half, minus 3 mm.
Having calculated everything you need, make a list to order the necessary materials and elements. Hinge milling is best ordered. This will reduce time, and buying a cutter will come to you at about the same cost.

Materials and Tools
Material for kitchen furniture with your own hands, check for defects, "non-standard". Decide in advance what the facades will be - buy or make yourself. For the rear walls, sheets with the smallest thickness are taken. Medium - for shelves, vertical parts. On the countertop choose the most durable option.If you are planning drywall, then make a frame with your own hands from wood, get metal profiles.
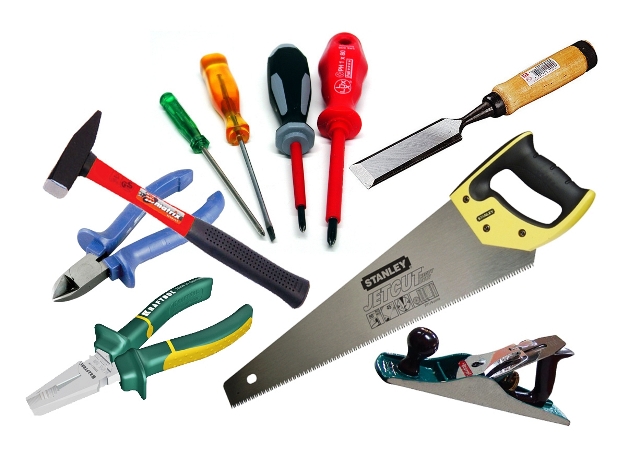
Accessories needed: edge, screed, legs, guides for drawers, dryers, hinges, handles, shelf holders, hooks. Fasteners - finish nails, dowels, screws, screws. Take care of the tools:
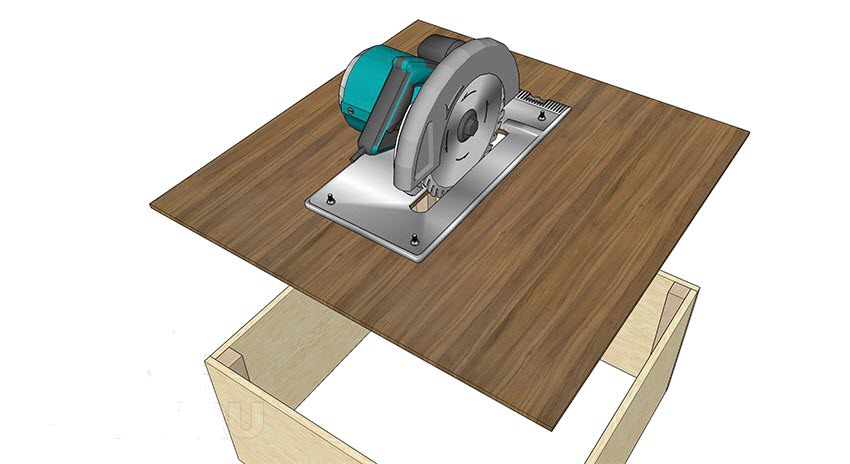
- disk saw (hacksaw) – applies for sawing of details;
- pencil, roulette;
- confirmations;
- screwdriver, emery sheet, hexagon, primer;
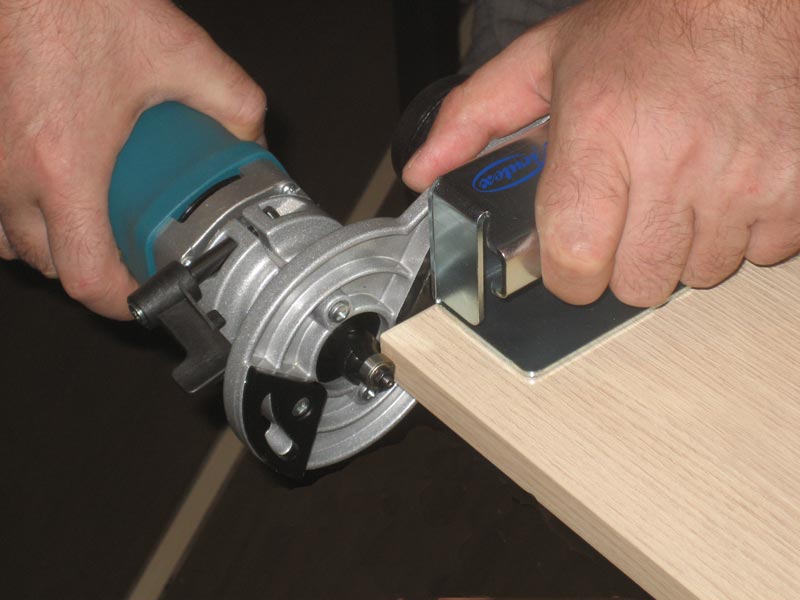
- manual milling cutter by a tree – is used for profiling edges, notches nests under fittings;
- drill, drill Forcener – for drilling nests under hinges for of furniture;
- level, laser rangefinder;
- iron (stick the edges);
- screwdriver and/or electric drill;
- jigsaw;
- electric planer/plane.
Get to work, making sure you have everything you need.
Material preparation
Furniture for a kitchen made of wood, particle boards or drywall begins with the preparation of materials and the processing of parts. After marking the sheet, do not forget to outline the canopies, pens, other fasteners. For marking, it is better to use cardboard templates. Holes are drilled immediately.
Cut the parts with a circular saw. Do this from the inside so that the edge remains neat on the outside. For wood and slabs, the edge is first processed. Facing can be done with melamine or plastic. The edge protects the material from moisture and swelling. Use an iron. After glued and the material has cooled, cut off the tabs under 45aboutand then sand the bend.
For drywall, preparation consists in marking and fixing metal guides. If it is understood that the part will carry a significant load, additionally use a reinforcement made of timber.


Assembly and installation
For the assembly of a kitchen made of wood with your own hands, fiberboard, drywall, the basics of events are based on common principles:
- it is necessary to separate all the elements, arrange them in a list and delimit them so that it is clear where which module is;
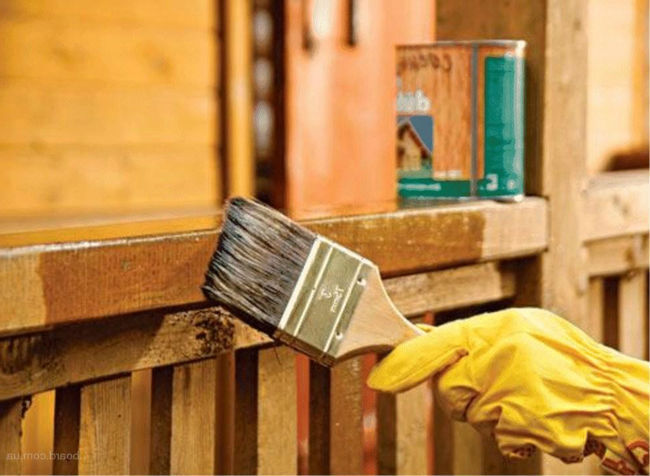
- if you haven’t done so yet, carry out antiseptic treatment, cover with varnish (3 layers minimum);
- first, facades are mounted on the varnished module elements, then they are installed in place;
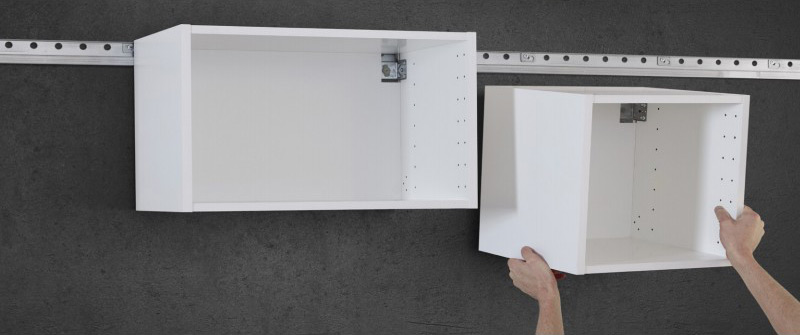
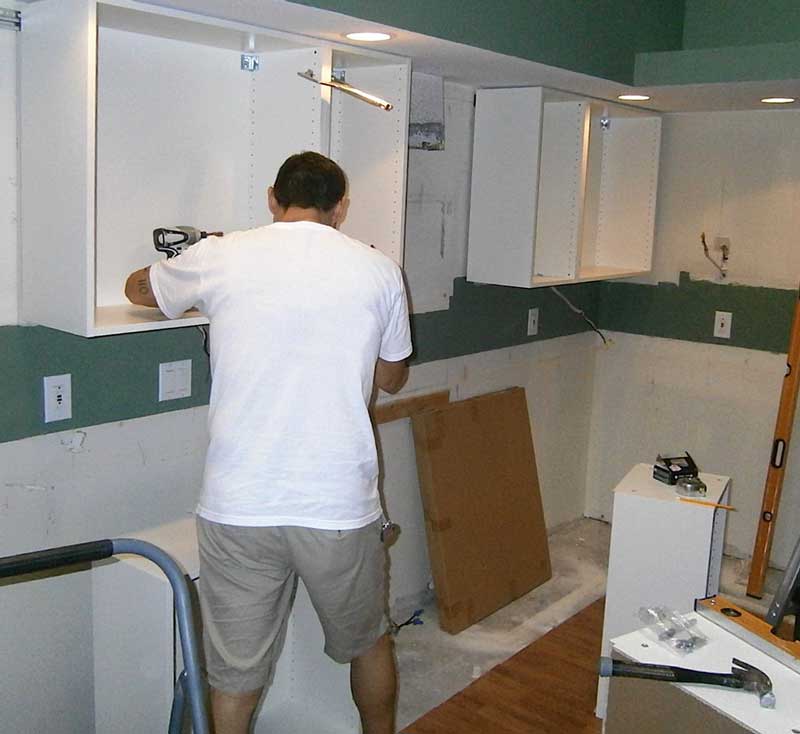
- the upper cabinets can be hung up as is, but to install the lower ones a level is required without fail;
- the countertop is laid without fixing, marking is done for the sink, stove, faucets. Remove the countertop, make holes;
- Before installing the countertop canvas on the pedestals, do not forget to also process it and varnish it if the surface requires it.
The washing area is treated with sealants, as it will be exposed to regular moisture. The sequence is just that - cabinets, then the countertop.
Installation of facades
Facades can be made of a variety of materials - wood, chipboard, plastic, glass. Depending on the material used when choosing the hinges, consider the weight of the facade. Wooden will be heavier, and you need to fix it on a quality basis. Chipboards and plastic are lighter.
Deaf or panel panels of facades must exactly correspond to the dimensions of the box, otherwise after installation you will receive inaccurate protrusions, which will be extremely difficult to fix.
If you made or purchased facades, make sure that all edges are machined around the perimeter before installation. This is important, since during operation it is the facade that will be subjected to the maximum impact - it is cleaned, moisture and basic pollution get on it.
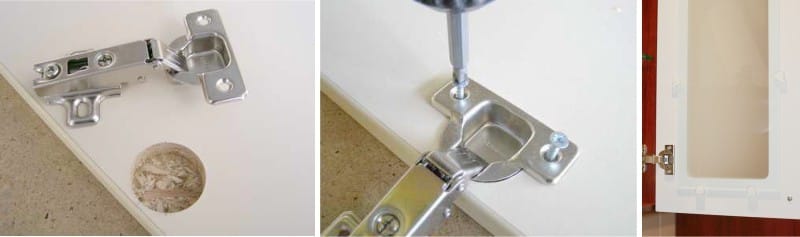
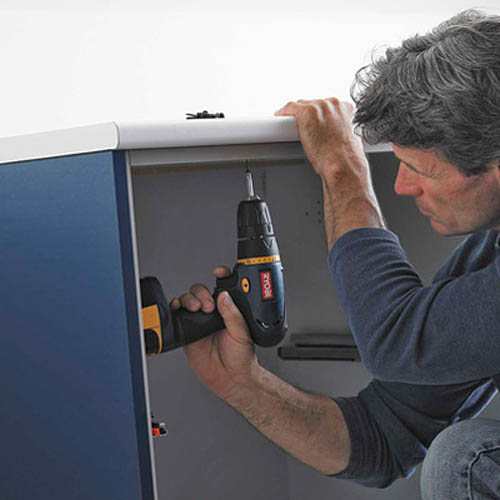
The installation of facades on the box takes place by marking the hinges. Therefore, it was very important to calculate all the markup at the project stage. It will not work to install on the eye - after all, the loop can get to the level with the shelf and, as a result, does not work as it should.
The holes are drilled using a Faustner drill, which is specially designed for the size of the holes in the hinges. To fix the hinges on the doors, self-tapping screws are used. Upon completion of installation, the hinges are adjustable.
If we are talking about the installation of drywall facades, then after hanging all the places must be putty. The gypsum-plasterboard facade can be decorated with tiles, for this use specialized glue.

Useful installation tips
Making kitchen furniture, if you are a beginner specialist and have never had a relationship with production, it’s better to master it on old furniture. Simply put, before you take on a real set, try to make furniture for dolls with your own hands. Practice the skill on a smaller model so that manufacturing technology is worked out from scratch. Surely in the bins you or your friends have polished headboards, countertops, cabinets that can be taken apart and put into use. If the result is successful, there will certainly be a child who will be happy to play with a “real” headset and dolls.
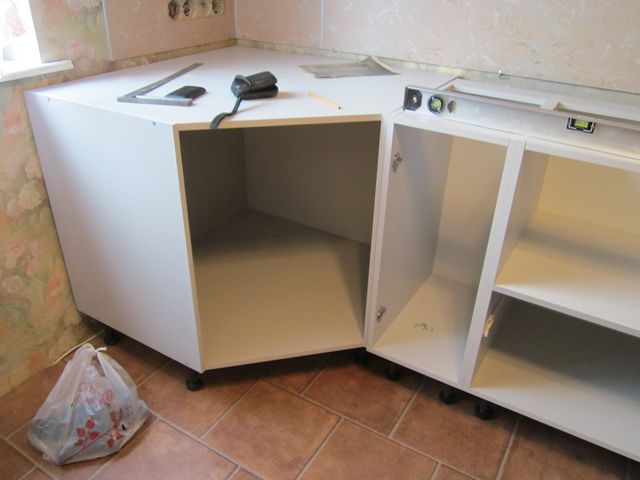
Now we turn to the tips regarding the installation of high-grade kitchen furniture:
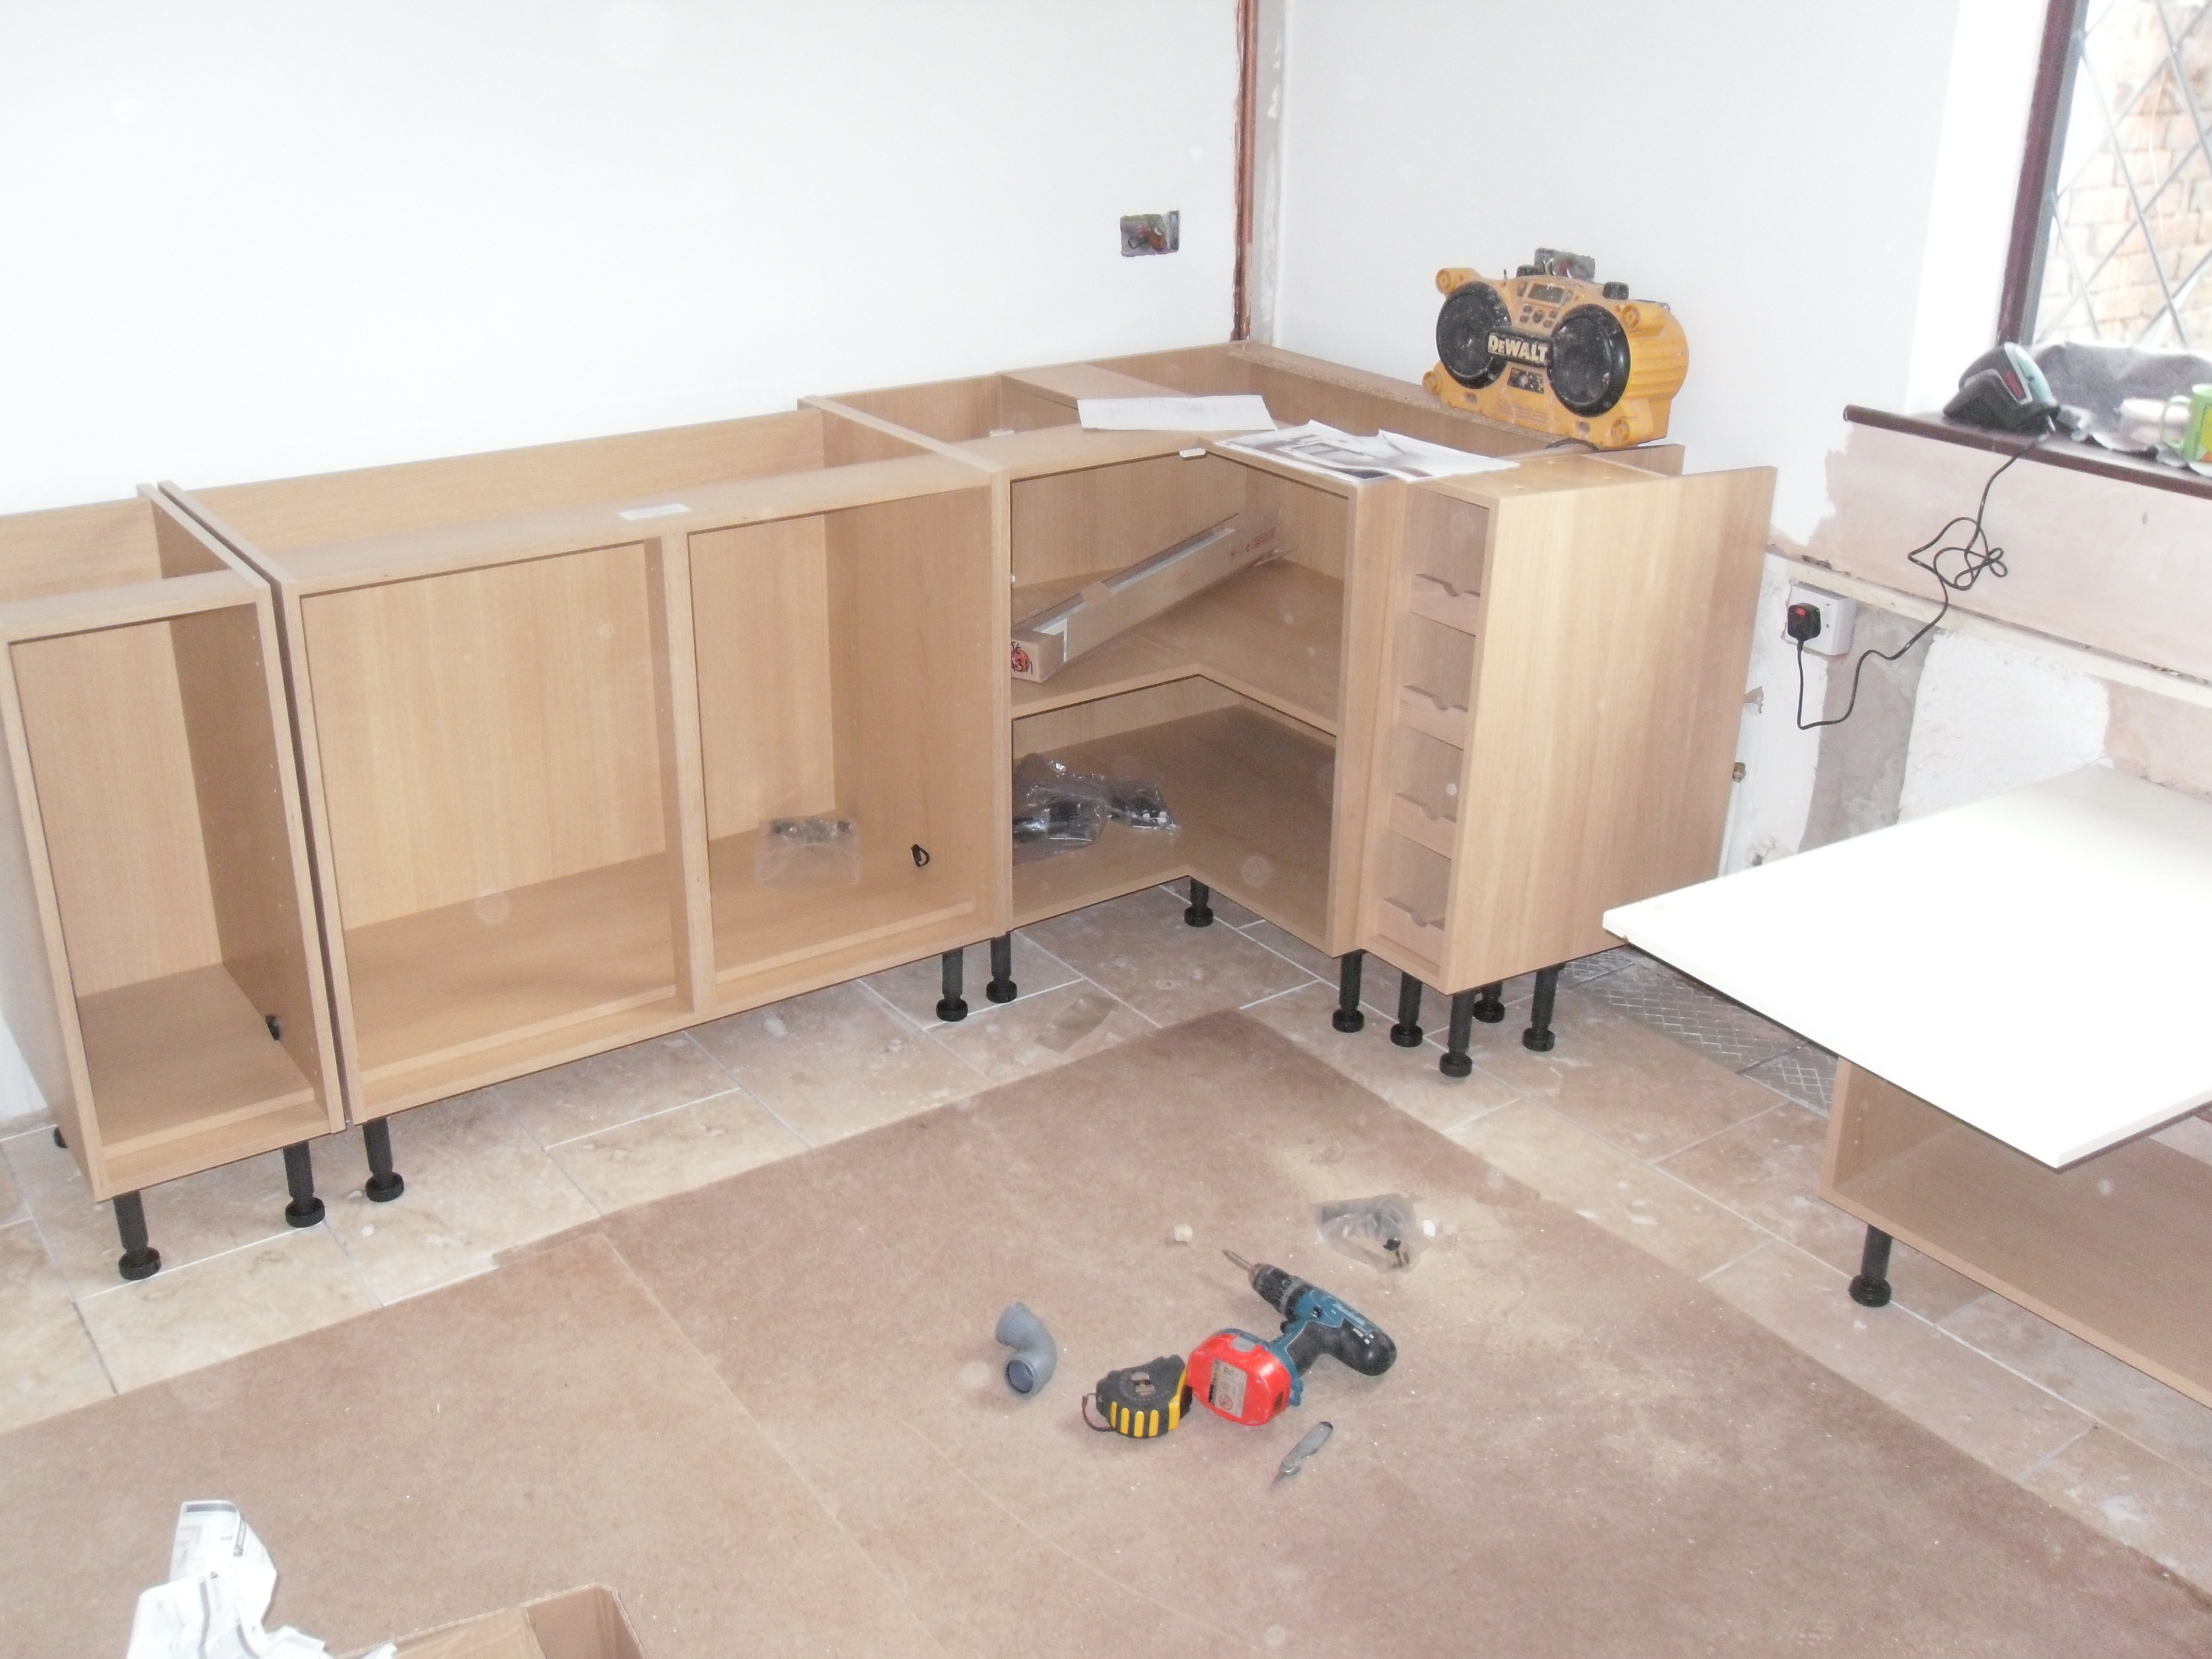
- installation begins to be carried out depending on the configuration of the headset: linear - from the cabinet, which will stand against the wall; corner set - from the corner section;
- so as not to clutter up the space, collect each module in turn, and not all at once;
- a gap of 0.5 cm should be left between the wall and the countertop;
- Do not immediately place facades on the upper cabinets. First hang up the module, and then mount the facade details;
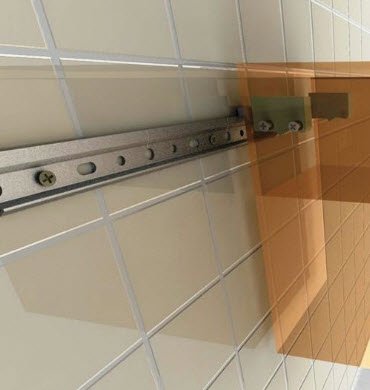
- fasten the drawer guides to the inner surface of the side walls before assembling the cabinet parts.
Will be reasonable to order a favor milling under furniture hinges. More reliable instruct work professionals, having for of this all necessary instruments.
Video