Making and decorating a DIY mirror frame, simple ideas
Mirrors have been known to mankind for thousands of years. Once upon a time, polished silver, copper, and iron products were used in this capacity. Nowadays, mirrors made of glass with a thin layer of reflective material on the back are ubiquitous. In order to protect a fragile interior item from damage, it is necessary to supplement it with a reliable frame, and it is not at all necessary to purchase it in a store. An original, unusually decorated frame for a mirror with your own hands is done quite simply. The scope for creativity here is really wide - to pick up an interesting option, you can be inspired by ready-made ideas or turn on imagination. And then you just need to select the necessary materials and allocate some free time to implement the idea.
Content
Benefits of DIY
Standard furniture and other similar interior items deprive the room of individuality, making it boring. To create coziness and make the house unlike any other, many are inspired by the ideas of hand made craftswomen. Numerous variations of the decor allow you to decorate the floor mirror in the hallway, mounted in the bathroom or bedroom, a small portable product for personal use. The advantages of this solution are obvious:
- exclusivity - the unique design of the mirror will exist in a single copy;
- the implementation of their own ideas about beauty is an opportunity to realize any design ideas;
- originality - you can decorate the frame so that it harmoniously harmonizes with the interior of the room;
- freedom of choice - the owner of the mirror decides for himself what to make the product from, so only environmentally friendly materials can be used.
It is much more pleasant to use a beautiful object that is created with the soul. This is easy to achieve if you make the frame yourself. The process does not require much time and effort.

Material selection
The frame must be reliable. In addition, it should not complicate the use of the mirror. It is also desirable that it protects the edge of the glass from chips. In some cases, a good frame can save the mirror even when dropped. The second important property is the availability of devices for attaching to the wall. And finally, the frame simply must be beautiful to continuously delight the appearance of its owner. This combination can be achieved in various ways and using different materials:
- Wood is very popular and is often used to decorate mirrors.It goes well with most finishing materials, suitable for the interior, the design of which can be made in almost any style.
- Polyurethane is very convenient for processing, at the same time affordable and inexpensive. A ceiling skirting board is made of it, which is used to create elegant baguette frames.
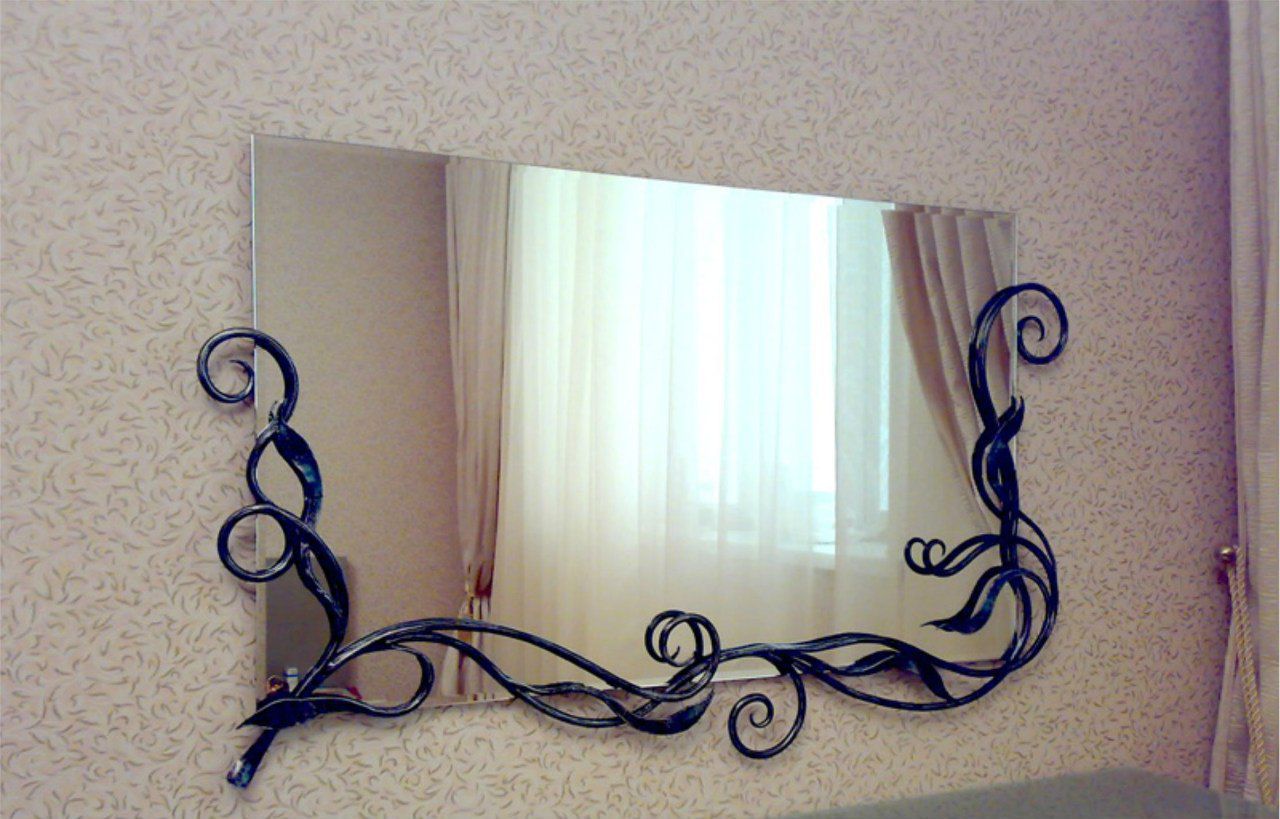
- Metals are strong, durable, but to work with them you will need special tools, special skills. Given these difficulties, this option is not suitable for everyone.
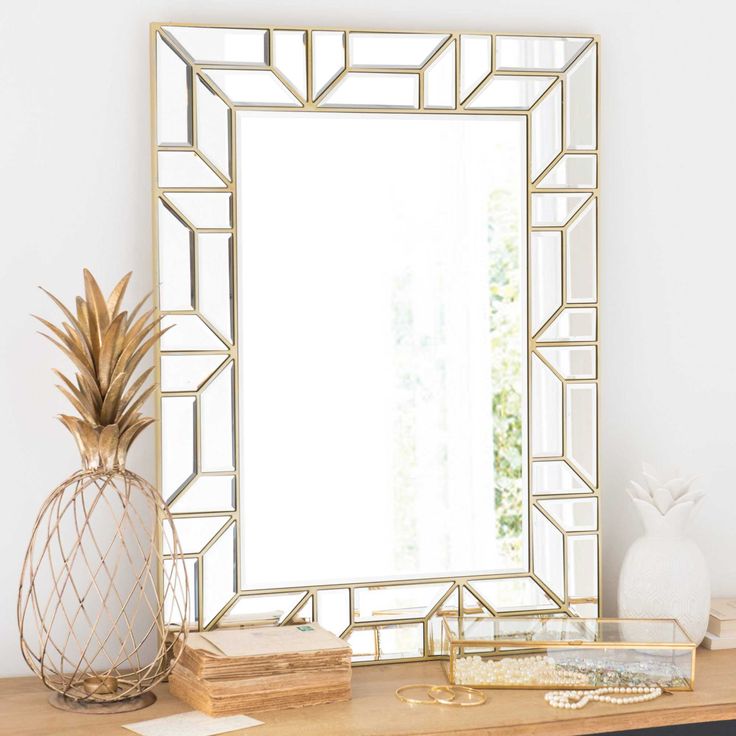
- Glass. There are many ways to decorate a mirror with this raw material. The main advantage is the same structure of the material of the frame and the product itself.
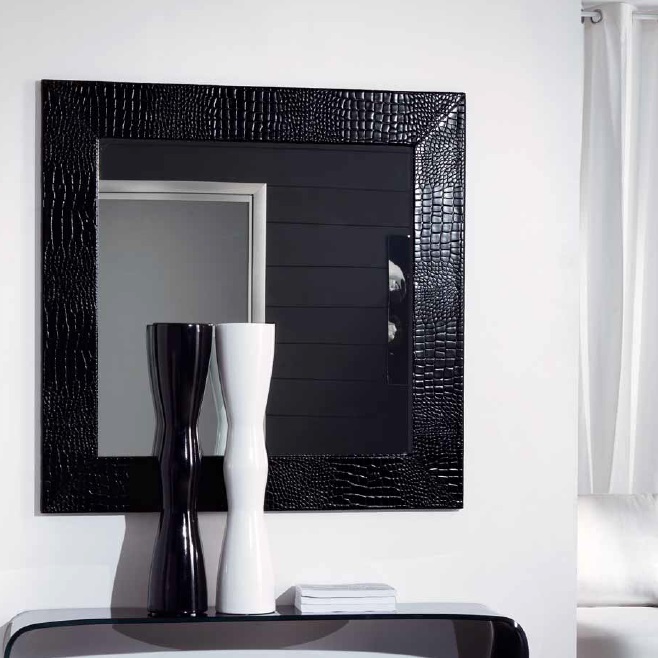
- The skin looks unusual, original. Such a product immediately attracts the eye, and you want to touch the frame of the mirror.
To make the front part, it is better to use the same type of raw material. If you overdo it by applying dissimilar materials, the design will turn out to be cumbersome. And the wrong combination, without taking into account, for example, differences in structure, can ruin the composition.
Frames for large mirrors are best crafted from durable materials such as wood or metal - steel, aluminum, brass. For small ones, light materials are better. It is recommended to make a frame in the bathroom with your own hands from waterproof materials, such as polyurethane, glass, metal. In this case, it is worth giving up paper and cardboard.
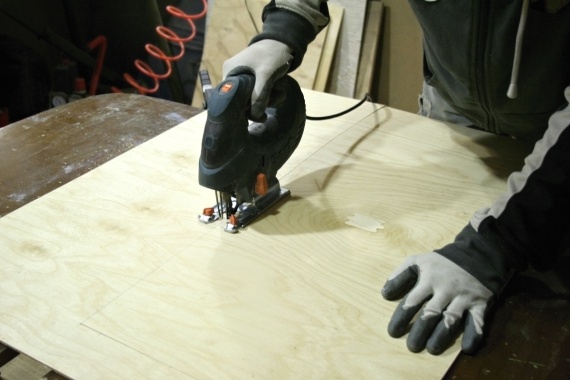
An important part of the design is the substrate for the mirror. It is made of sheet materials: fiberboard, particleboard, plywood. They are strong enough to hold the product and frame securely. Such raw materials can be used to create the basis of the frame. But it rarely has a presentable appearance, so these materials will have to be decorated.
Frames made at the factory are equipped with special hooks, hooks, hinges with which you can hang the mirror on the wall. Homemade must be equipped with a similar design. If the wall is wooden or brick, you can hang a mirror by driving an ordinary nail or screwing a screw. If concrete, you will need to purchase a dowel and make a hole using a hammer drill.
Step-by-step creation algorithm
To get an effective edging, it is easiest to use wood or polyurethane. The unique appearance of the finished product will give a special original color. Here you can also show your imagination and create a unique mirror design.
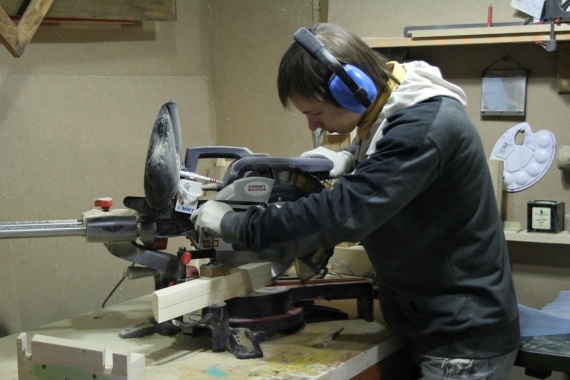
From wood
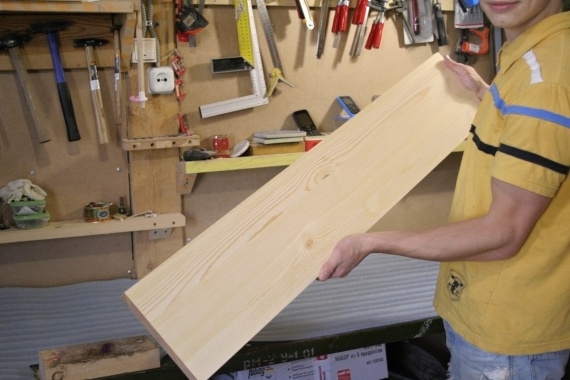
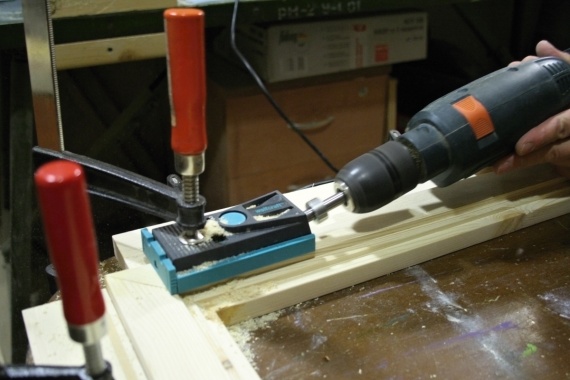
The simplicity of processing leads to the appearance of a wide variety of wooden elements from which a frame can be made. Therefore, at the first stage, you need to clarify the concept of the product and select the appropriate raw materials, tools, fasteners. Creating a frame of wood without frills, you can use screws and corners, glue or nails as fasteners. From tools it will be enough to take a hammer, sandpaper, a hacksaw on a tree. A pencil and ruler will also come in handy. In other cases, if you plan a carved or complex frame, you will additionally need cutters, a file, a drill and, possibly, other devices.
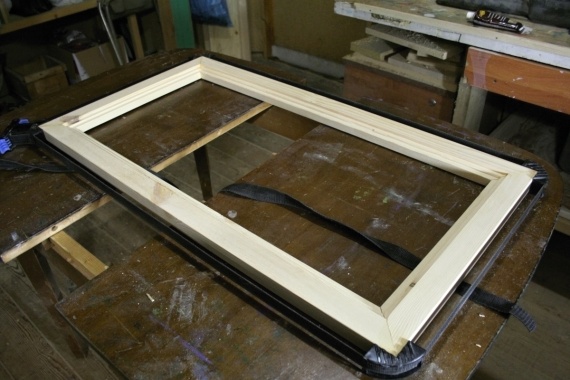
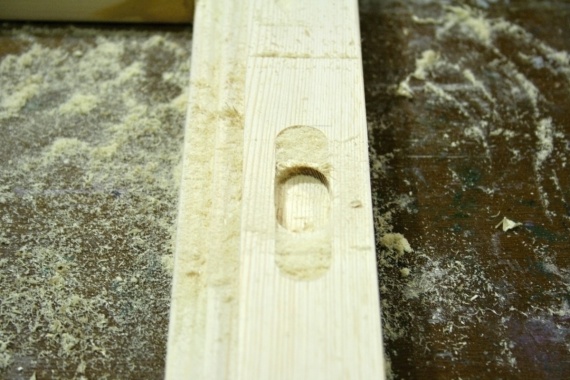
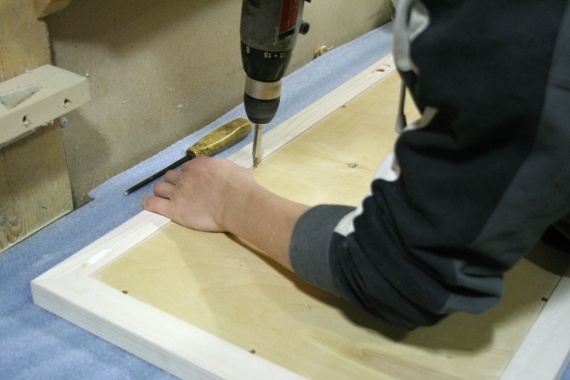
You can make the appearance of mirrors from any wood semi-finished products. Even the remaining after repair elements of wooden door or window frames are suitable. They are convenient in that they have a profile that is well suited for installing mirrors. The procedure for creating a wooden frame will be as follows:
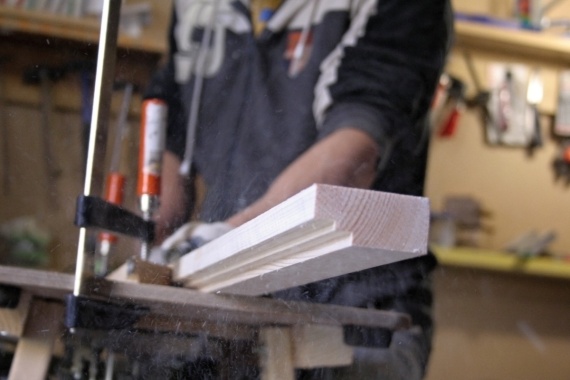
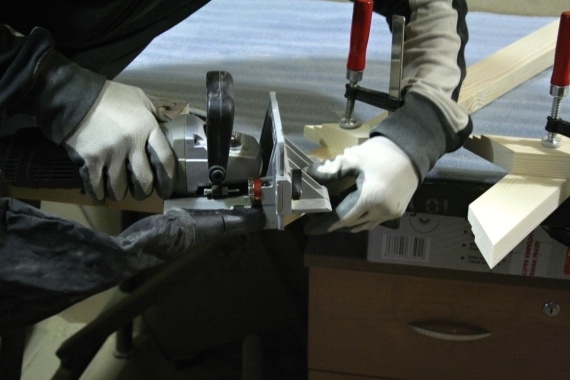
- Disassemble the clypeus into individual elements.
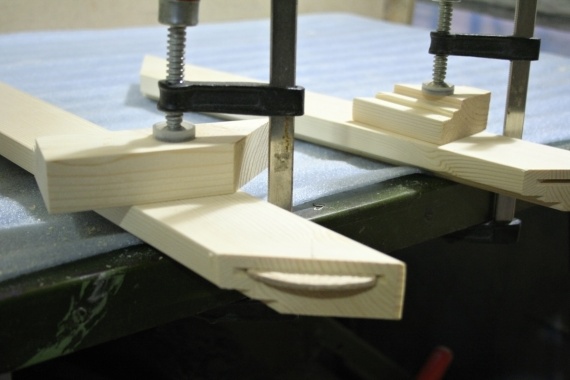
- Trim them to the height and width of the mirror - just four parts. The size of the elements depends on the articulation method. You can make it at an angle of 45 ° or straight. You will also need a glazing bead. Its size will be determined after assembling the base for the frame.
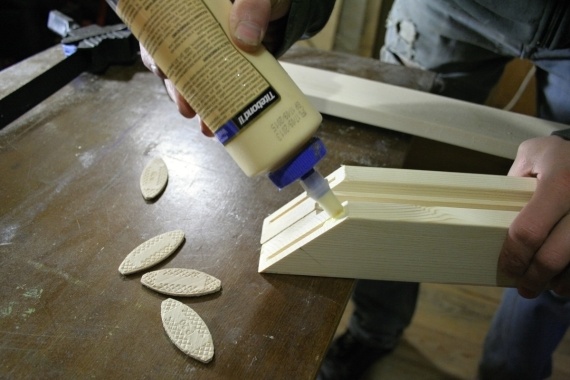
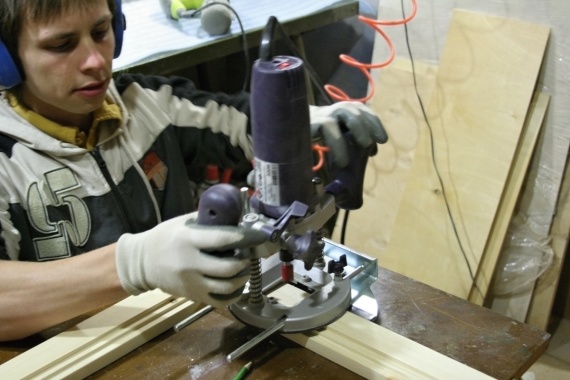
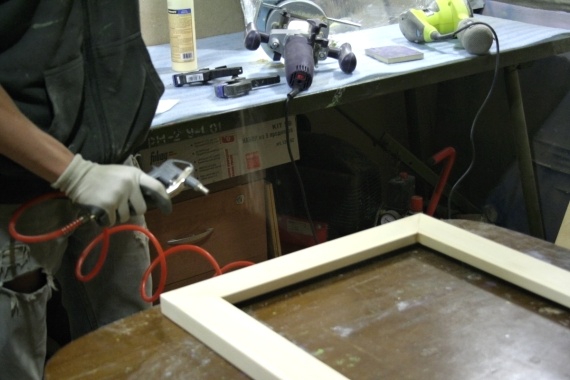
- When the layout is ready, all the elements are cut to size, it is necessary to treat the wood with an antiseptic for its best preservation.
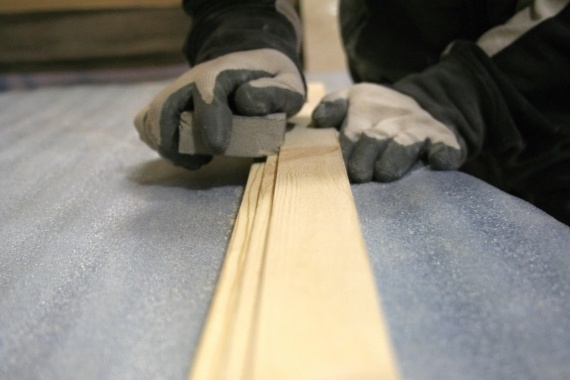
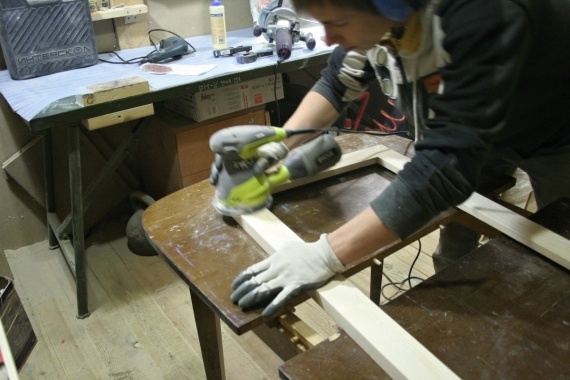
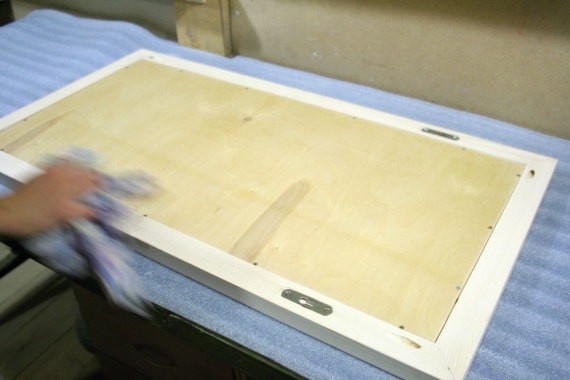
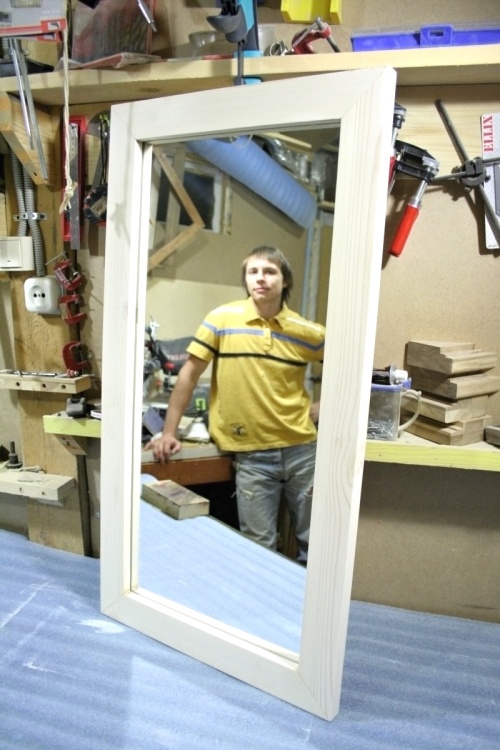
- After the wooden frame is assembled, the front surface should be sanded and then sanded. This will manifest the natural pattern of the tree. Then you need to cover the surface with varnish, or you can simply paint it with oil paint in a color that matches the interior. As an option, apply decorative elements by gluing them and coating them with colorless varnish. Such a composition will look great on the wall.
The frame for the mirror is ready. It remains only to make a substrate of dense sheet material and install the mirror itself. You can fix it with a glazing bead.
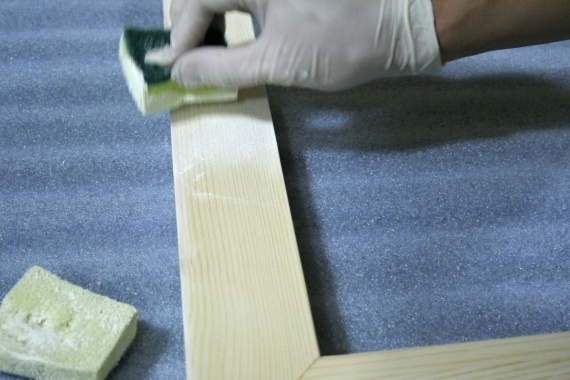
Before decorating the frame of the mirror with a paintwork coating, degrease the surface.


From the skirting board
Polyurethane is best taken in the form of a ceiling plinth. Firstly, it has the desired shape, and secondly, its surface, decorated with an interesting pattern that looks like stucco or carved patterns, will become an important element in the design of the frame.
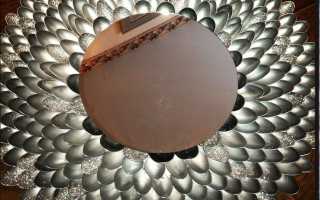
Making a baguette with your own hands is not difficult. Square frames for mirrors from the skirting board are obtained without any problems. It is somewhat more difficult to make a frame for a round mirror from polyurethane. For this purpose, widespread ceiling moldings, for example, central elements under the chandelier, are suitable.
The algorithm for creating a round frame made of polyurethane:
- Choose a decorative element, the diameter of which is 10 (or more) centimeters greater than the similar size of the mirror.
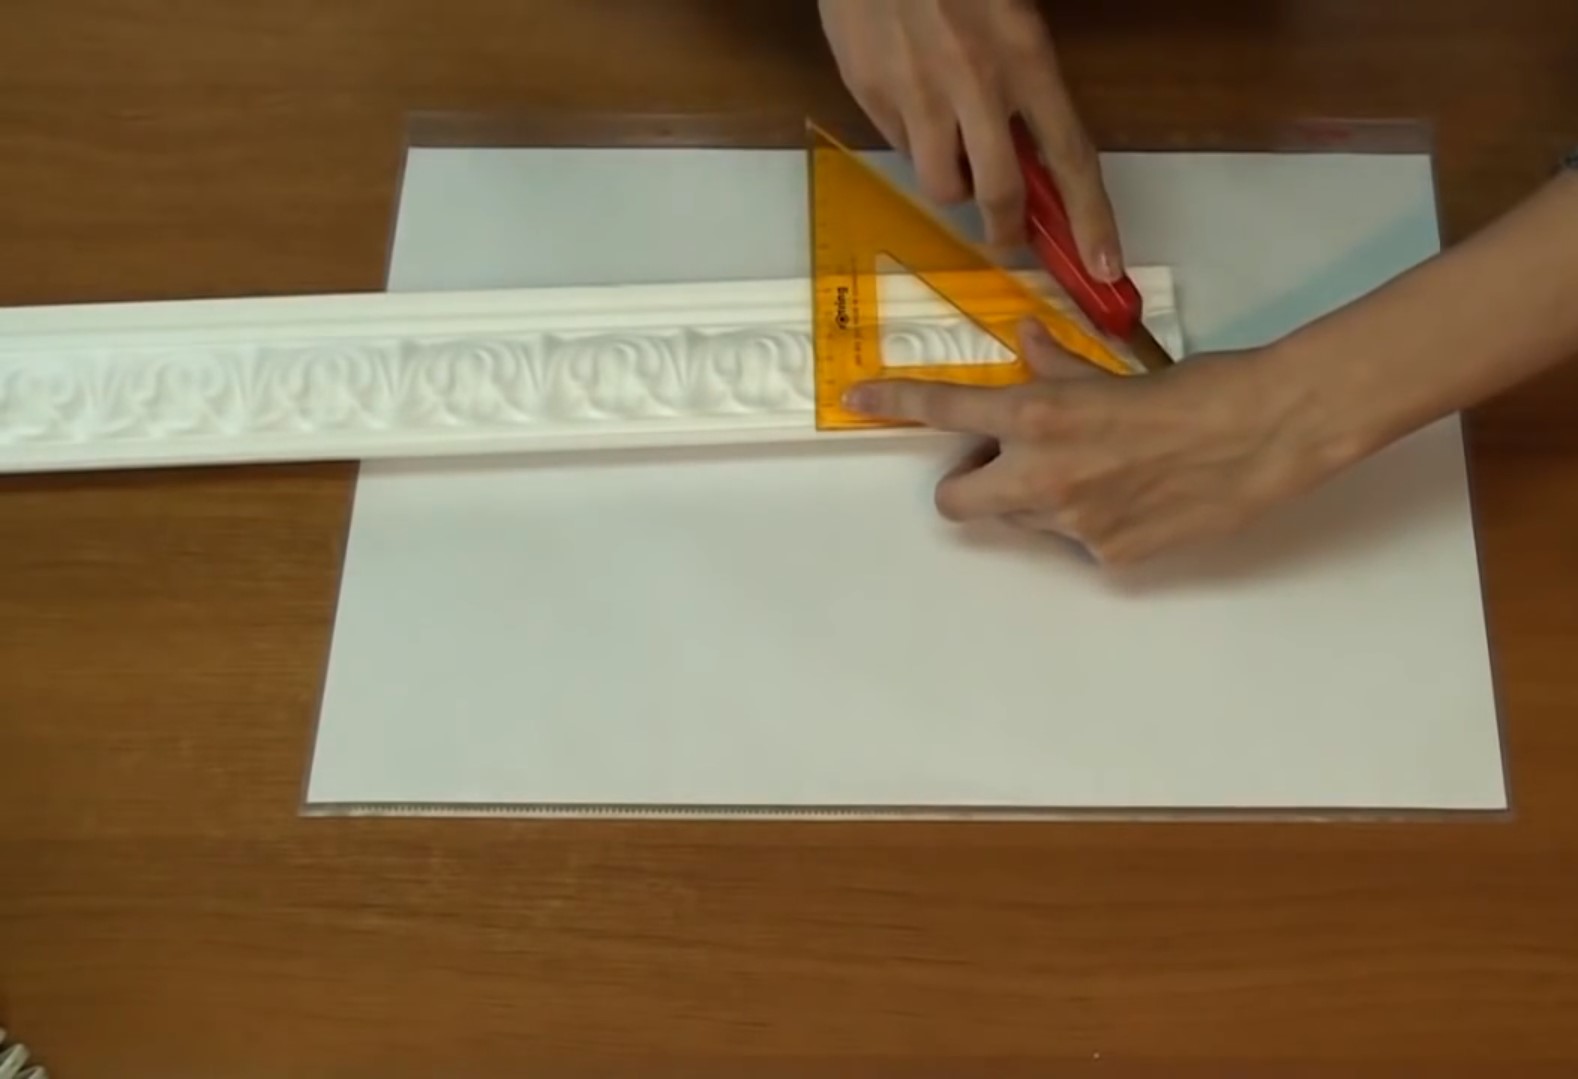
- Prepare tools and supplies. They will be the same as in the manufacture of a wooden frame for a mirror. In addition to them, a breadboard knife is useful.
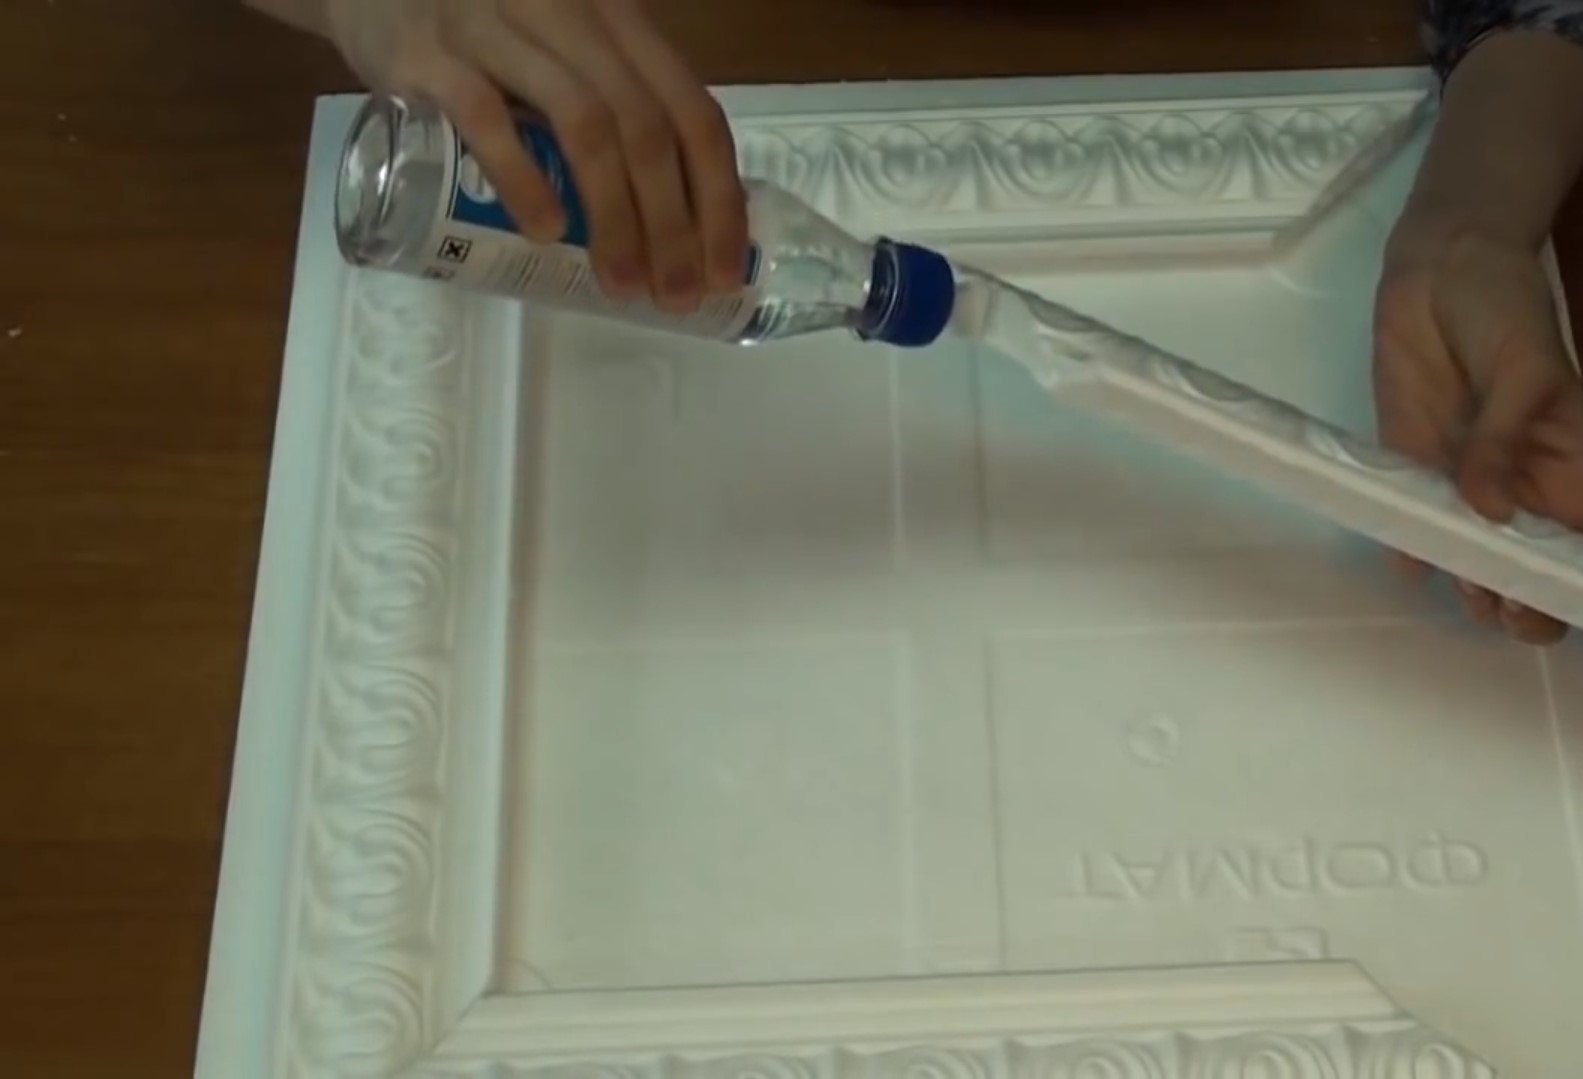
- In a polyurethane preform, make a cut 1-2 cm less than the diameter of the mirror.
- Protect the reflective surface from paint, for example, seal it with masking tape.
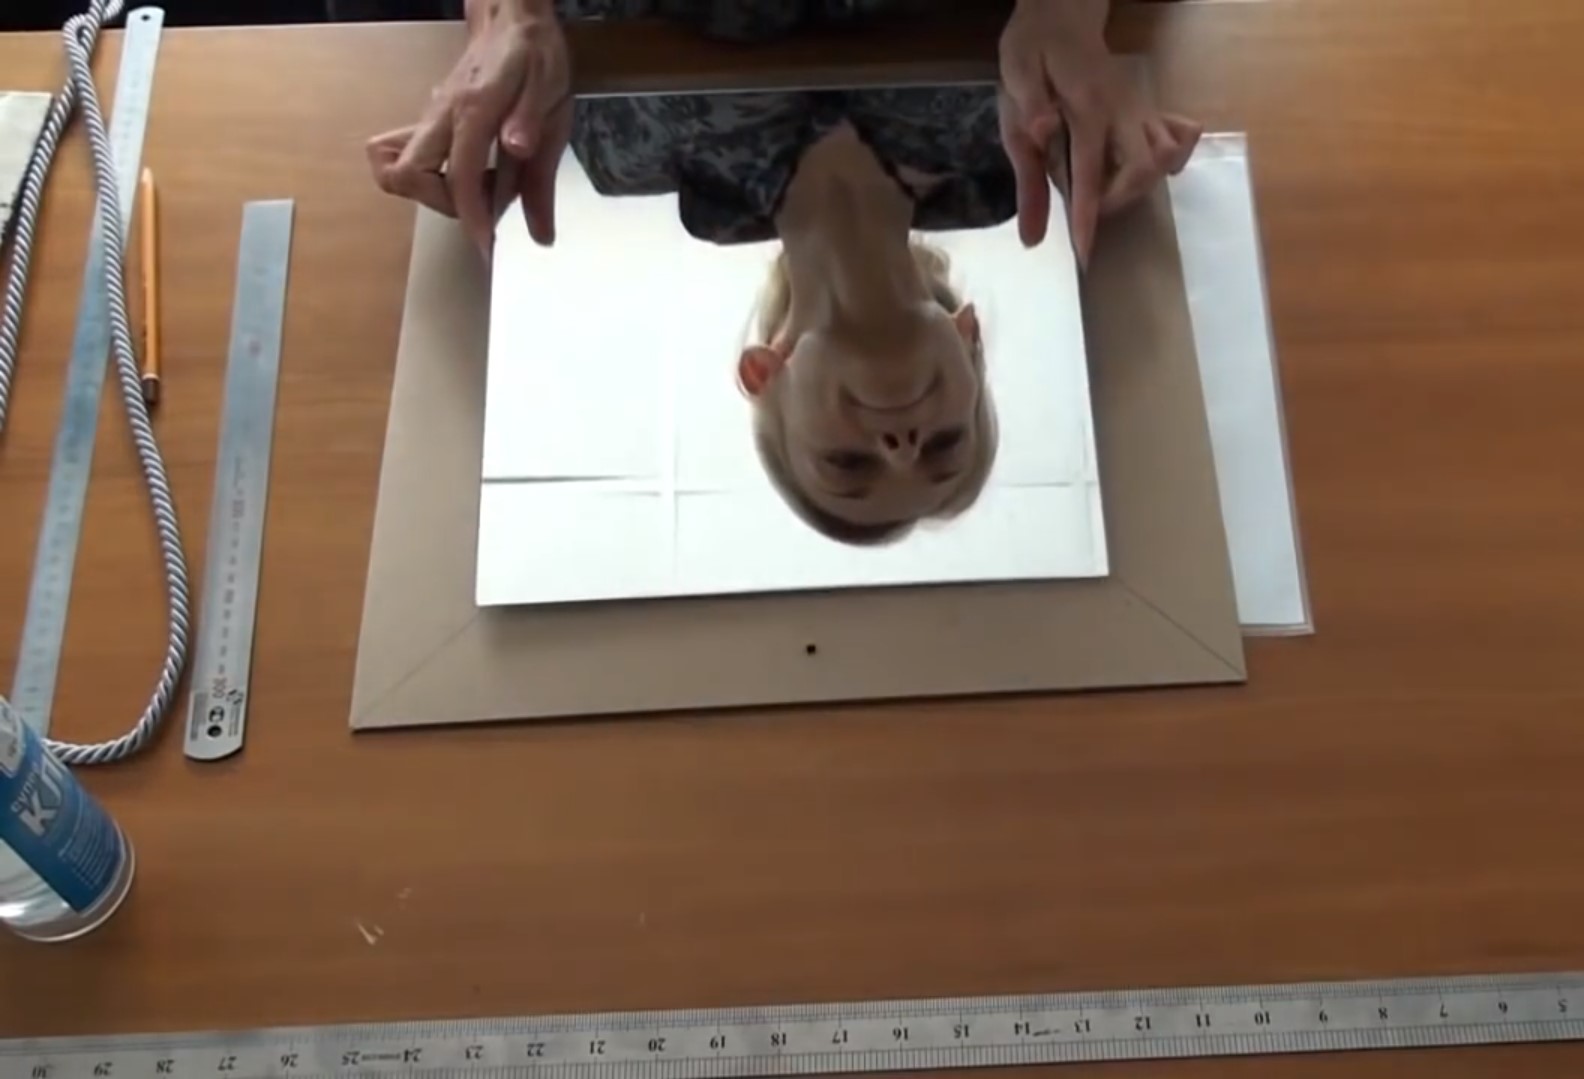
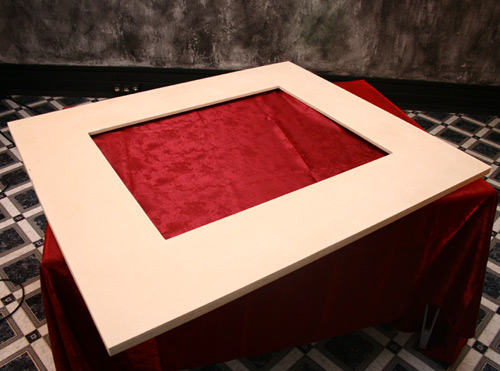
- Fix the mirror on a sheet of chipboard, fiberboard or plywood with glue or special metal fasteners.
- Glue the polyurethane blank.
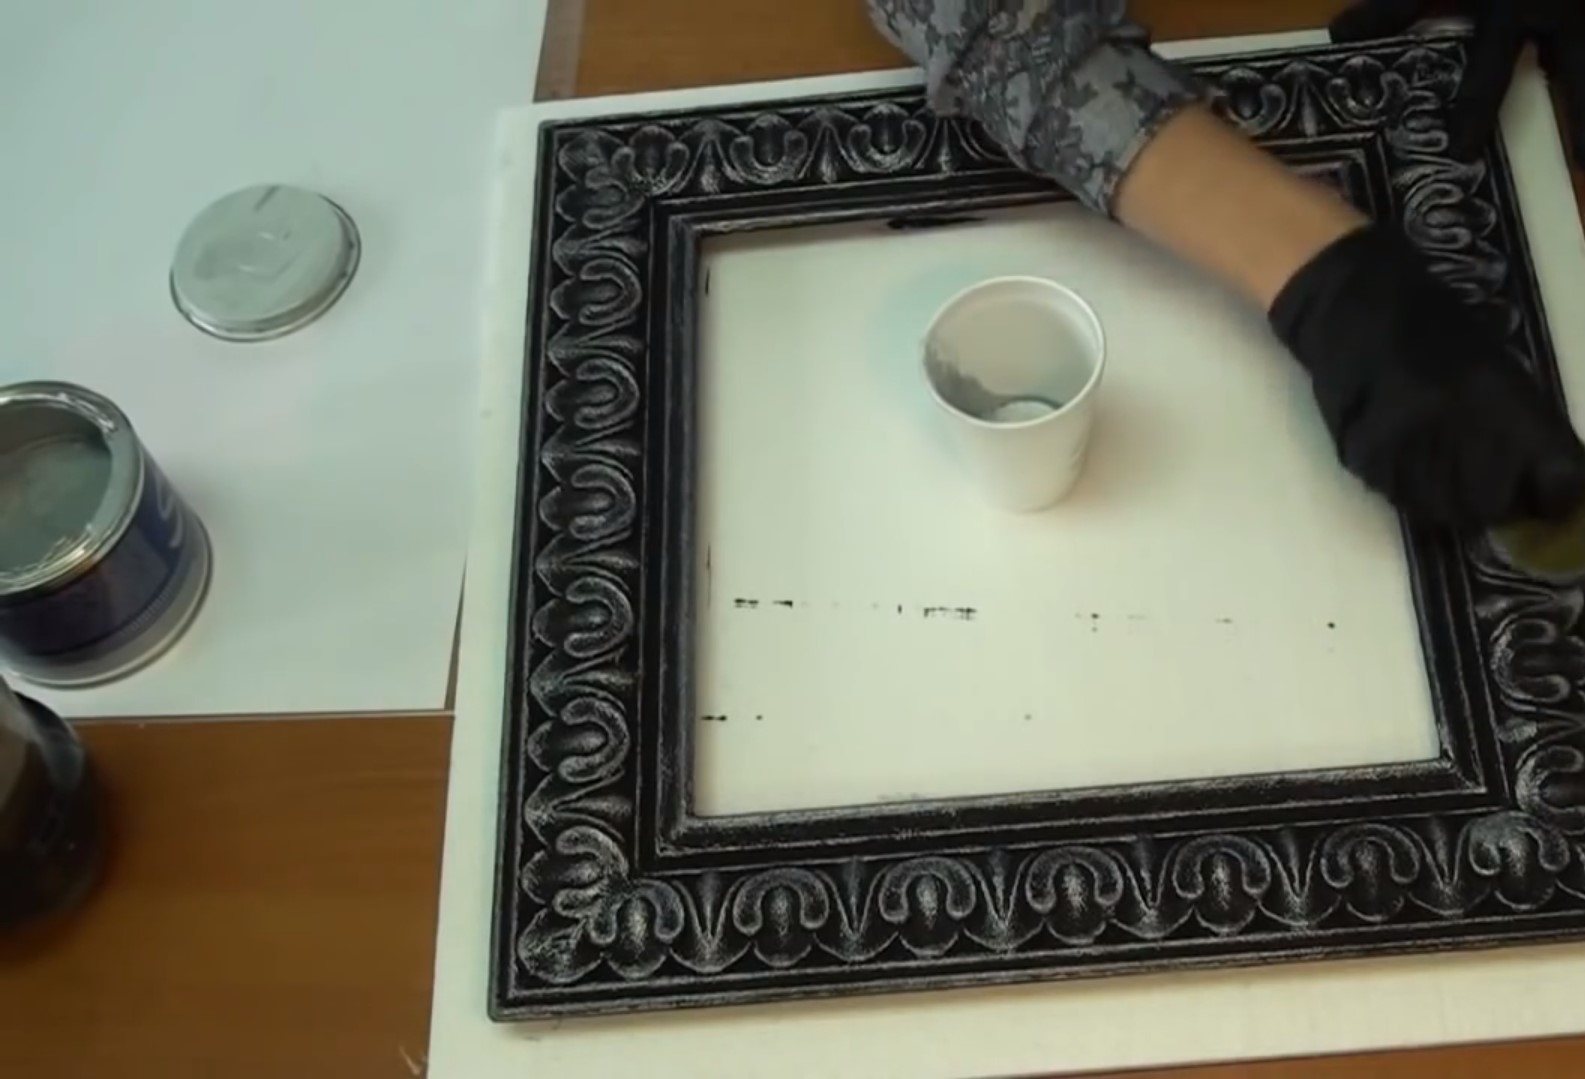
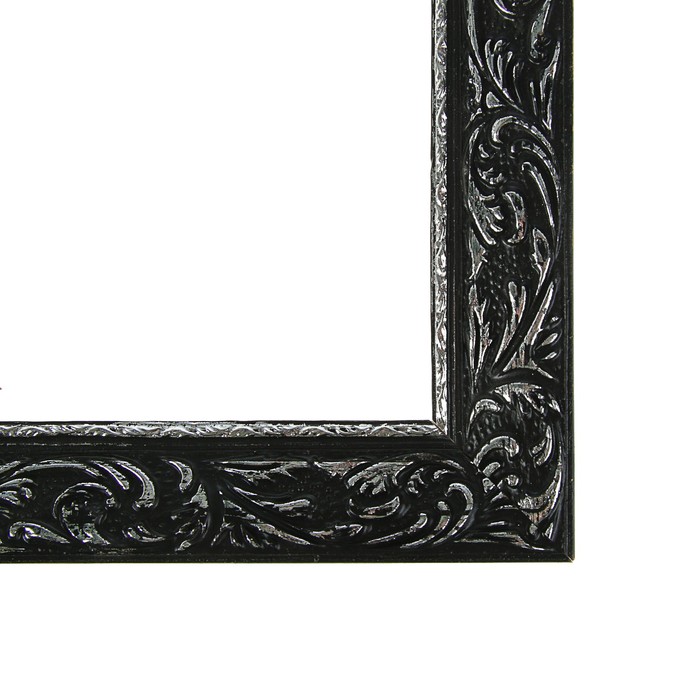
When the product is assembled, the final phase begins - it is necessary to decorate the resulting frame. You can give it an attractive appearance by painting it in one color. Either create a contrast, using a gold, silver color for the pattern or leaving it white. This effect is achieved using masking tape - they cover places that do not need to be painted.
Roughnesses and gaps in the joints should be avoided, they will spoil the appearance of the product.


Decorating workshops
Mirror decor is a creative process.Not only artistic taste is important, but also courage, willingness to experiment and try different colors, materials. To create beautiful and original things, there are many ways to design, using a large set of materials.
Cords
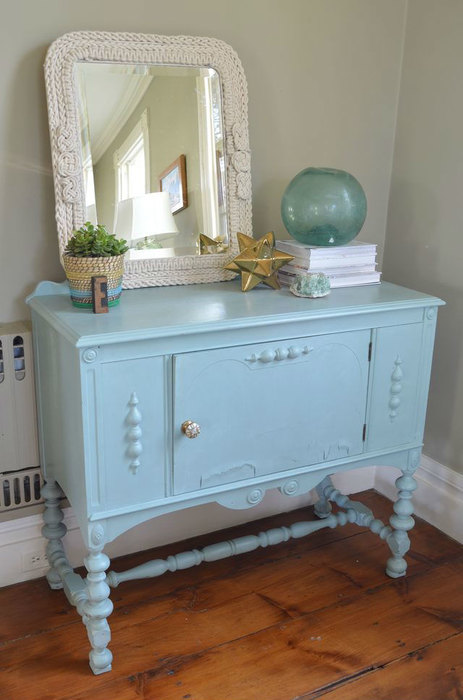
A rope or cord is an excellent raw material for decorating a mirror. It may not be suitable for every interior, but such a frame will undoubtedly look unique. So you can decorate and stand.
The following materials are needed:
- a sheet of plywood 12 mm thick (in length and width it should be 12 cm larger than the size of the mirror - it will turn out 6 cm on each side);
- twenty-four small cloves;
- sixty meters of cotton cord 5-6 mm thick;
- paint, preferably aerosol spray;
- "liquid Nails;
- Scotch.
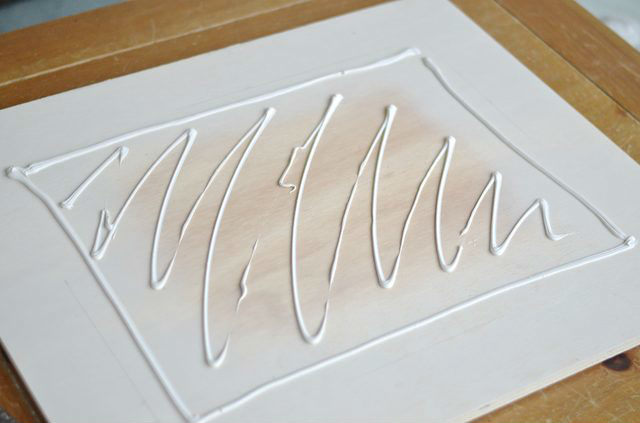
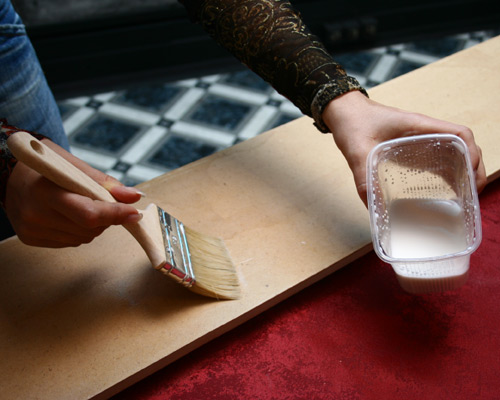
As tools you will need: an adhesive gun for hot polyethylene, an adhesive gun for "liquid" nails, scissors or a stationery knife, a hammer, a hacksaw for wood. Plywood is used for the substrate. It is coated with white paint and allowed to dry. Procedure:
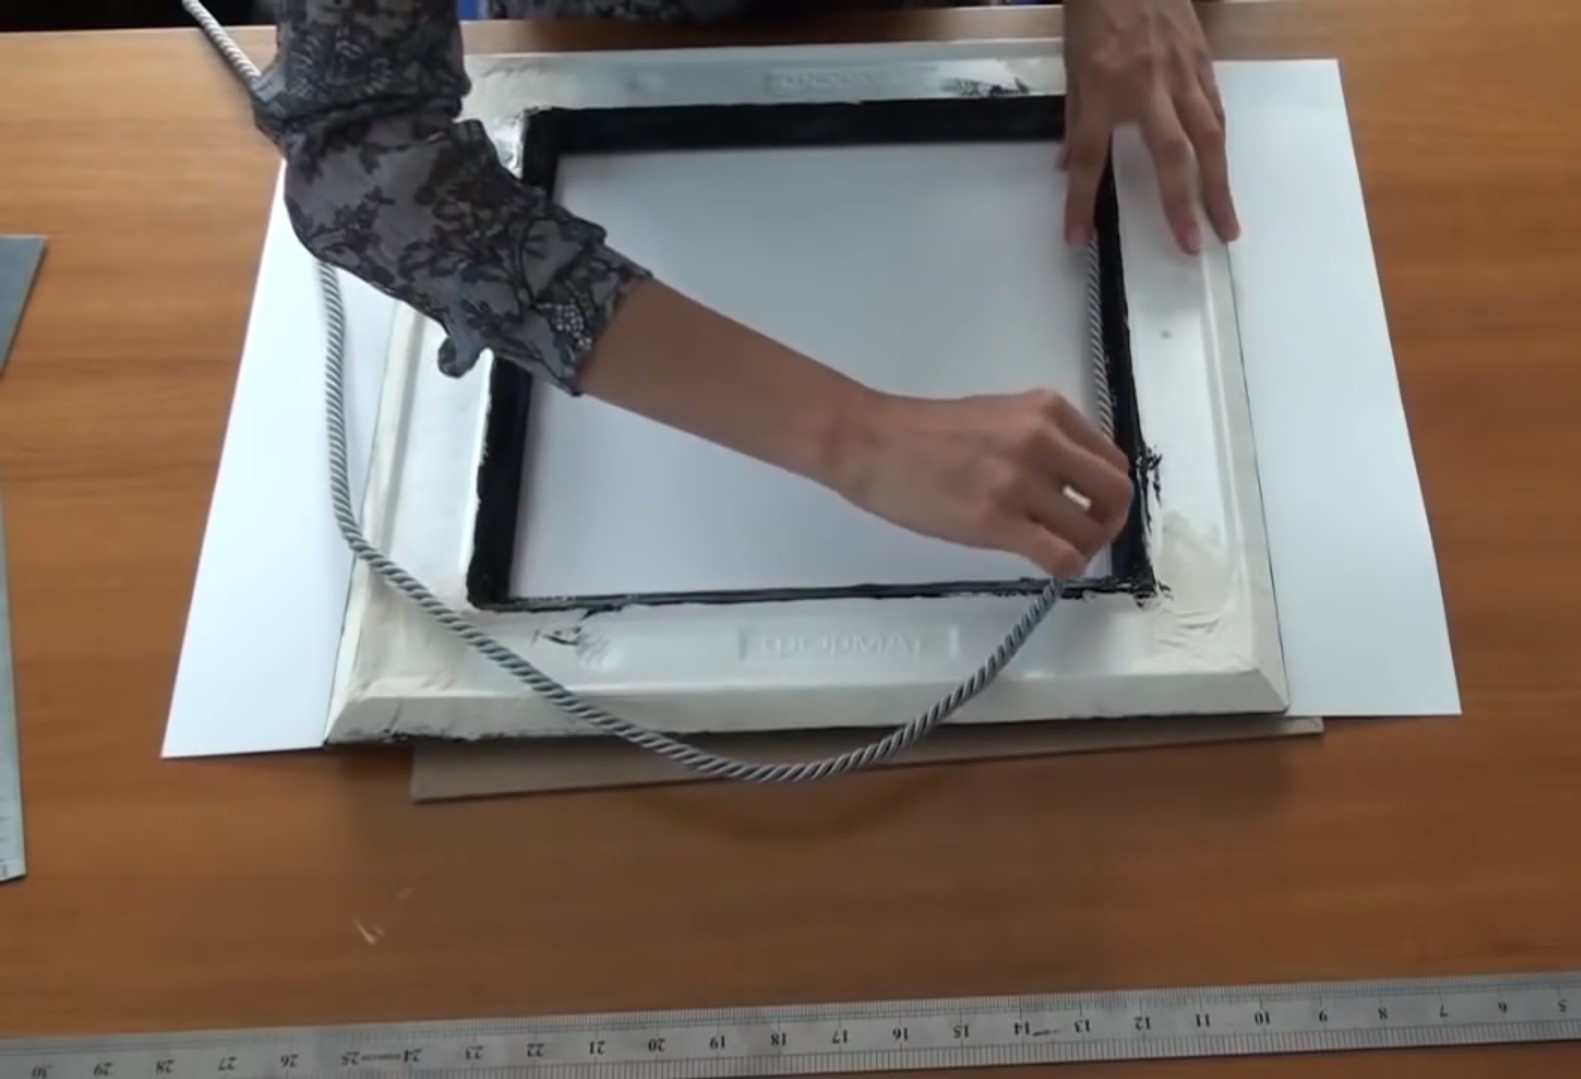
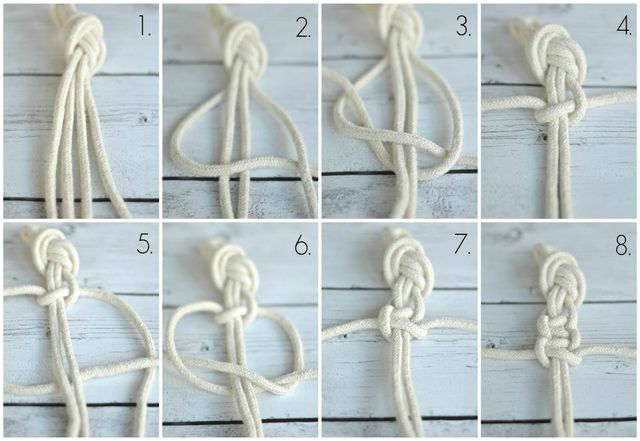
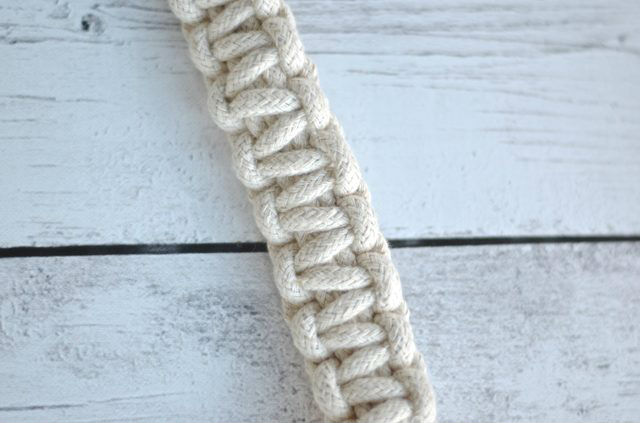
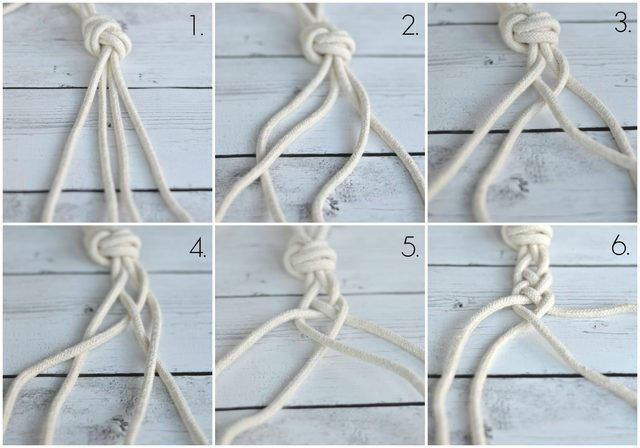
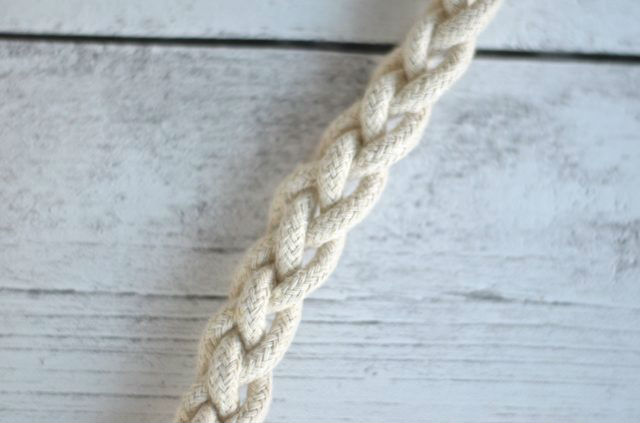
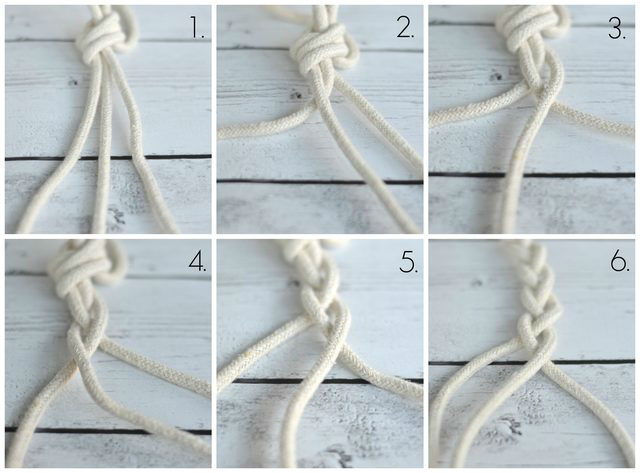
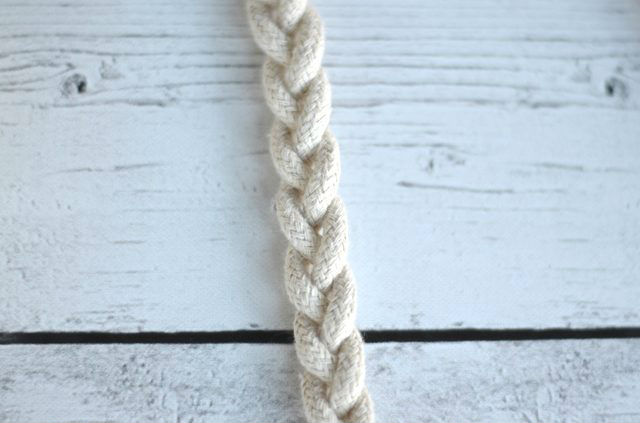
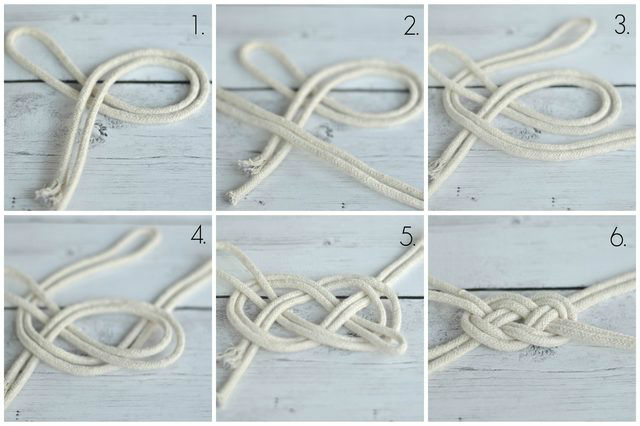
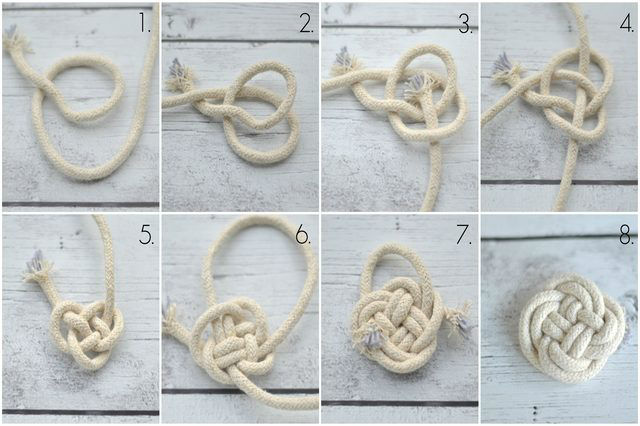
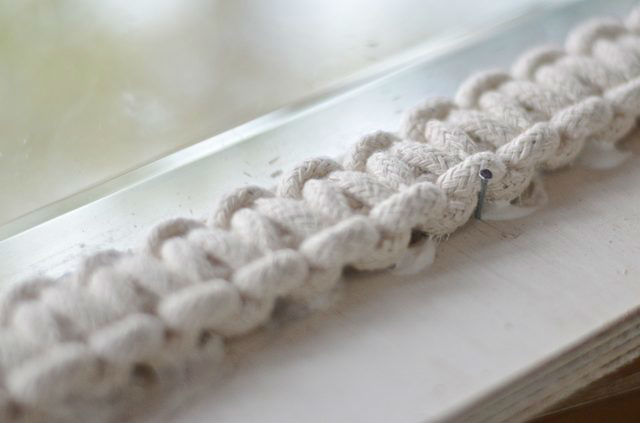
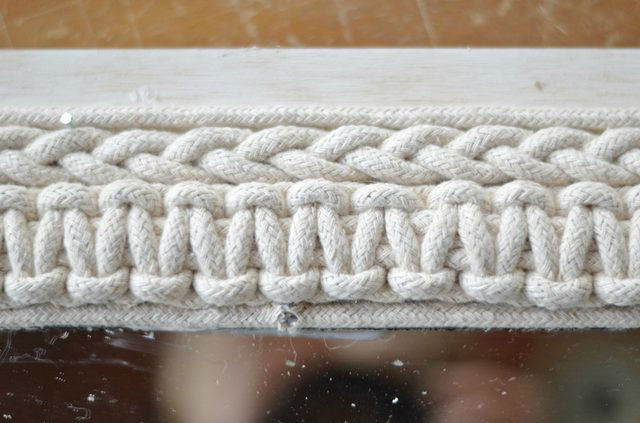
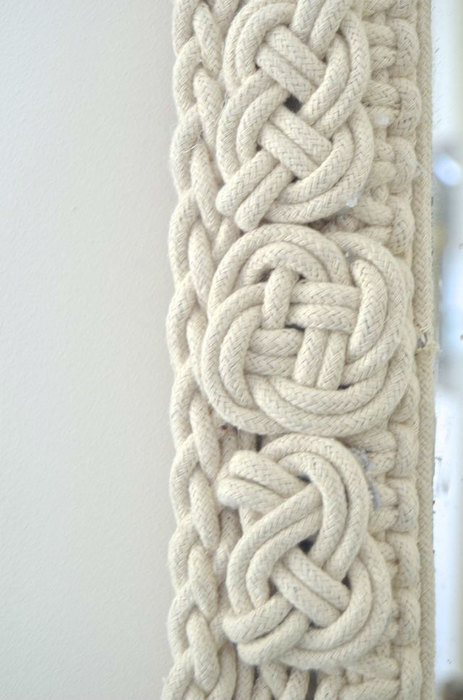
- A flat galun is braided (equal in length to the perimeter of the mirror), then two braids. The length is chosen so that the first pigtail covers the perimeter of the mirror, and the second can encircle the first. In addition, four curly and two clover nodes are created.
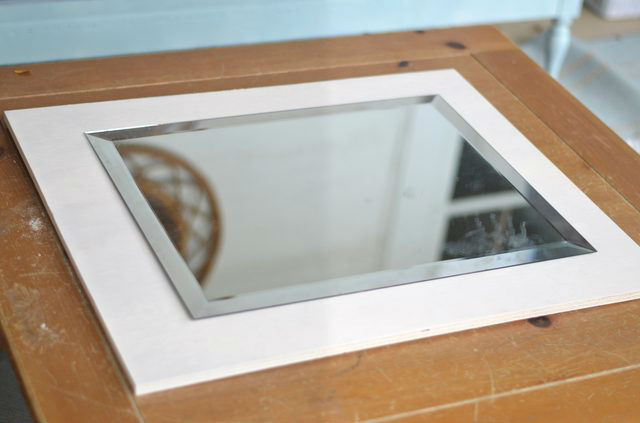
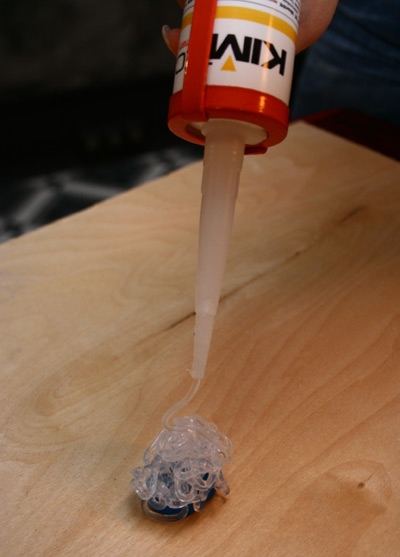
- A mirror is glued onto the substrate using “liquid” nails.
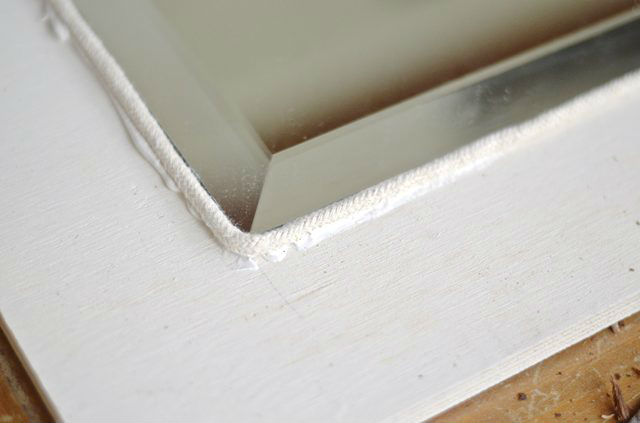
- A rope is glued around the perimeter of the product.
- Galun is glued onto “liquid” nails. To keep it in place while the glue dries, you can use nails or hot polyethylene, which dries quickly.
- Similarly, braids and knots are glued.
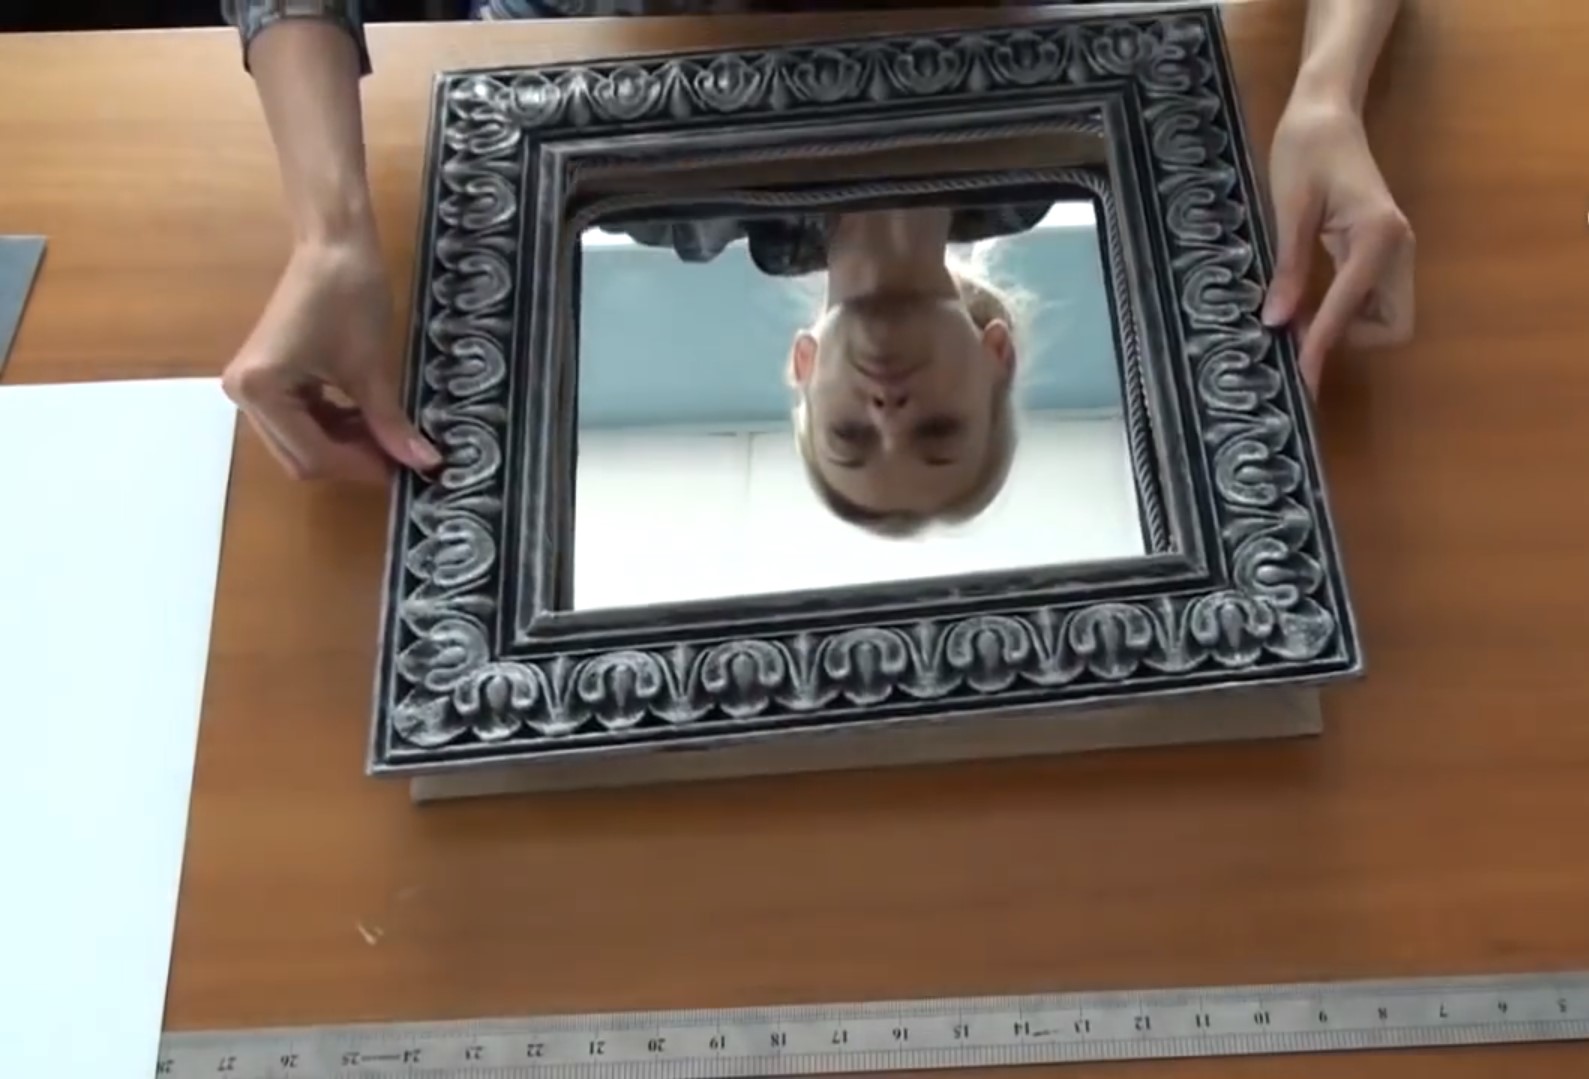
- At the final stage, you should saw off the corners of the plywood sheet and mount the suspension.
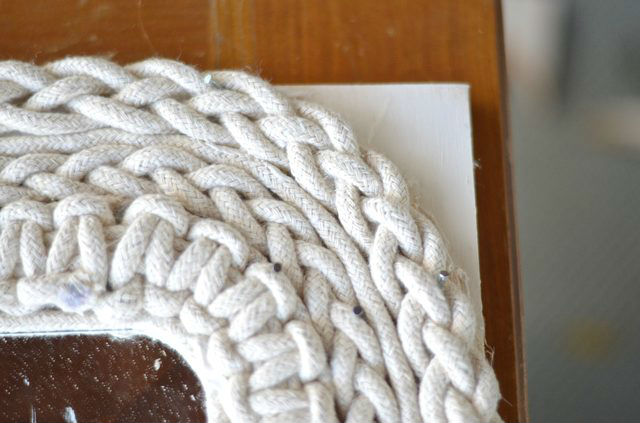
Also, cords are suitable for creating a round frame. In this case, weaving is laid out around the perimeter around the mirror. In this case, glue can be applied both to the surface of the substrate and to the rope itself.
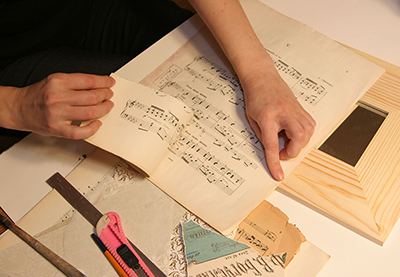
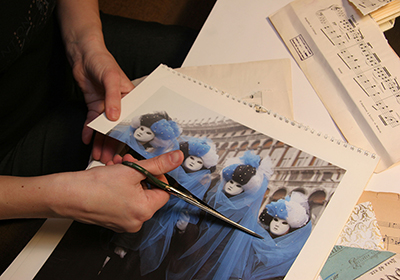
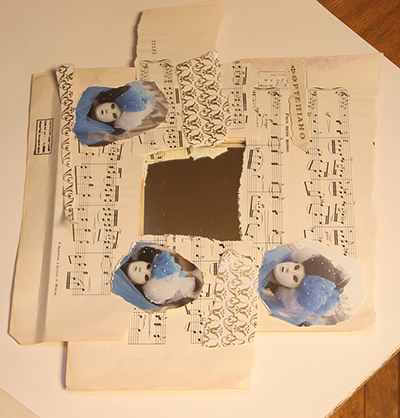
Decoupage
An original way to beautifully decorate your product is to use the decoupage technique for the mirror. Materials needed:
- special paper;
- tracing paper;
- lace;
- decorative elements;
- colorful pictures from the magazine;
- PVA (glue).
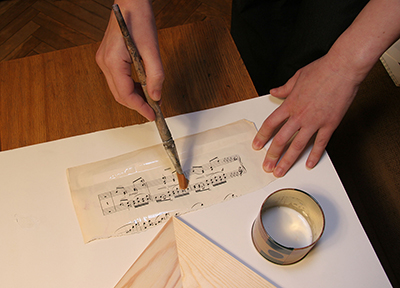
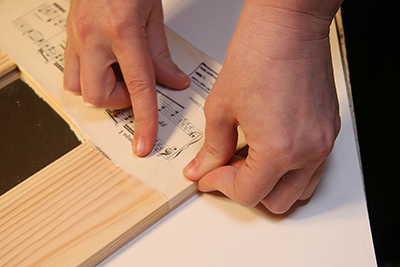
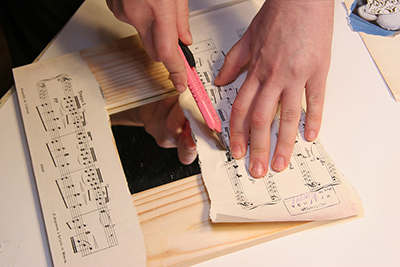
It is also worth taking scissors, a brush (for glue), a breadboard (stationery) knife. For this type of decoration, a mirror with a wide wooden frame is best suited. But you can use the product on a plywood basis or thick cardboard. The surface should be smooth, plain, for this it can be covered with paint or a layer of decorative paper glued. Further it is necessary:
- pick up clippings from magazines and newspapers;
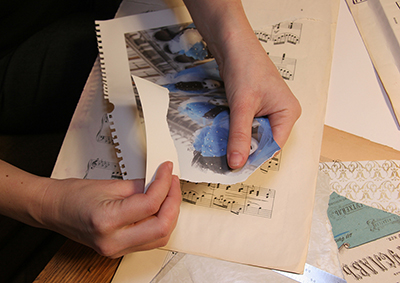
- create an interesting collage from pictures;
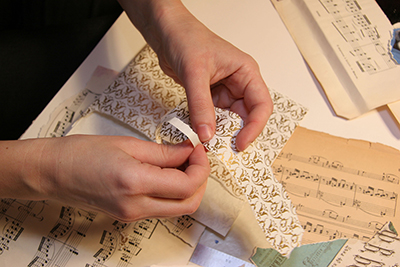
- fix the resulting pattern on the frame with glue;
- to preserve the decoration for a long time, it is required to cover it with transparent varnish.
Decoupage technique allows you to create original decor, but requires a certain artistic taste. It can be developed if you regularly engage in decoration.
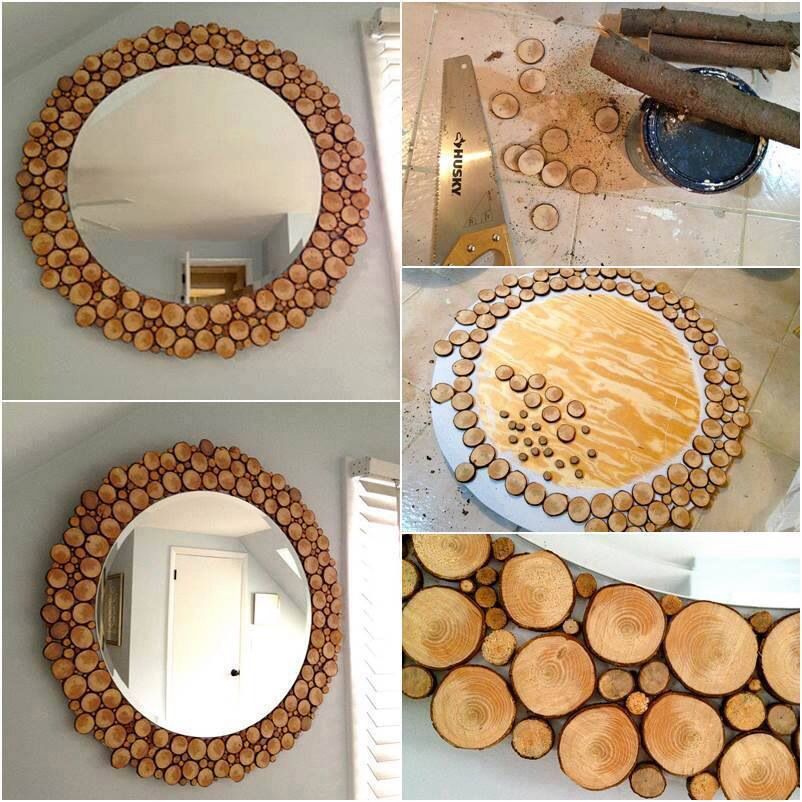
Twigs
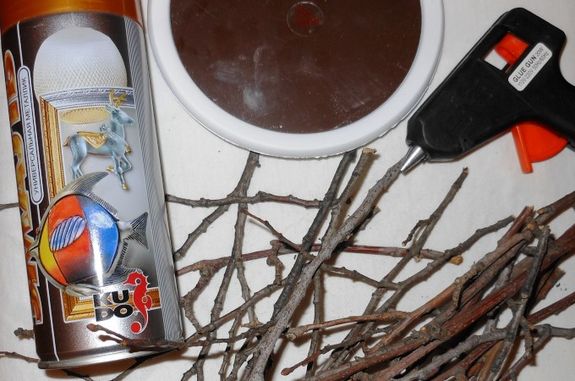
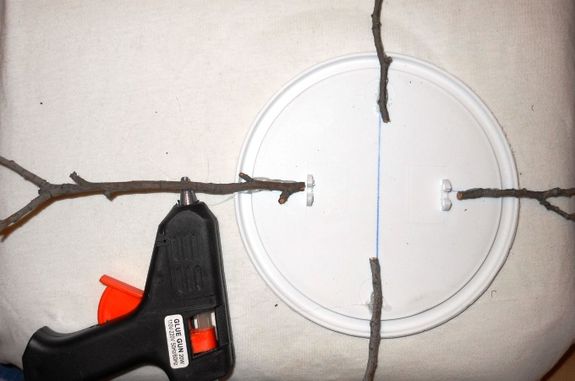
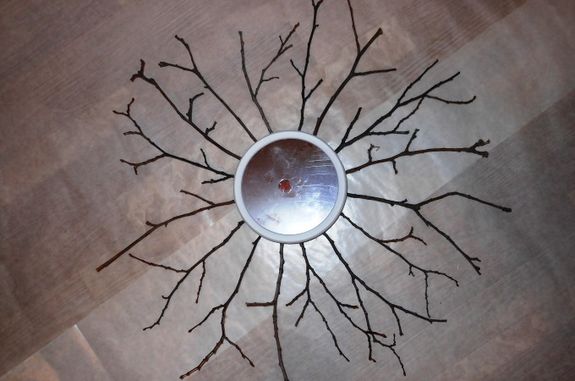
A frame can be made of branches, they are great for creating it. In this case, the lower layer is glued to the substrate. Others are attached to existing branches. Of course, to ensure durability, the material should be treated with an antiseptic and varnished.
Branches of any tree are suitable for decoration, you will also need a glue gun and a spray can of paint. Procedure:
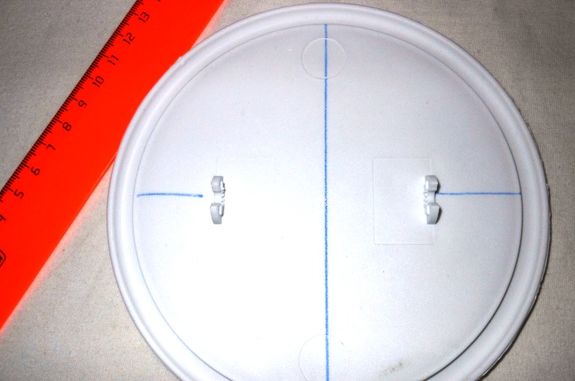
- Cover the reflective surface with paper or masking tape.
- Mark on the back of the frame.
- Using a glue gun, attach twigs to the back of the frame. Their location and combination can be changed in accordance with your preferences.
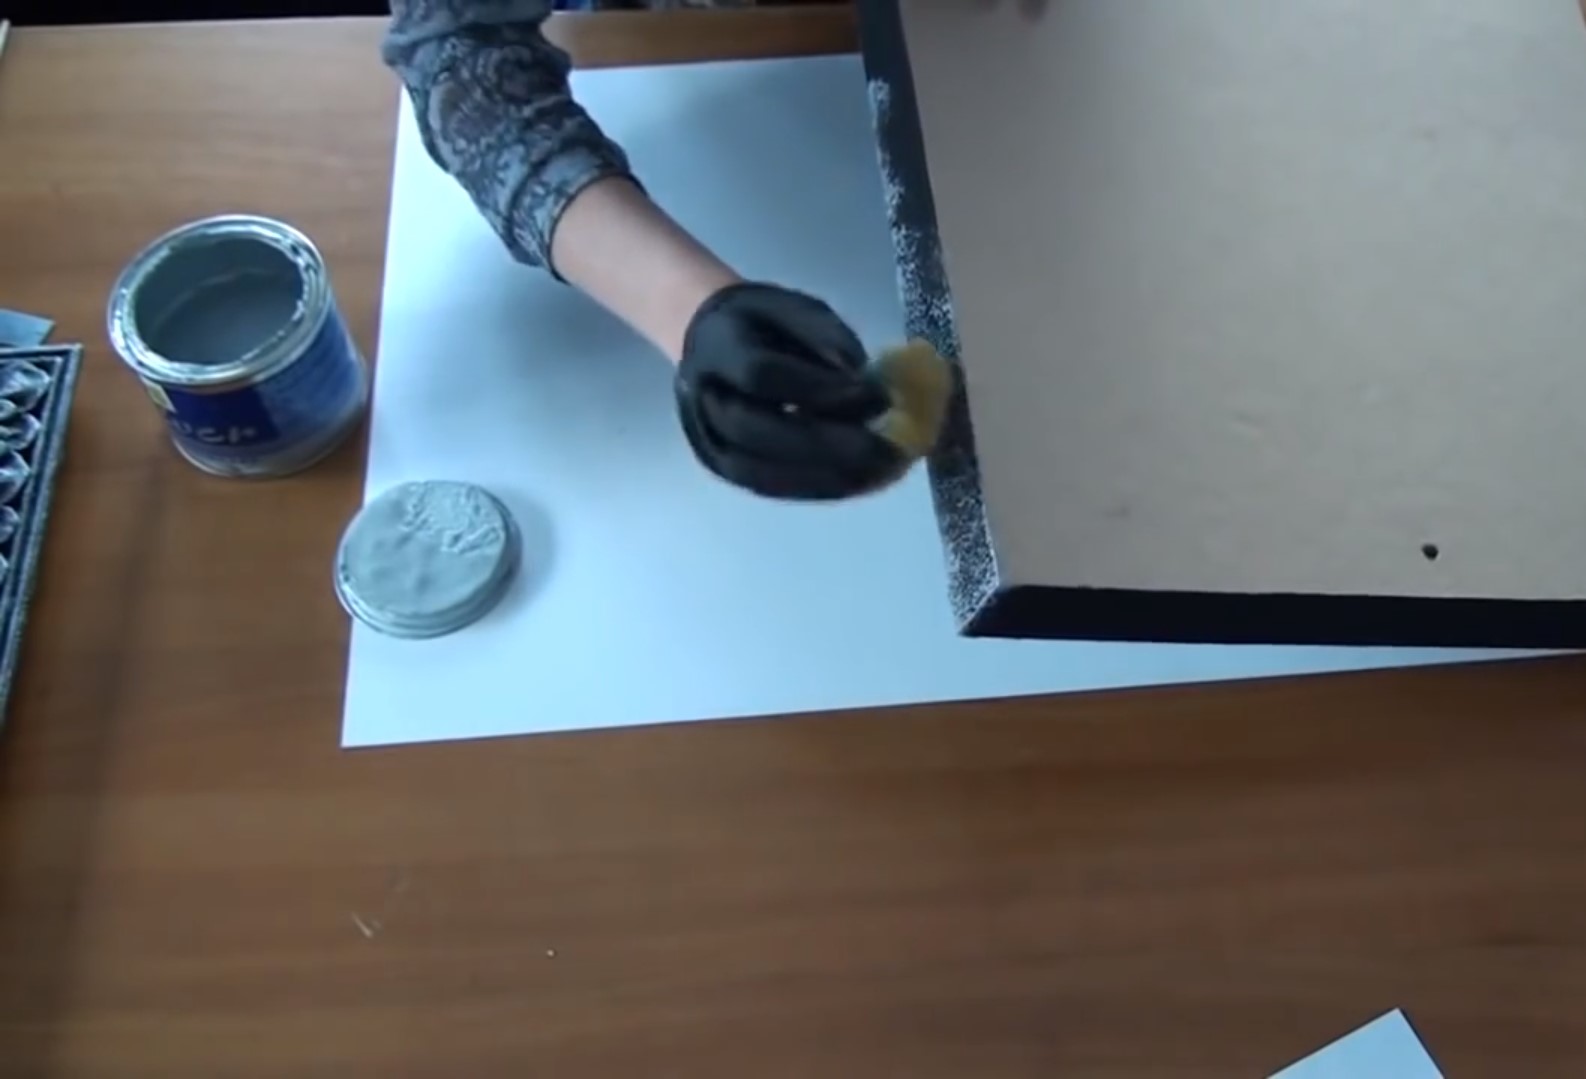
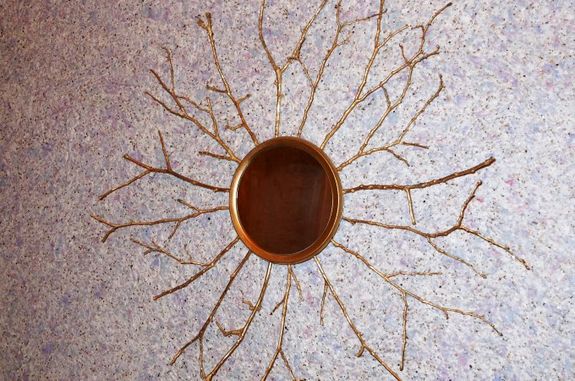
- Apply paint to both the front and back of the frame.
In this work, it is desirable to use a mirror with a substrate, which protrudes very slightly beyond the edge of the reflecting surface. The back side of the substrate should be degreased so that the glue easily lays on the surface.
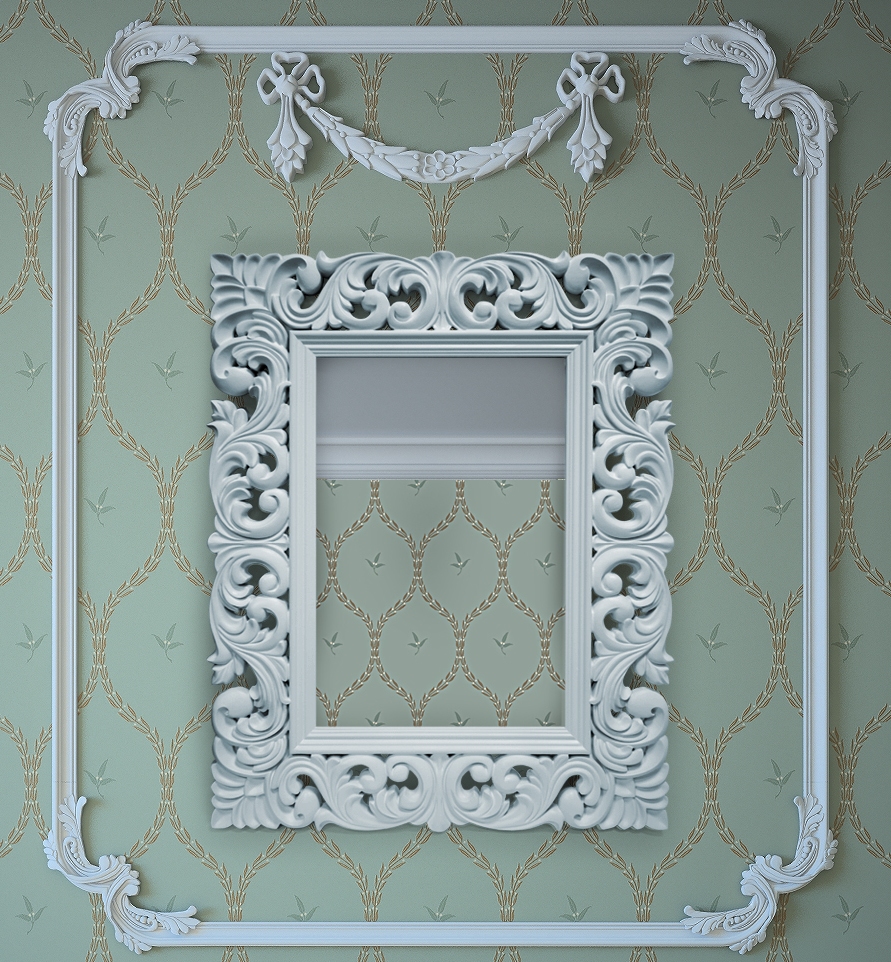
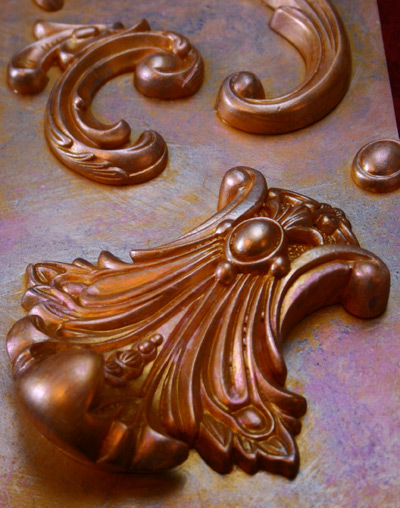
Gypsum
Stucco made of gypsum gives great scope for imagination. However, it will require advanced creative skills to make a good product. With this material, you can also create a good stand for the mirror.
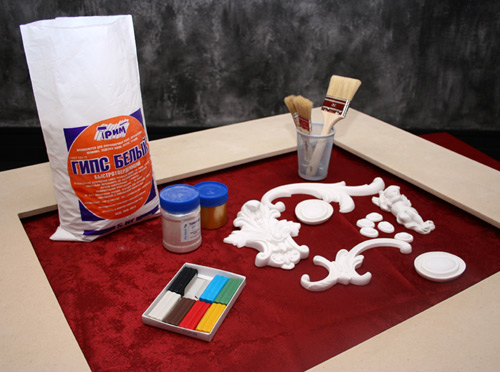
Availability is required:
- stucco moldings from plaster;
- MDF - two sheets;
- glue;
- sealant;
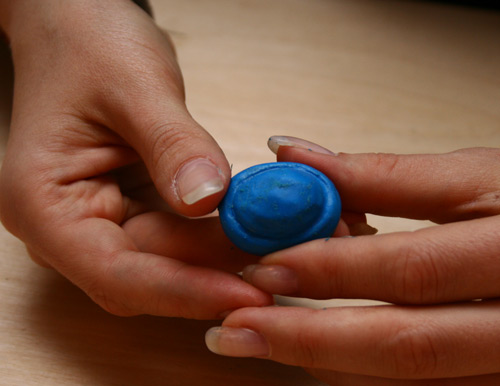
- plasticine;
- tinting powders;
- gypsum powder;
- paints (acrylic, white).
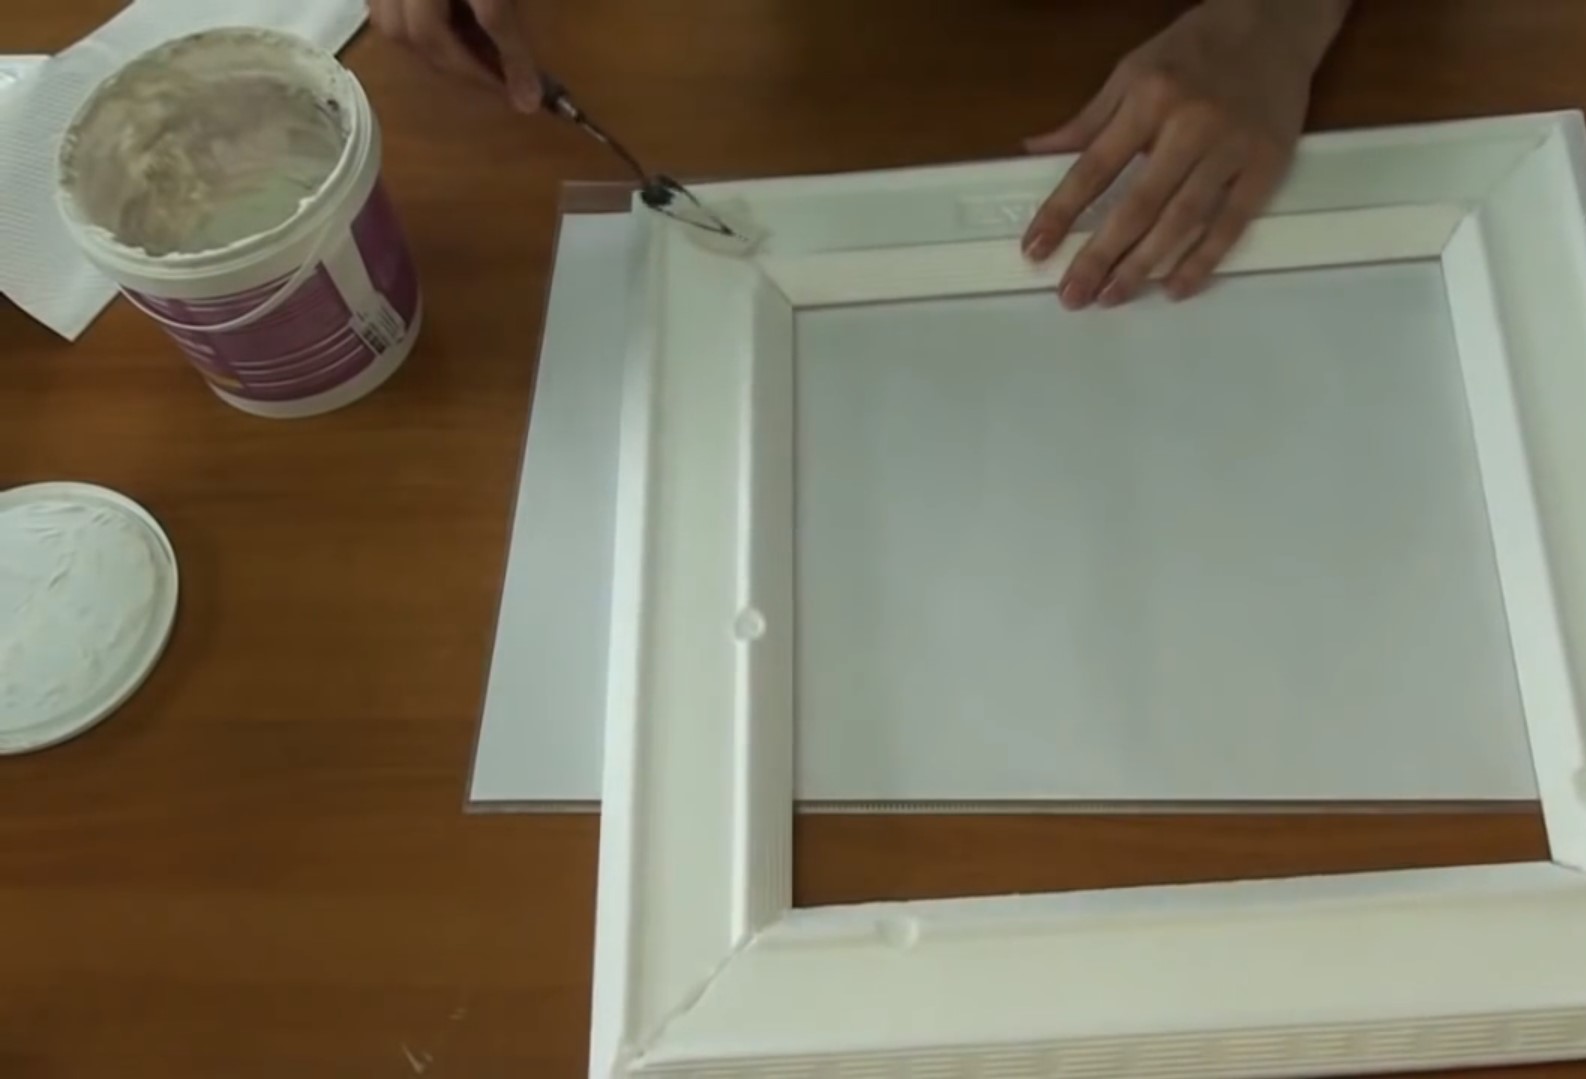
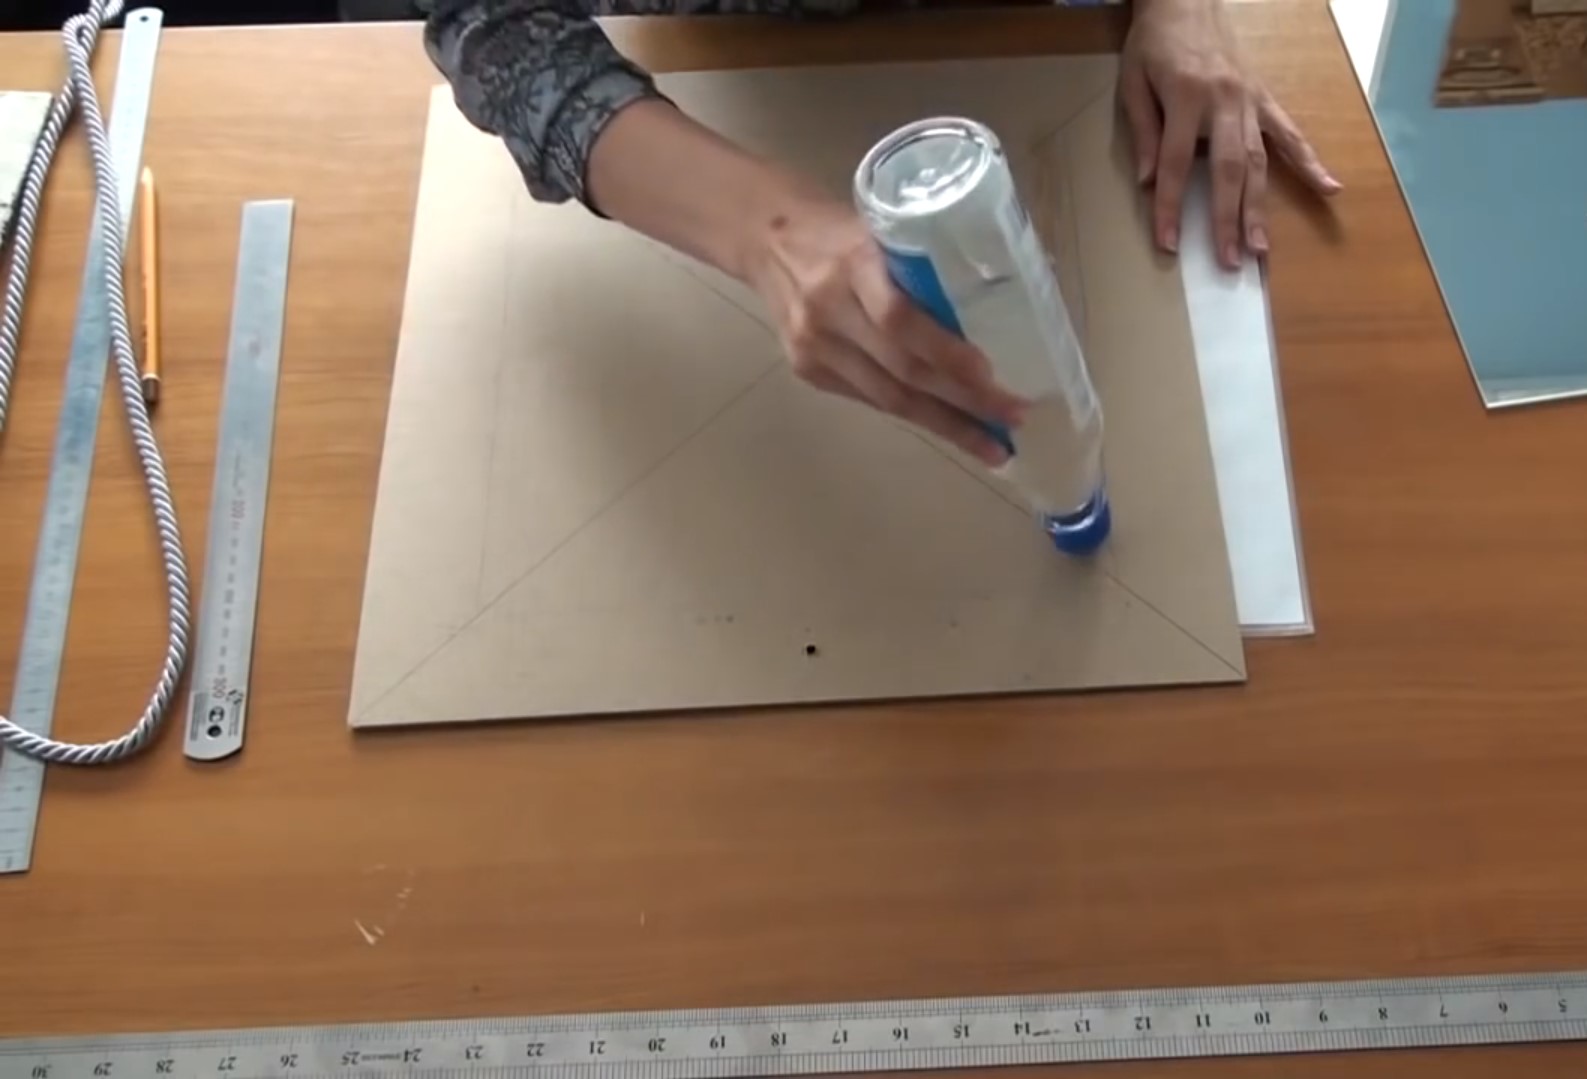
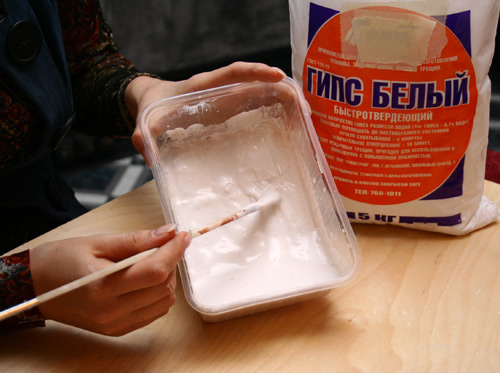
The base is created from MDF. The sheets are cut out: the size of the mirror in one and slightly smaller in the second. Before decorating, cover the frame with white acrylic paint. Further it is necessary:
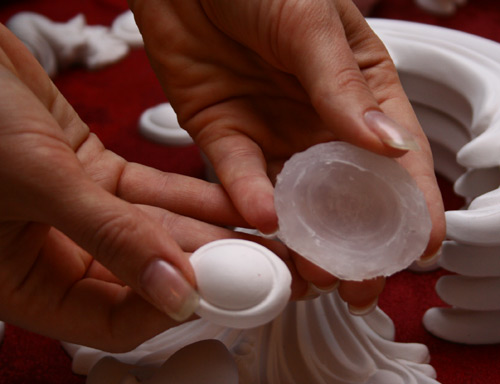
- Prepare gypsum stucco. You can use both purchased products and make them yourself from gypsum powder.
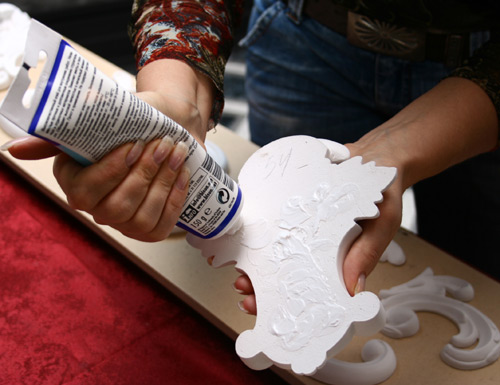
- On the frame, make a composition of finished gypsum elements. At first, without glue, the parts are simply laid on the surface. And when the pattern is perfectly made, fix it with glue.
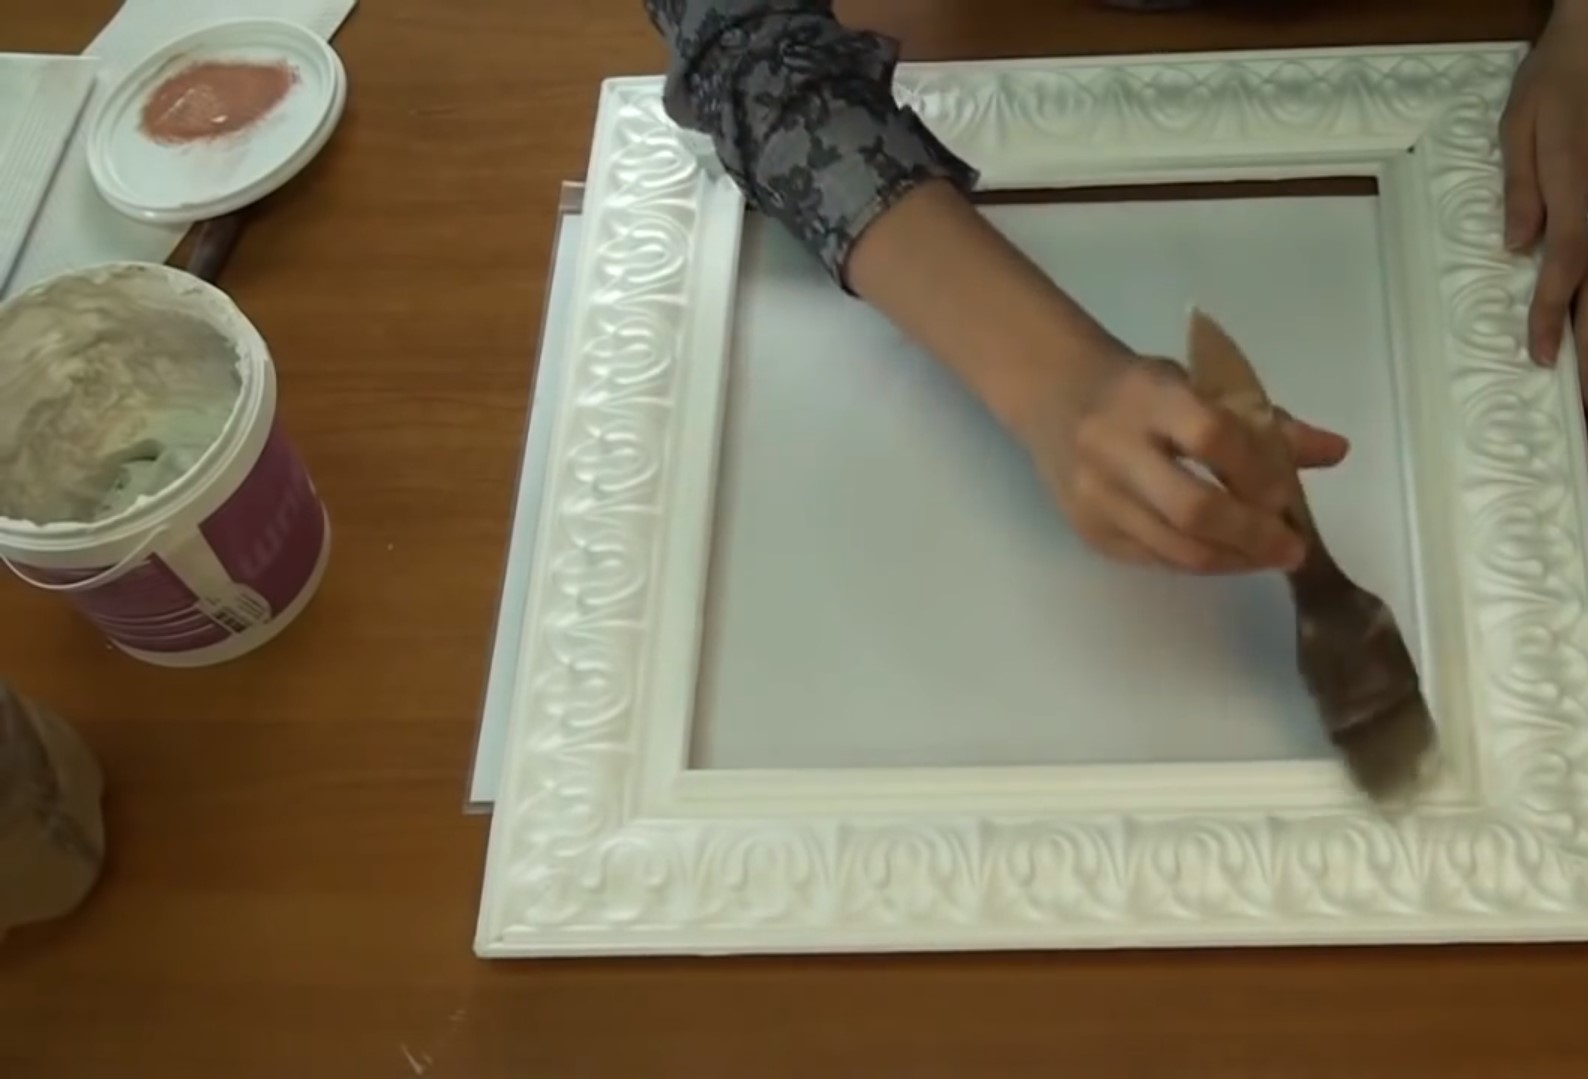
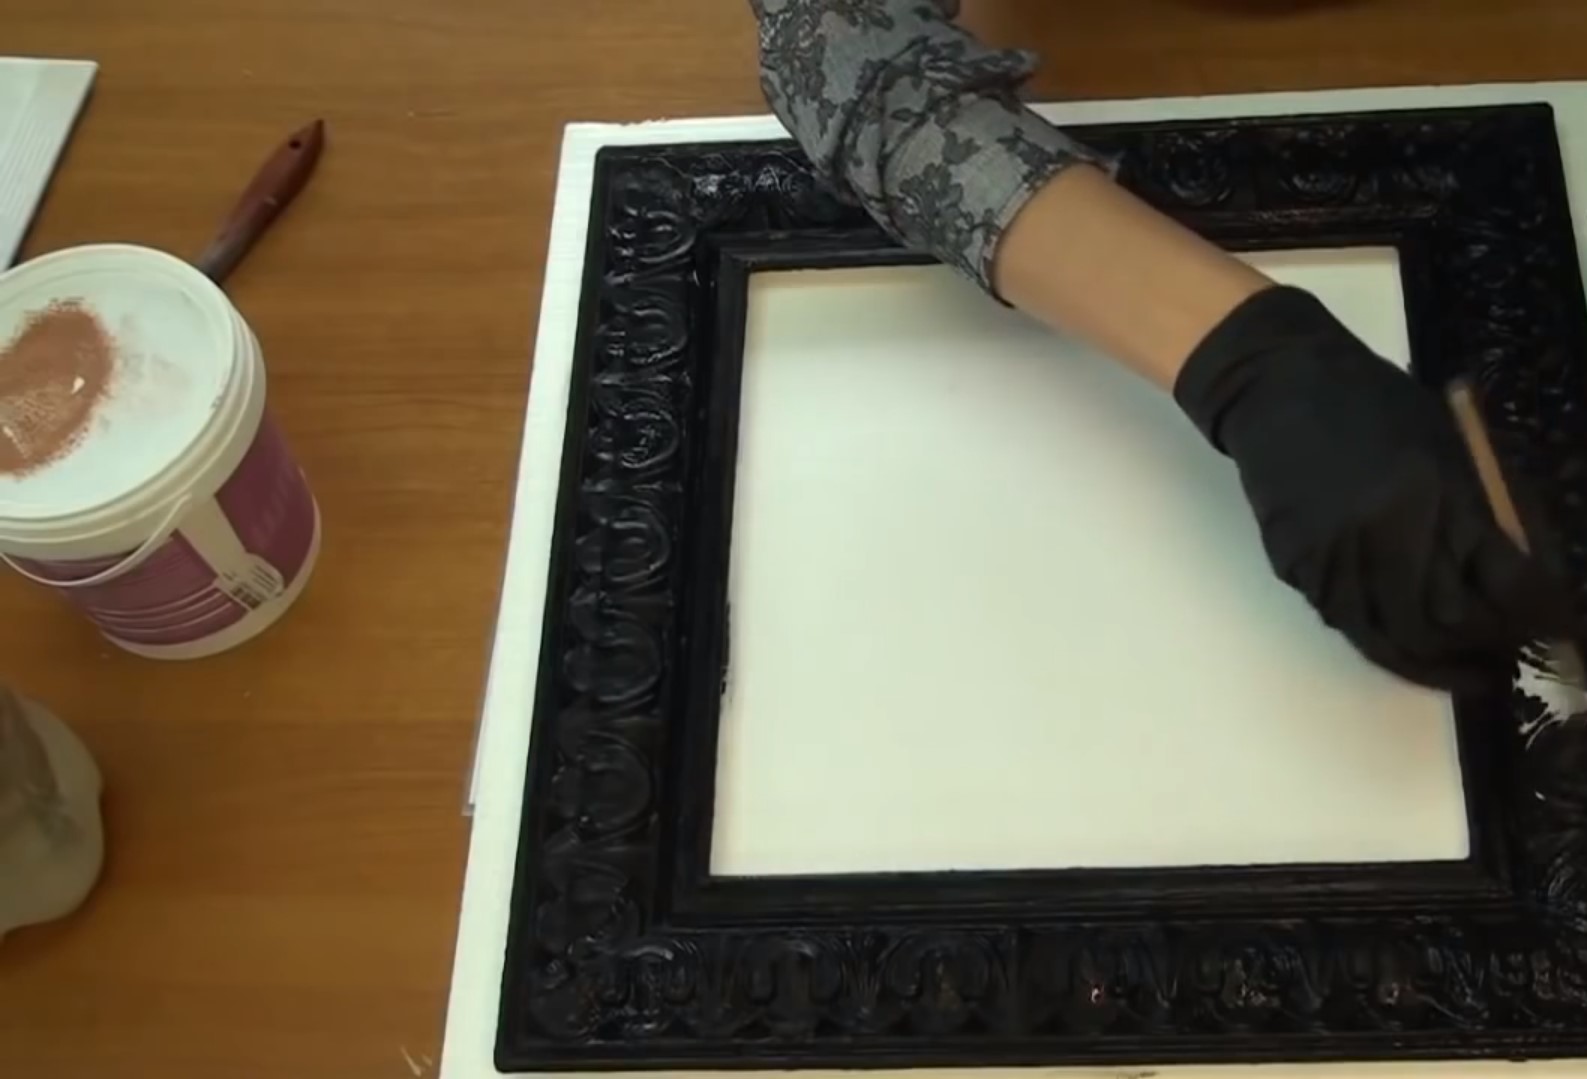
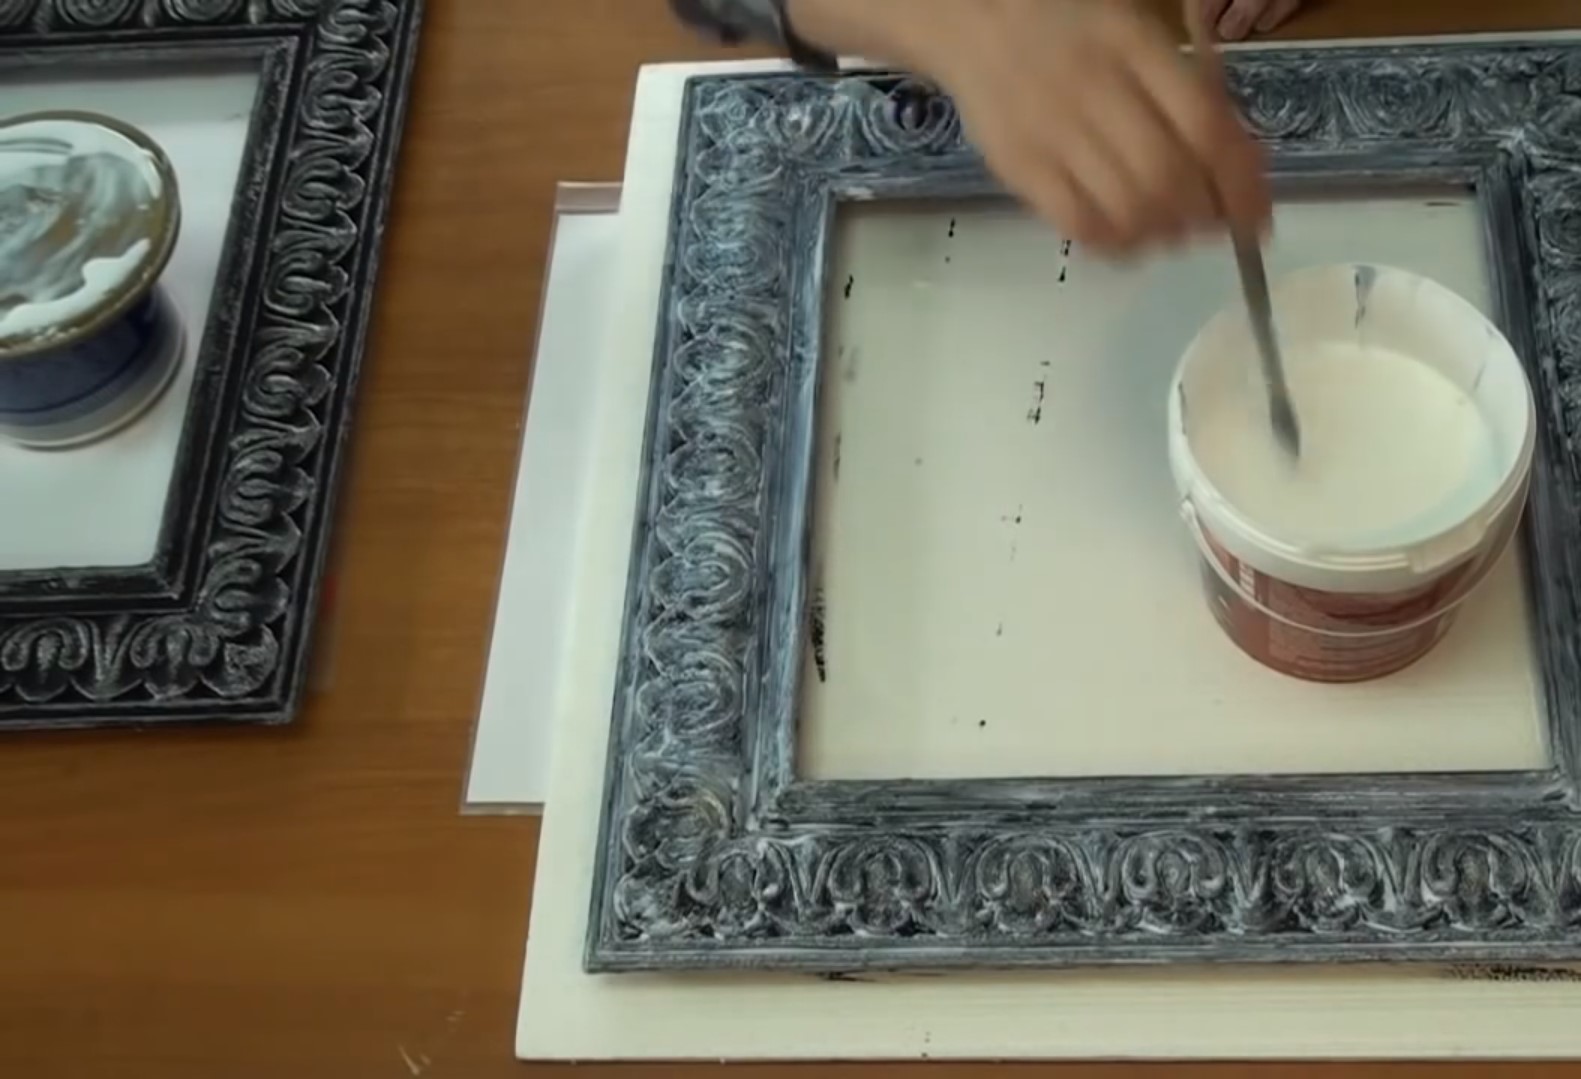
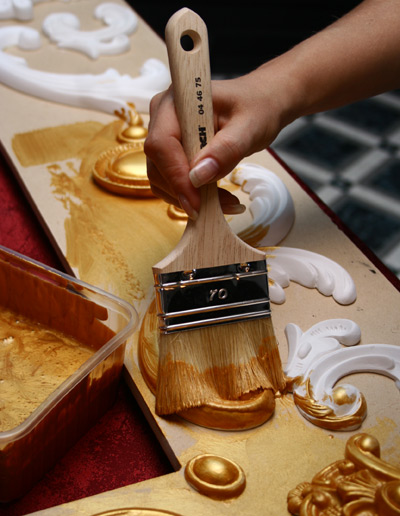
- After fixing the stucco molding, proceed to painting.
Using various artistic techniques, you can achieve interesting effects that will decorate the frame of the mirror.

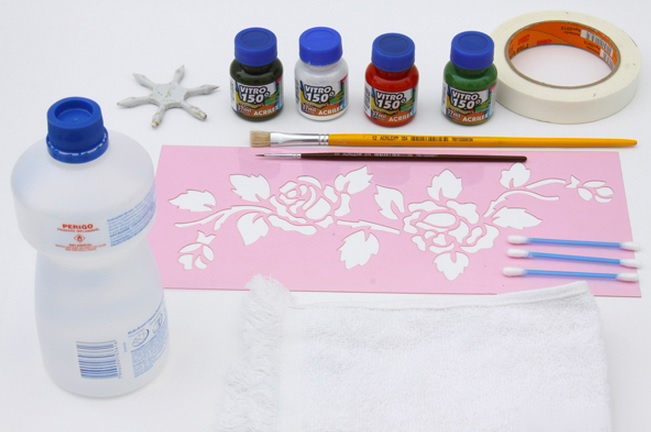
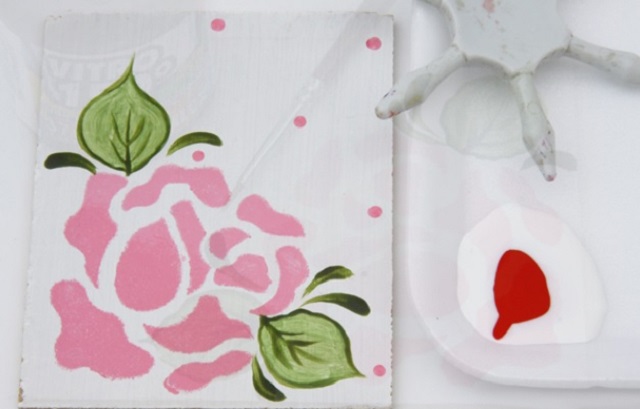
Stencils
Decorating with a stencil also allows you to create an original frame. It can be made of any shape - it all depends on the imagination of the master. Typically, the stencil is made of paper or cardboard. Cutting holes, set the shape of future drawings on the frame.
For work are required:
- acrylic paints;
- cardboard;
- masking tape;
- nail polish remover or acetone.
The tools will consist of brushes, a simple pencil, sponge, stencils, scissors. When drawing a picture on the frame, it is necessary to paint it in the color chosen for the background. Before this, the base is primed. Then you can follow the plan:
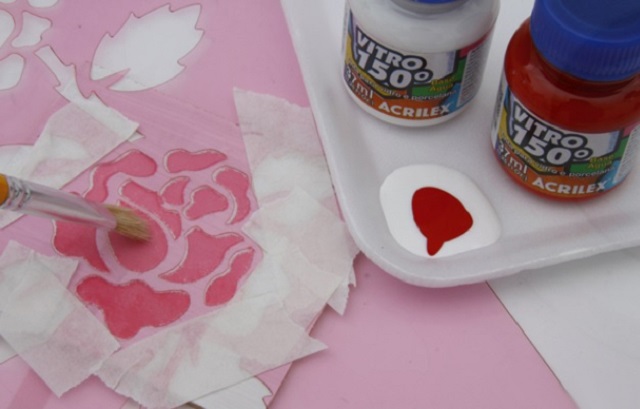
- Purchase a ready-made stencil or make it yourself by cutting it out of cardboard.
- Check the colors. Be sure to see what shade they will take when applied to the mirror frame.
- Plan a pattern, determine the location of the drawings.
- Fix the stencil on the mirror with tape.
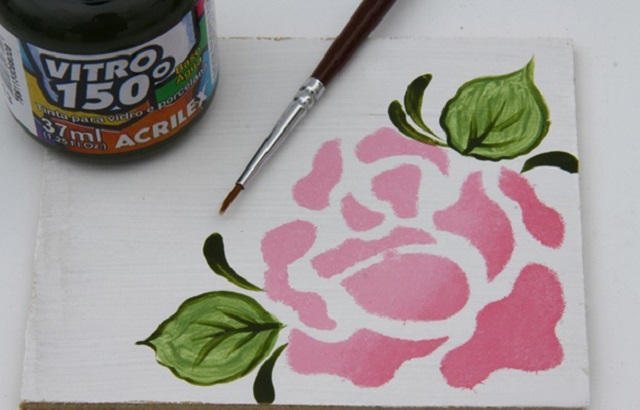
- Apply a layer of paint on top of it with a sponge or brush. Images can cover both the frame and the mirror itself - along the edge.
If the picture was not applied correctly, you should use acetone to erase it. You can strengthen the picture with a transparent varnish. Using a stencil is a simple and quick way to create unique products.
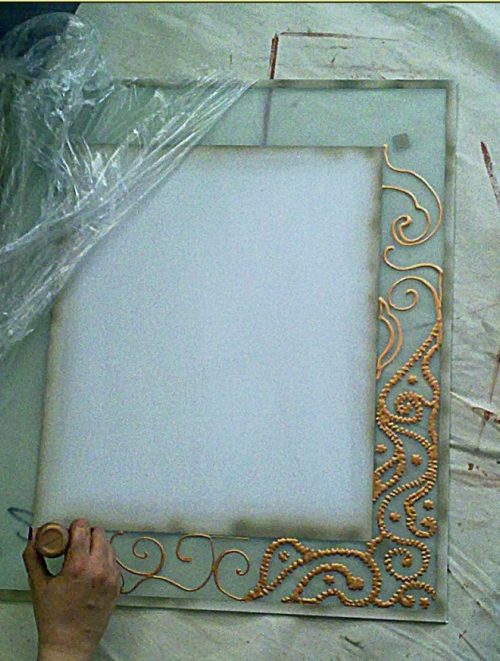
Patterns and ornaments
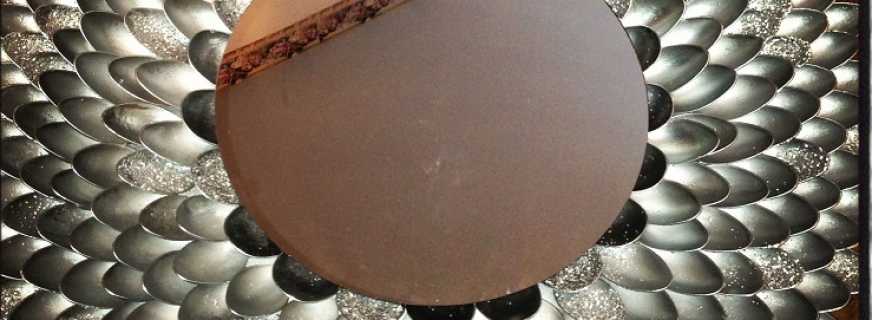
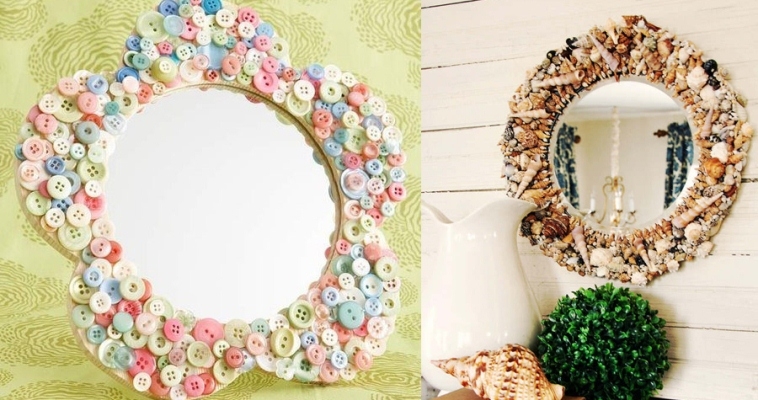
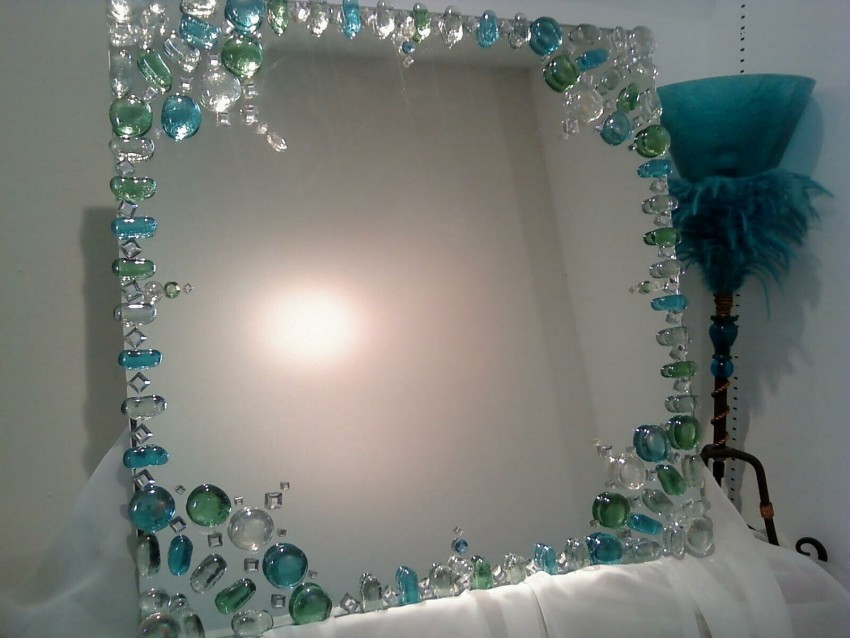
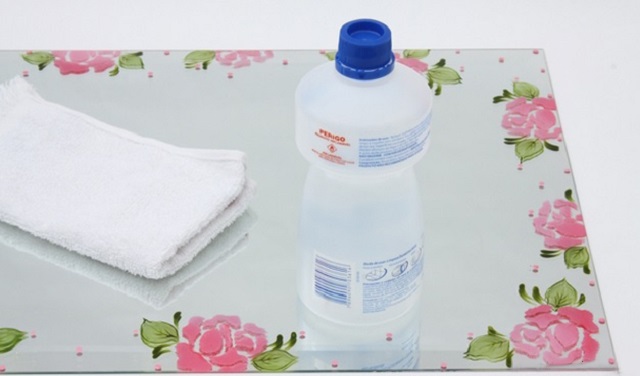
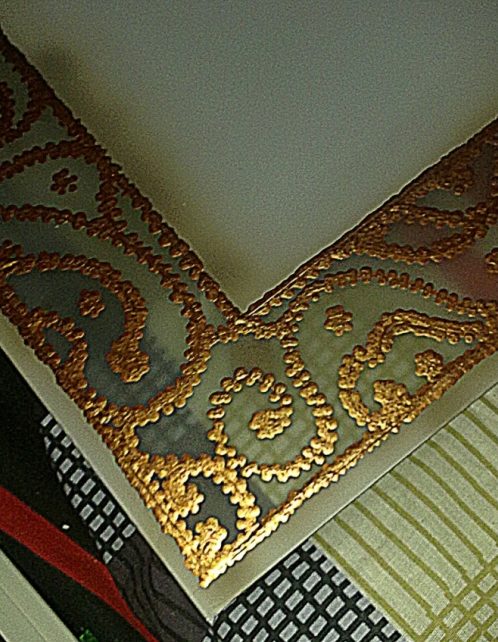
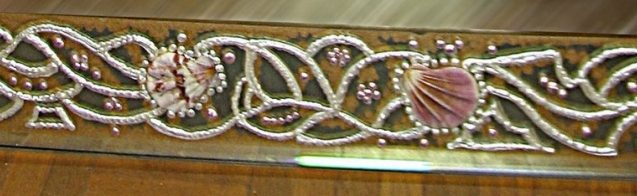
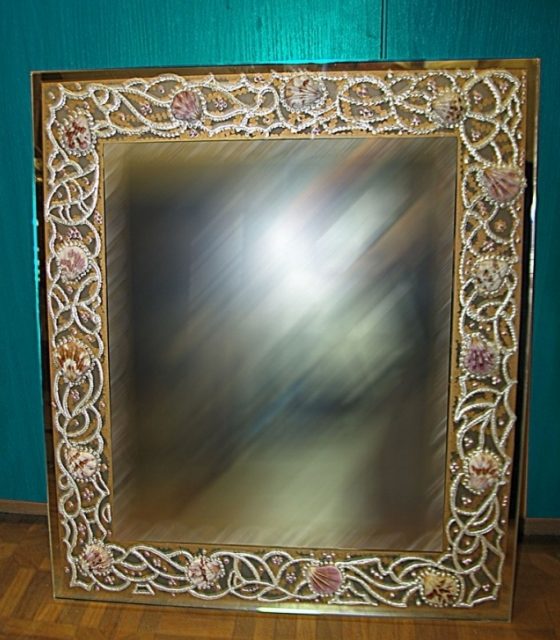
Ornament and patterns on the mirror can be applied independently. Decorate not only the frame, but also the reflective surface. Here, both paints and special methods of etching glass are used. Not all operations will be simple, but the result compensates for any difficulties. This decoration method is well suited for decorating a bathroom mirror.
You will need paints and jewelry. To fix the elements you need to use glue (glue gun), and for decoration - paints. Operating procedure:
- degrease the transparent edge of the mirror;
- apply a pattern or ornament with acrylic paint;
- on the front side, decorate it with jewelry or shells, buttons or even nuts, depending on the concept of the designer;
- in some cases, the resulting composition can be varnished.
To get an excellent result, before starting work, you will have to modify the mirror itself. You will need to remove the amalgam a few centimeters from the edge. It is also necessary to protect its sharp parts, for this it may be necessary to use special equipment.
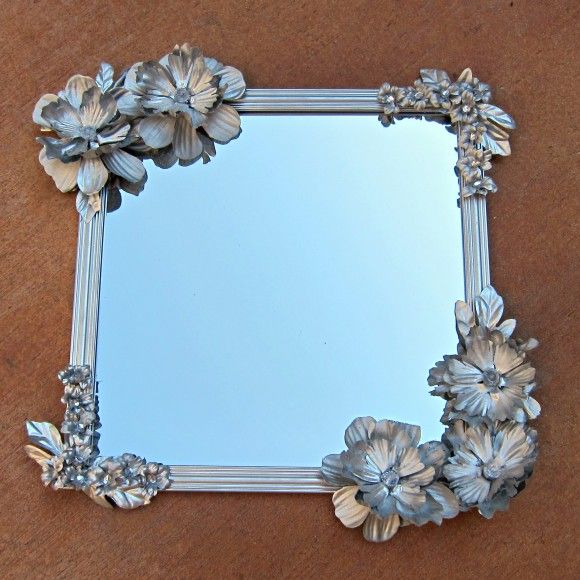
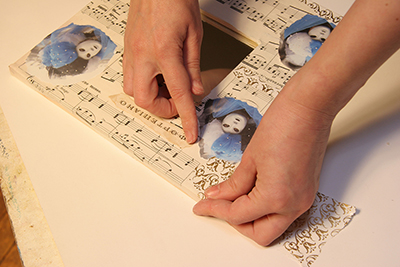
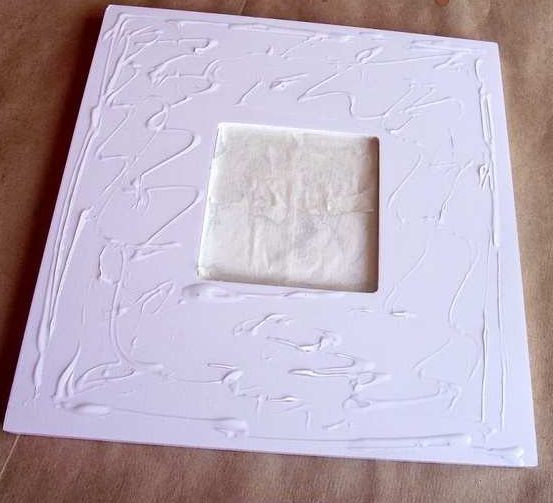
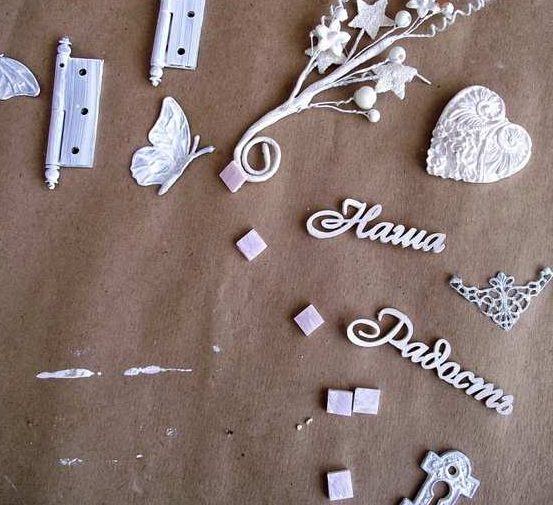
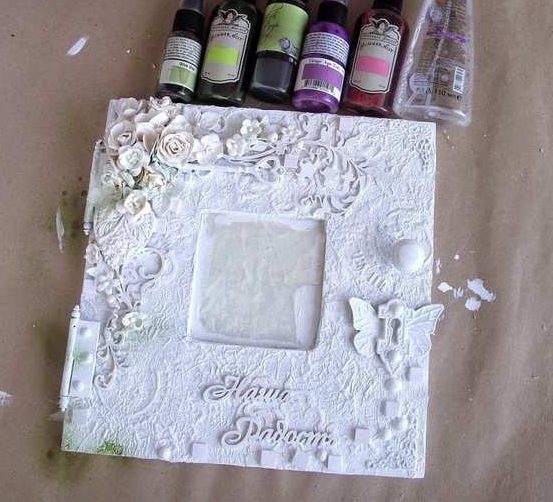
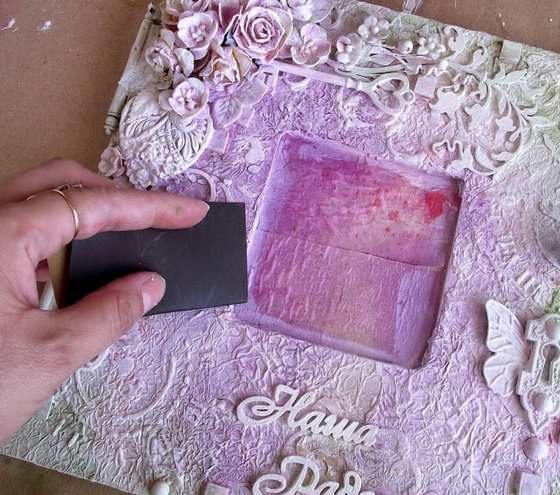
Scrapbooking
An interesting frame for a mirror can be created using the scrapbooking technique. This method helps not only to make a beautiful element of the interior, but also to create heirlooms from mirrors. The materials used are quite simple:
- paints;
- texture paste;
- foil;
- glue;
- paper napkins;
- decorations (jewelry, shells, plastic or plaster flowers, volumetric inscriptions, other trifles that can be used for decoration);
- masking tape.
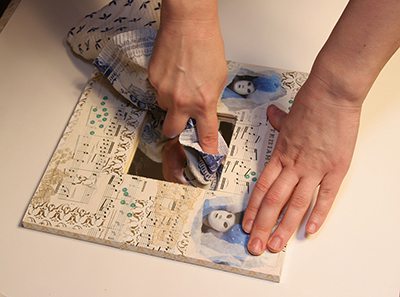
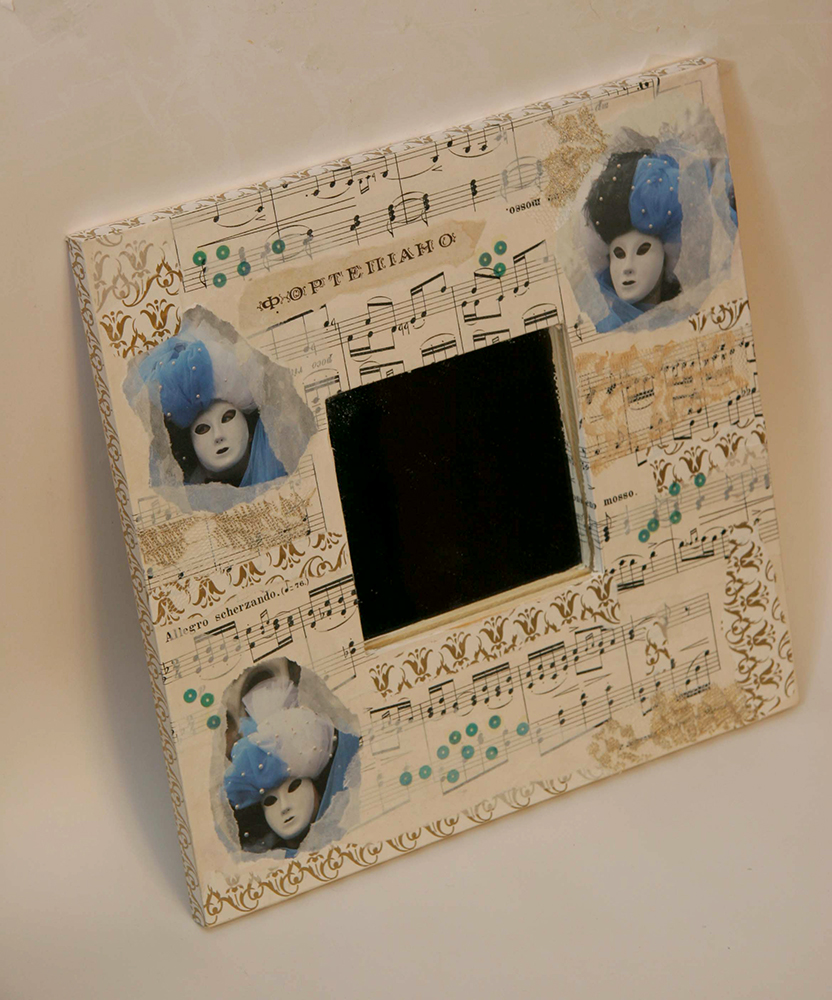
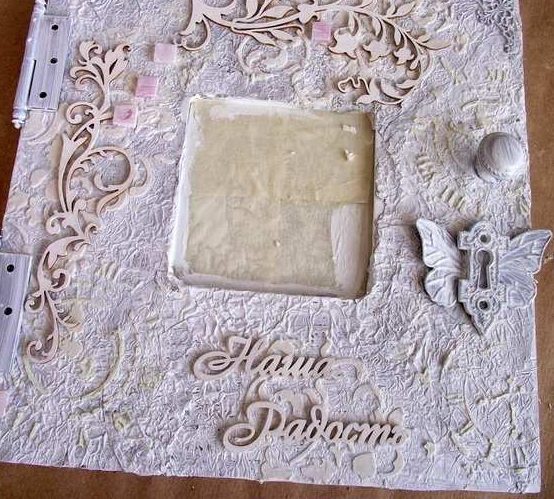
For work, you need a brush, hair dryer, scissors, several stencils. Mirrors with a wide frame are suitable for scrapbooking. Before starting work, the surface should be coated with white acrylic paint to create a good basis for further decoration. In order for the product to turn out as it was intended, it is recommended to follow the sequence of actions:
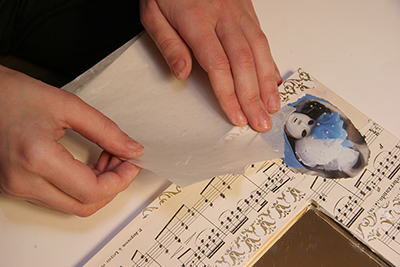
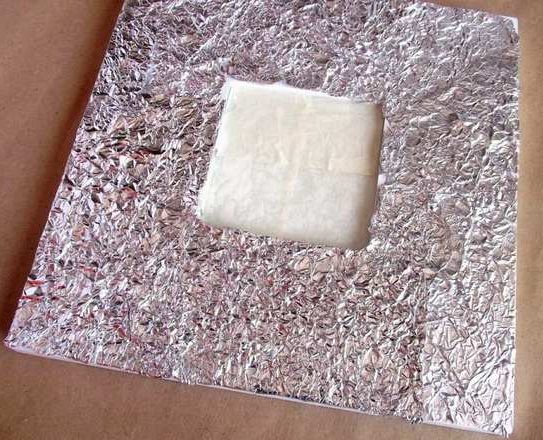
- If the mirror is already inserted into the frame, cover it with masking tape.
- Cover the surface of the glue with glue.
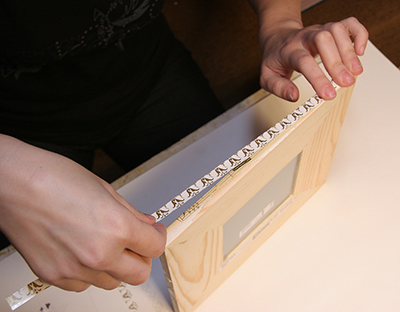
- Apply crumpled foil to the frame, creating the basis of the background.
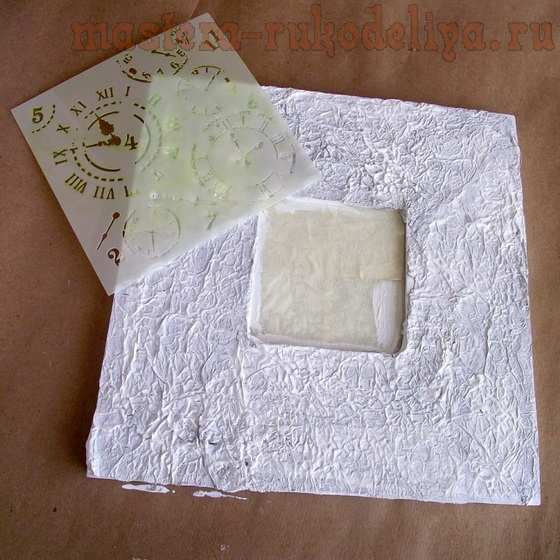
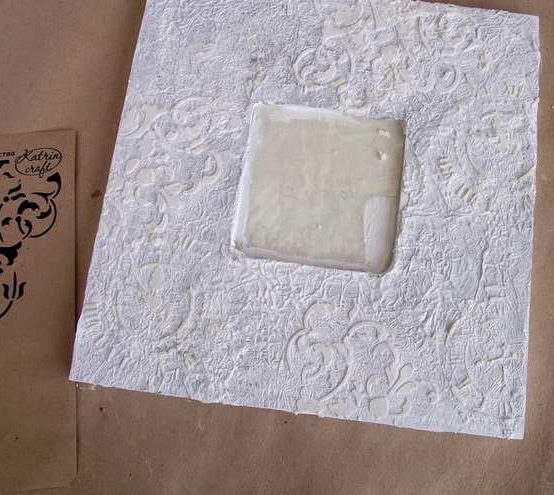
- Cover it with white acrylic paint. Apply a fancy pattern to the background tone on the resulting surface using a stencil.
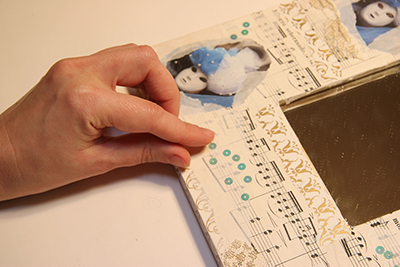
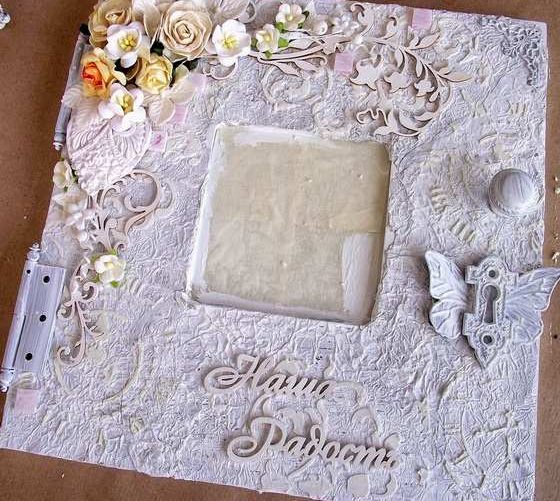
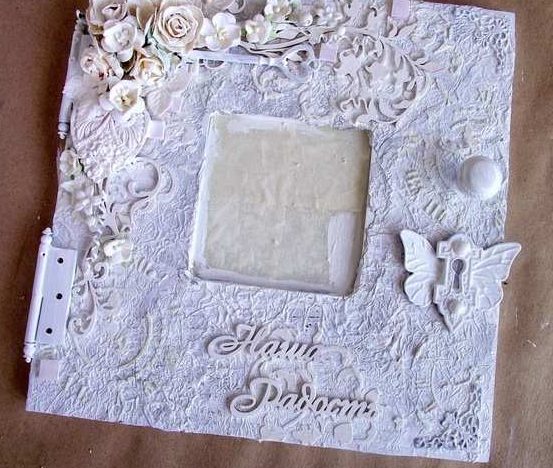
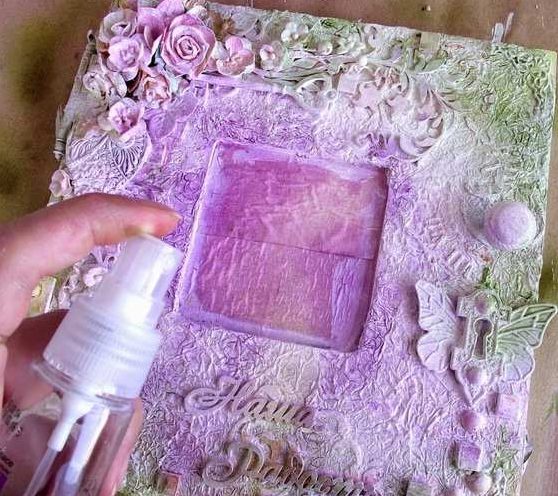
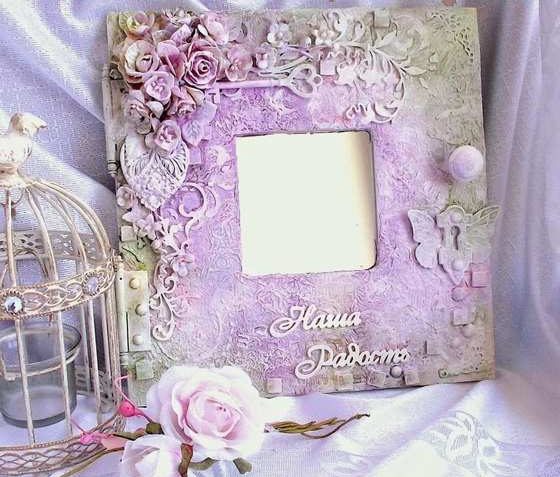
- Form a composition. Decorations are superimposed on the surface of the frame without glue. For everyone, a place is sought.
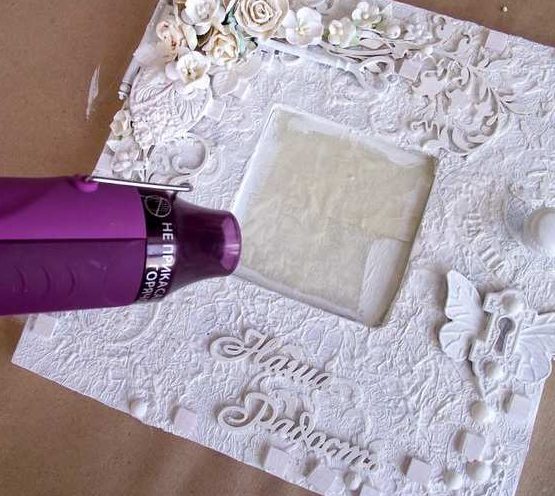
- Paint all the elements in the background color and stick to the base.
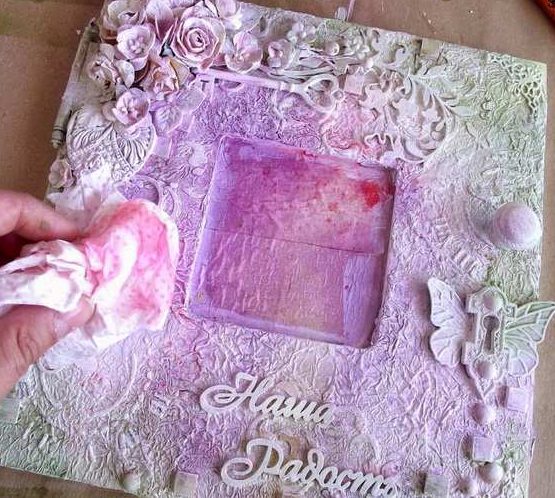
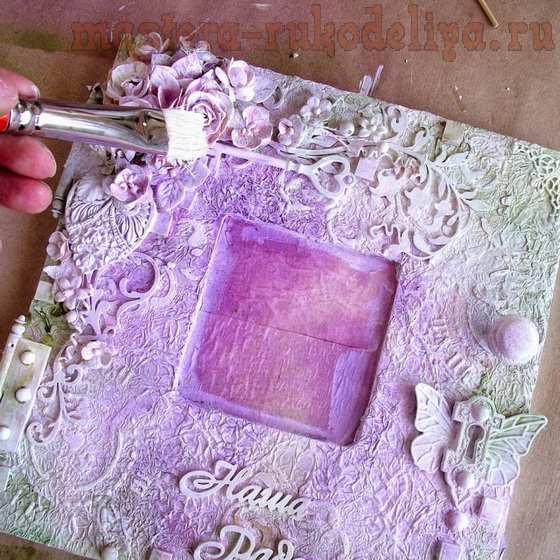
- To complete the work, design the product using paints of different colors.
Decorating the frame using personal photographs or clippings from albums and magazines dedicated to memorable dates will be highly appreciated by all family members and will allow you to keep the best moments of life in your memory.
To create a beautiful frame for a mirror with your own hands, which organically fits into the interior, anyone can do. And although the use of some materials requires special skills, the processing of others can be easily mastered right while working on your product.


Video
 (no ratings yet)