Features of making a do-it-yourself table made of chipboard
The owners of small apartments always feel a lack of free space. It is quite natural that with the equipment of housing there is a need for the selection of ergonomic furniture and work surfaces. Designs of typical sizes do not always turn out to be suitable, you have to order their manufacture according to individual measurements, which at times increases the cost. Meanwhile, having elementary skills of working with a drill and a drill, it is quite possible to create the right model of furniture yourself. A good solution for the kitchen or living room, where guests are often located, is a table-book - with its own hands it is assembled quite easily, the manufacturing process does not take much time. With a responsible approach to the task, home-made furniture will look no worse than the factory, in many ways even more original and colorful.
Model and drawing selection
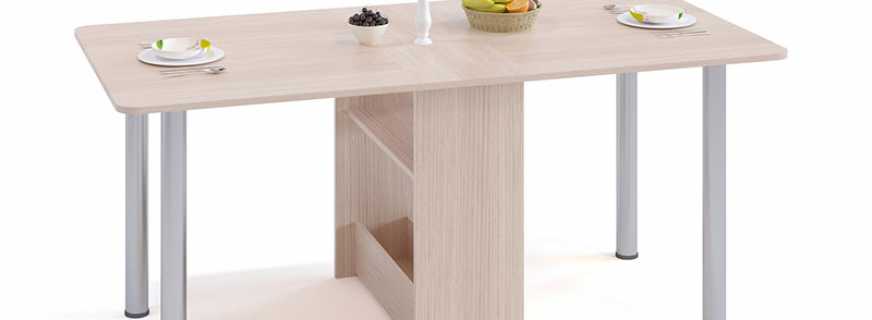
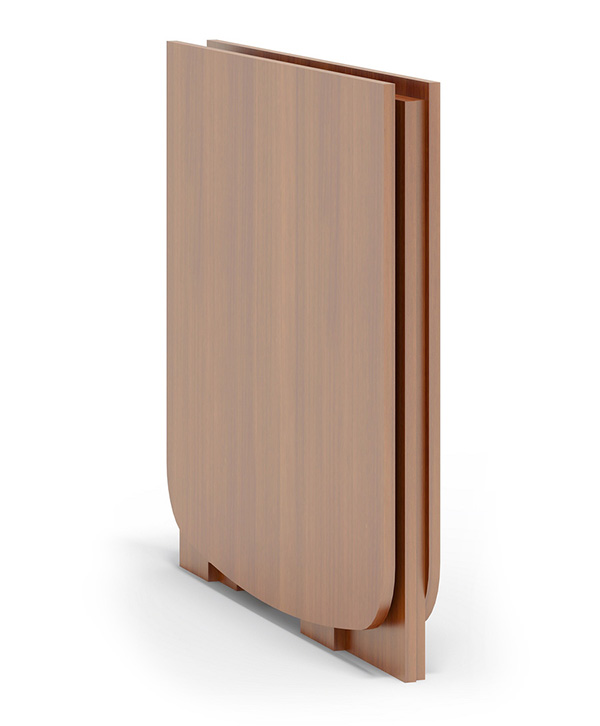
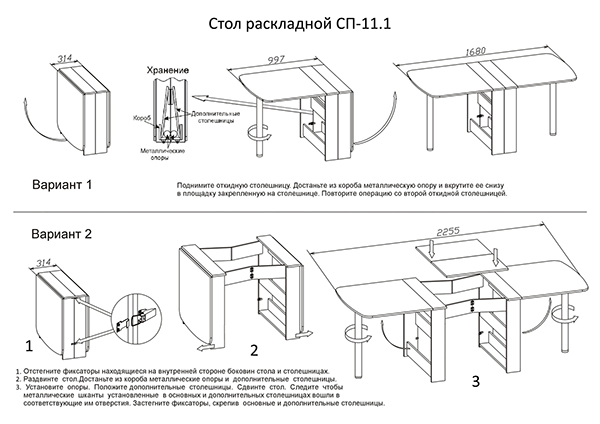
Table-book - transforming furniture, in which the countertop consists of three parts, where the center remains stationary, and the side "wings" can be folded and unfolded. When lifting the movable part, it is supported on extendable legs. There are various designs of this model:
- A table-book without a central part takes up less space; it is as compact as possible when folded. It provides only sidewalls and supports. With self-manufacturing, they require less material.
- A table with a central but non-functional detail. In such models, the element located in the middle is not equipped with any shelves, partitions. This is done in order to save the maximum amount of space.
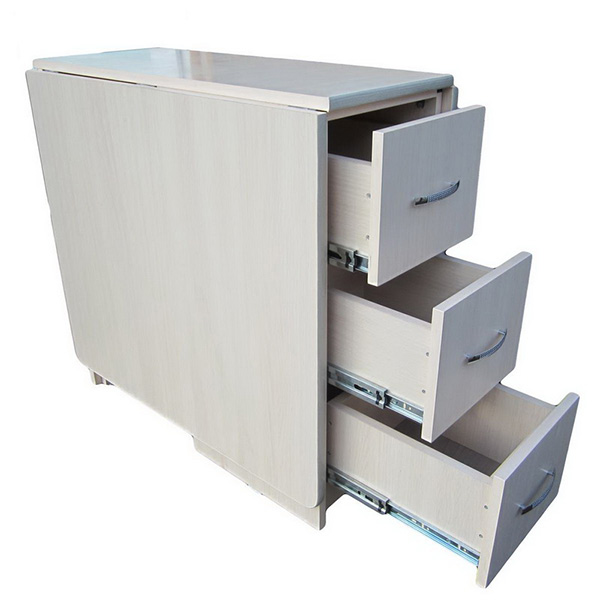
- A product with a pedestal in the central part. This model combines a table and a place for storage. Making a table-tables with your own hands will require more materials and, accordingly, the skills and abilities of the master.
- A transforming table is a model that, if necessary, becomes a niche for chairs, a minibar, dishes and other things.
It is really difficult to make a choice among such a variety of models. Understanding how to make a book-table with your own hands, it will be useful to take into account the recommendations of experts:
- It is best for experts in carpentry without experience, as well as for beginners, to prefer the simplest variation of the book: without an internal niche for things. An experienced craftsman can choose any attractive model.
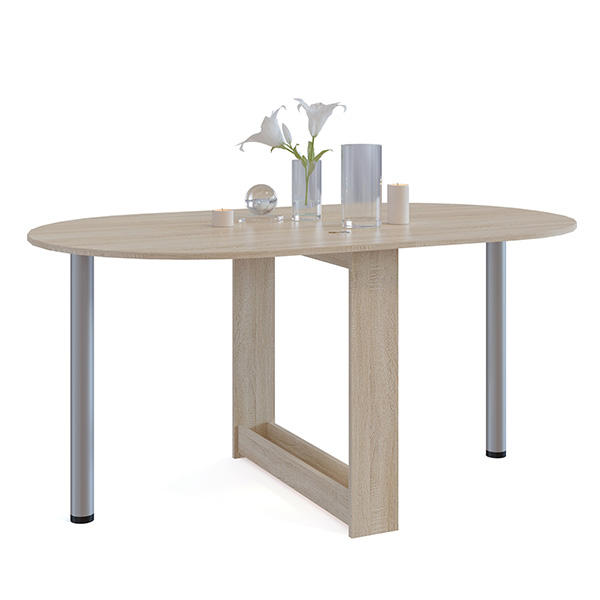
- Lateral parts, as a rule, provide a rectangular shape. If the cut is ordered in the workshop, then you can round them if you wish.
- A table of this model can be used as a dining or coffee table. The nuances of the assembly, the design will be identical, but the dimensions will already differ. Coffee tables of this kind are very convenient, compact.
- It is important to consider the types of table materials that will be used in the manufacture.Laminated chipboard for such works is recognized as a classic, raw materials are suitable for all components. But there are other possible variations: a countertop, side “wings”, stiffeners, drawers to cut out from chipboard, use a beam for the legs. Or, legs, racks for the side “wings” can be made of steel pipes with wheels at the ends (this option is best suited for a coffee table). You can make the central part, legs, drawers made of metal, and for the tabletop to take shockproof glass.
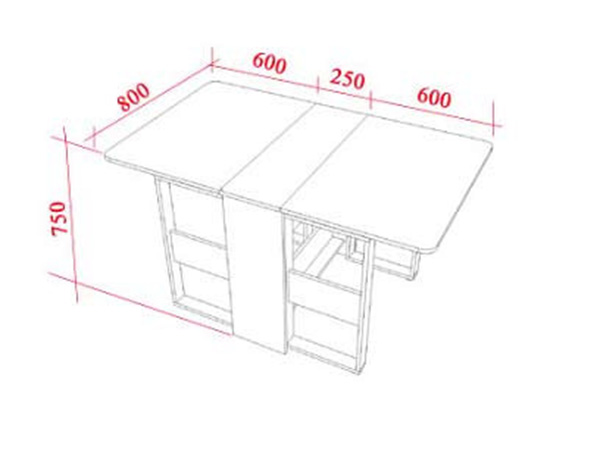
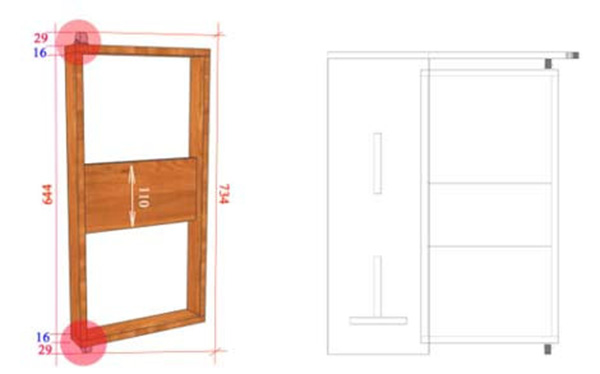
If there is a desire to make a table-book with your own hands, drawings and diagrams will be a good help in the process. They can be performed independently, with the necessary skills, but it is preferable to use ready-made options as a basis. This method has many advantages:
- significantly speeds up work on the product;
- no need to build a drawing from scratch;
- less risk of inaccuracy or error;
- if necessary, you can make the necessary changes;
- You can always make a calculation according to your size.
After the parameters of the future product will be completely satisfied, you can begin to display the design for the details in accordance with the dimensions in the quantity required for manufacturing. Detailing and cutting sheet are prepared on the basis of the drawing. After it is made directly cutting.
The drawing can be prepared using a ready-made program on the computer, which will significantly reduce time costs and eliminate the possibility of errors in the calculations.
Materials and Tools
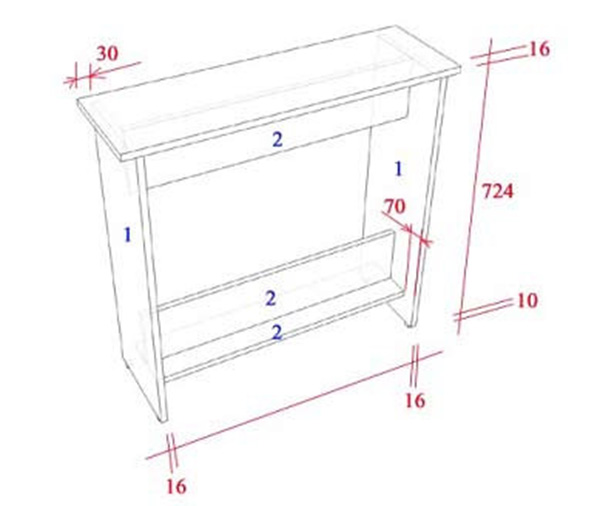
In the presence of a drawing and detailing, work begins on the preparation of materials and tools. Assembling a table will require the availability of prepared parts:
- three elements of the countertop;
- sliding legs (4 pieces);
- main support.
You can cut the materials yourself, and if there is no equipment for these purposes, it is better, having previously calculated the sizes, order a cut in a specialized organization.
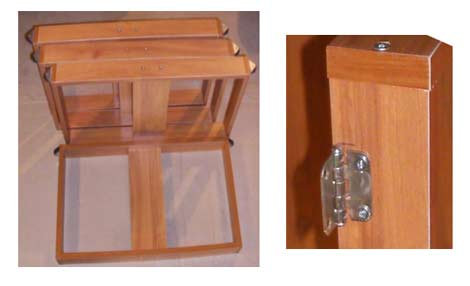
When choosing hinges, it is important to pay attention to the quality and thickness of the material. Masters advise choosing butterfly loops instead of the usual ones. They are small, but made of metal of the required thickness, harder and more reliable than standard fasteners.
You should also prepare the fasteners with which you will be assembling:
- butterfly loops - 16 pieces;
- straight-through rollers - 8 pieces (if a table on castors is required);
- self-tapping screws (usually sold in a set of 100 pieces);
- confirmation 75 x 5 - at least 40 pieces;
- adjustable legs - 4 pieces.
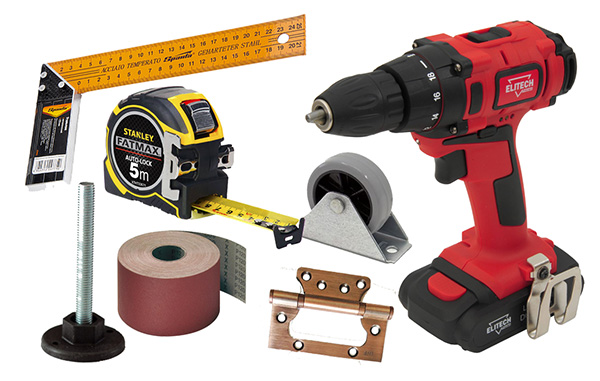
Separately, the presence of such tools and consumables is required:
- drill / driver (with a set of bits);
- iron;
- drill;
- knife;
- an unnecessary piece of cloth for use as a rag;
- fine sand paper;
- roulette;
- pencil;
- construction line.
When choosing materials, you should focus on the amount you plan to spend on the purchase, as well as the required wear resistance of the future product.
Stages of manufacturing a table-book
After preparing all the necessary components for work, you can proceed to the manufacturing procedure. How to assemble the construction, a step-by-step ready algorithm will tell you:
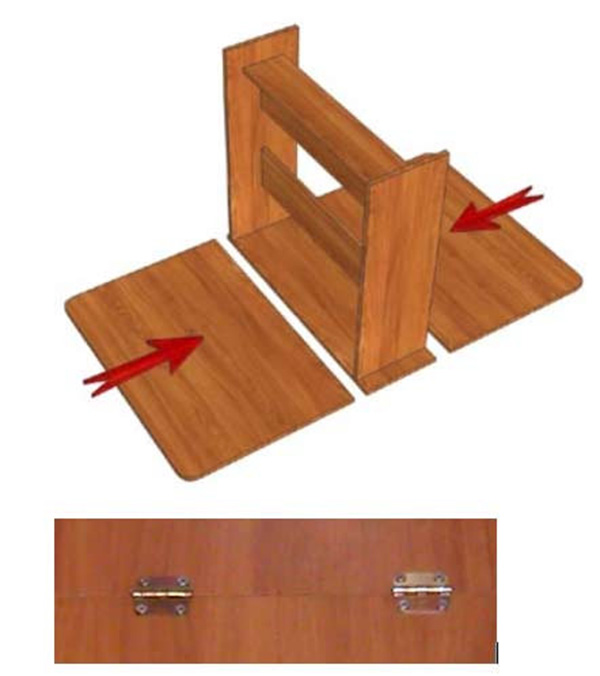
- Assembly of the table begins with the central part. It is formed from the middle component of the countertop, side “wings”, as well as three stiffeners. First, side parts should be cut from the chipboard sheet, after the center of the countertop, then stiffeners. They should be installed on the side parts using confirmations. After attach the central part.
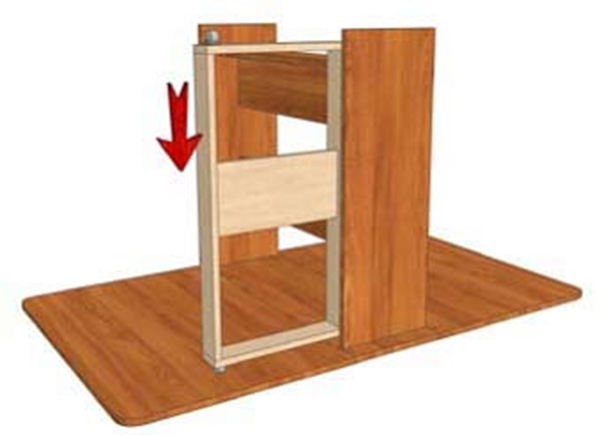
- Then legs are attached to the assembled elements.
- The following is a combination of all components. To do this, turn the center and hinge the right and left parts of the countertop.
- To attach the legs to the central part, drill holes, then attach the hinges.
- Next, the legs are set to the extreme working position, where the clips are mounted in the places of mounting the wheels. These elements will exclude spontaneous movement of the side parts of the table.
During assembly, it should be remembered that the components must be processed with sandpaper.This will help get rid of bumps, roughness, and the resulting product will eventually look neater. It is also important not to forget to close the confirmation hats with plugs.
After the do-it-yourself table-book is made, it can be painted, varnished or decorated in any way you choose.
Making a table-book with your own hands is a simple procedure, basic skills are enough. But it is equally important to choose high-quality materials, then the finished product will look decent, and will also last for many years.

Video