Do-it-yourself furniture manufacturing from chipboard, detailed instructions
For a long time, as a basis for furniture, use chipboard (particleboard). For those who have minimal skills in working with wood and carpentry tools, home-made furniture will provide an opportunity to significantly save the family budget. Chipboard furniture with your own hands will be exclusive and will take its rightful place in your apartment. Everything you need for work can be found in specialized stores.
Content
Necessary tools
To repair or assemble the furniture itself from chipboard, you need a small set of materials and tools. All you need can be found at home, or bought for a small price.
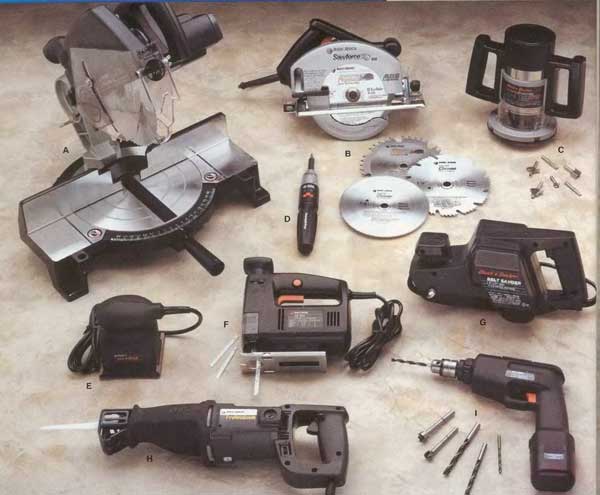
For work, you need such tools:
- A small drill or screwdriver. Of course, it is better to use a small and not heavy drill to assemble furniture;
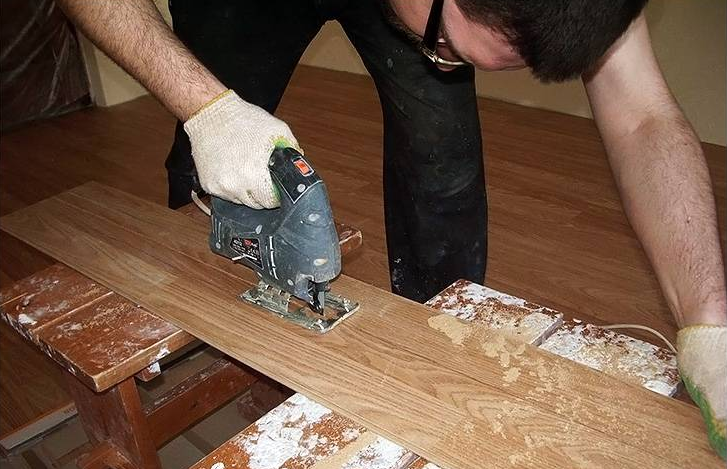
- Circular saw, milling cutter, jigsaw. If these tools are not available, then they can be rented;
- Level, square, tape measure;
- A set of hex keys, countersinks, drills;
- Conductor.
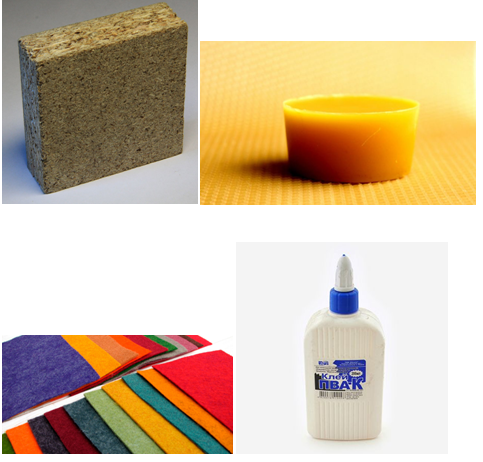
Materials will be needed such:
- Chipboard plates;
- Wax of the desired color;
- Felt-tip pen for retouching or marker of the desired shades;
- Scavenger;
- Varnish;
- Felt fabric;
- PVA;
- Staple.
With such a small set, you can either update the furniture or make a new one.
Manufacturing process
Chipboard cutting is carried out independently or they turn to professionals who have the necessary equipment. In addition to chipboard, in the manufacture of furniture you will need fiberboard (wood fiber board), natural wood lumber, accessories, fasteners.
To make a simple update, the master class of which is offered by experienced specialists, is quite within the power of everyone. The result is a beautiful, completely new product, and the family budget will not suffer. The most important structural details that need to be given the most attention and time are:
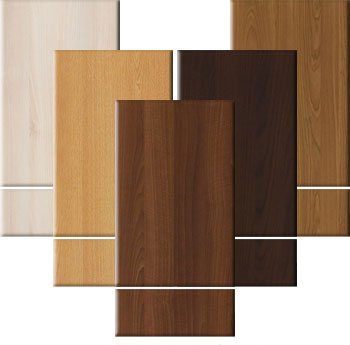
- Facades - the front part of the furniture and its doors are made of a more attractive material. Do-it-yourself chipboard furniture should look attractive. The facade is a separate piece of furniture, it is usually made to order. There are many different types of facades for furniture; they differ in the material used and the design;
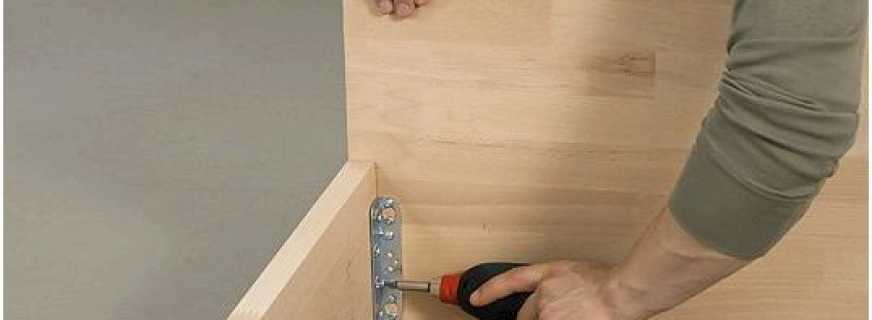
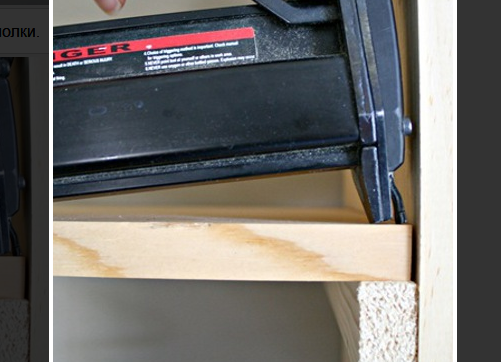
- The bottom and side walls of the drawers - these furniture elements, as some other parts do, are most easily made from fiberboard. Some craftsmen prefer to fix fiberboard with a furniture stapler, but this is wrong. After a while, the staples will loosen, and then the entire structure can skew. Fiberboard is best fixed with self-tapping screws or nails, it is good to install self-tapping screws with special washers;
- A countertop is a horizontal surface where you can write, read. Most tables made at home (photos are presented below) are made of the same chipboard.A weak area of countertops - cut surface. They are most often protected with a melamine edge, for this reason they begin to break down in the first year. To prevent this nuisance, the edges are covered with aluminum profiles. Fix the countertops from below, using small screws so as not to damage the front surface.
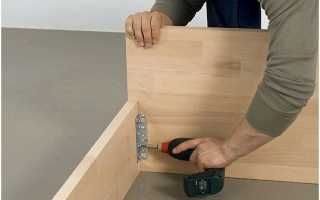
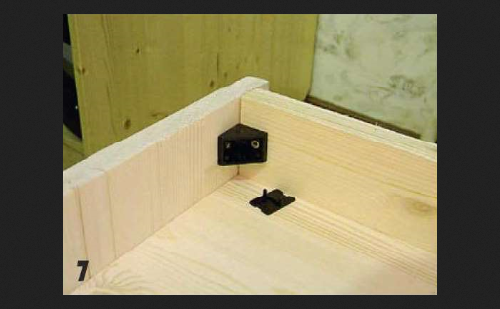
The right choice of fasteners and accessories is no less important than high-quality materials. Furniture fasteners - products necessary for connecting individual parts. Basically, all elements are connected at right angles.
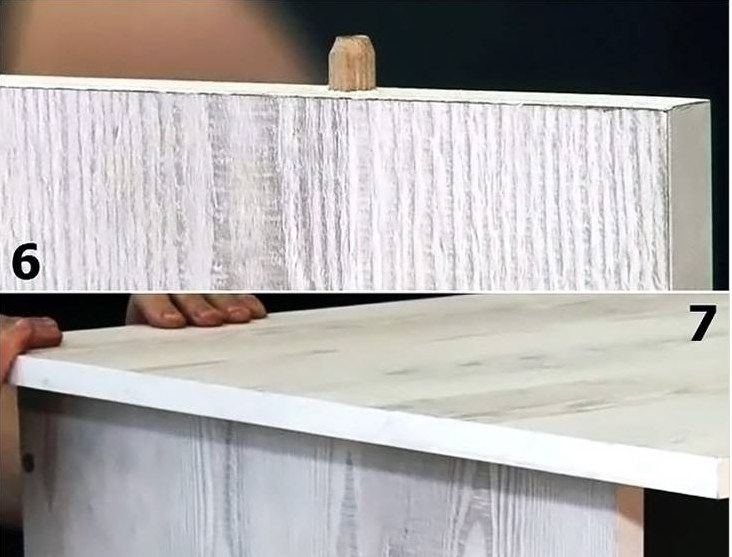
- Dowels - schemes for their installation, imply the use of pre-prepared holes. They are used for preliminary fastening and increase the strength of the connection;
- Furniture corners are a common, but already outdated type of fastening. They don’t look too beautiful, they become loose after a while;
- Euroscrew - screws for joining furniture parts.
Holes are made directly in place, using a special drill that can drill a groove of the required diameter. The question of how to make furniture with your own hands requires control of the perpendicularity of the drilling direction so as not to spoil the furniture element. When connecting elements, you need to take into account the subtleties:
- Furniture screws are screwed with a hex wrench. The heads intended for a Phillips screwdriver cannot be fully tightened;
- The main disadvantage of this mount is that fully twisted heads remain visible. To hide them, the holes are closed with plastic plugs of a suitable color;
- Eccentric couplers are a convenient, modern method of fastening. It allows you to make a hole on the inside of the furniture element.
To make holes of the right size, use a Forstner drill. It is not rational to buy it only for assembling hidden elements, but they are convenient for installing doors. With how to repaint furniture at home, even a novice master should have no problems, and step-by-step recommendations will help to assemble new products.


Bookcase
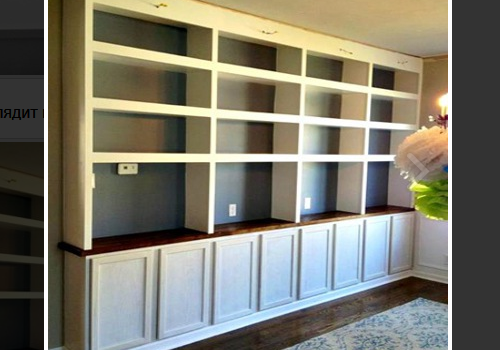
Everyone who loves books faces the need to keep a library. The easiest way is to purchase a finished cabinet, but you can save a lot of money and independently make or restore furniture from chipboard. The easiest way is to make a classic version of the cabinet with open shelves that can easily fit in any room. The ideal depth for this furniture is 400 mm, the overall dimensions are 2000x800x400. (height width depth). Most of the books fit quietly on such shelves.
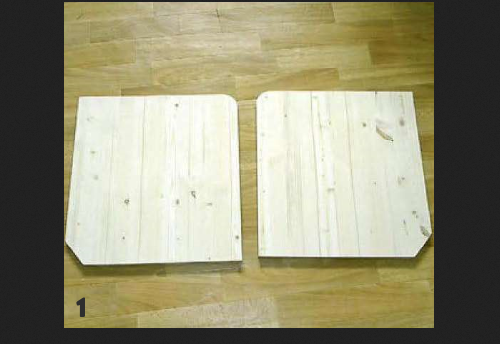
You need to start work by drawing up a drawing, separately depicting all the details. Then transfer the details to the chipboard. Next are cutting and other stages:
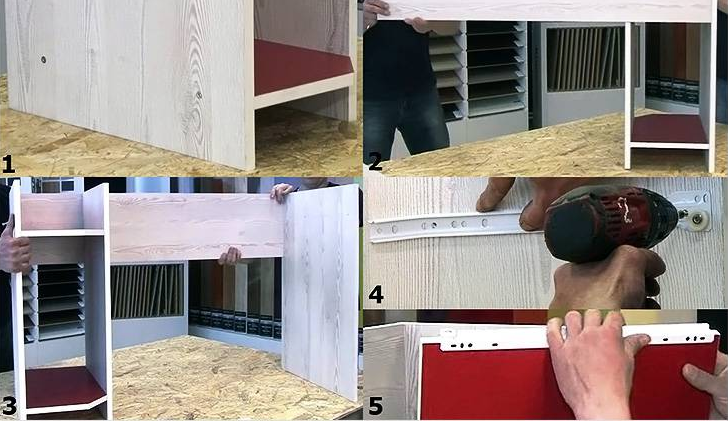
- Assembly must be done on a flat surface so as not to skew the structure;
- We connect the top of the cabinet and the side walls. It is necessary to use a special square, so that the angles are smooth;
- Using fasteners connect all the elements;
- Having installed the top of the cabinet, fasten the bottom, controlling the correct connection with a square;
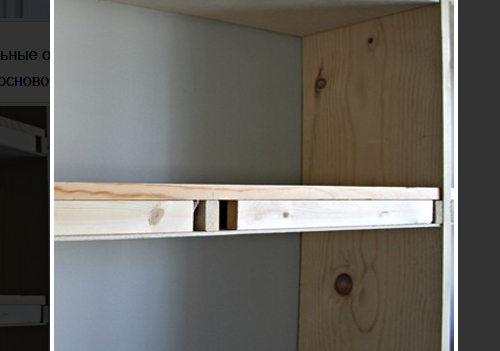
- Do not rush to mount the back wall, it is more convenient to first install the shelves. It is better to fix them with confirmation in several places. This will add reliability and increase shelf life;
- At the end, attach the back wall;
- In conclusion, mount the supports.
TV table
Although there are now widespread models of TV devices that are easily mounted on the wall, there are many devices for which special stands are needed. After all, you need to find a place not only for the TV, you may want to install a home theater, remote control, find a shelf for a collection of discs. By making a convenient TV stand yourself, you will not only save money, but also be able to take into account all your desires - style, how to paint furniture from particleboard with your own hands.
For the product, the most convenient dimensions are 600x400x1850 mm (height - depth - width). The bedside table is placed directly on the floor, it is able to withstand severe loads. Making furniture of this size will allow you to easily place even a large TV, and next to it - the rest of the necessary equipment.
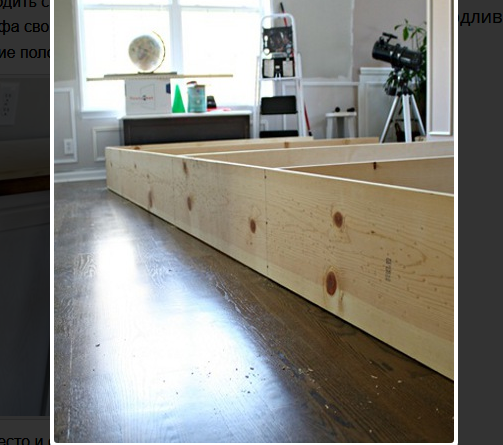
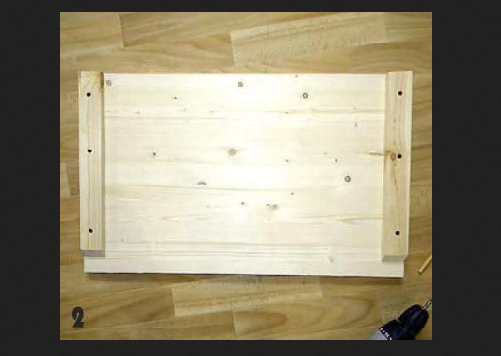
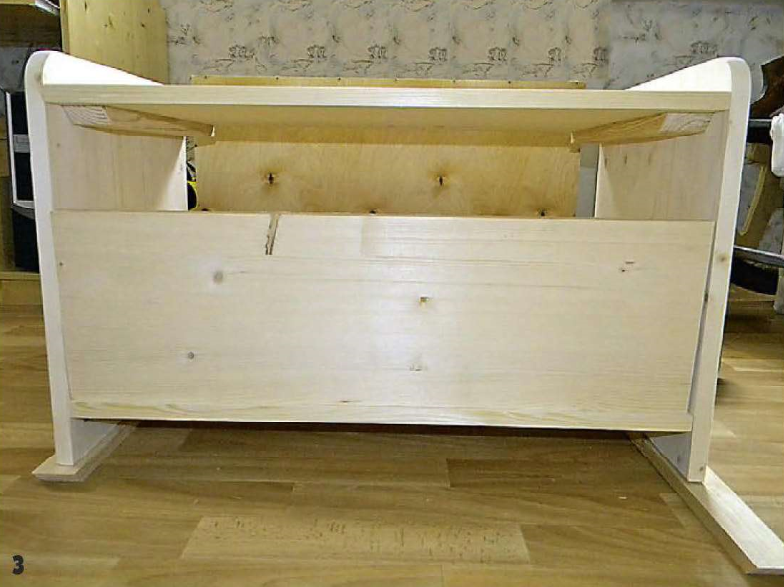
- First assemble the frame of the cabinet under the TV;
- Put marks for fastening the middle shelf, make holes and put it in place;
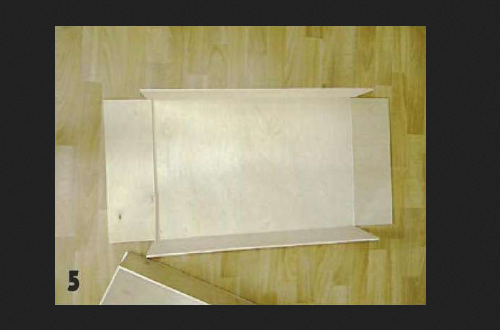
- From the elements 0.12 x 0.45 mm, assemble the frames for the drawers. Then fix the bottom of plywood on them, on glue or nails;
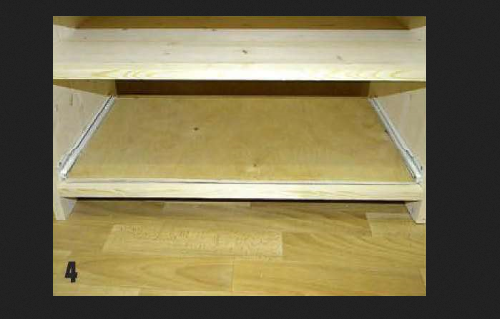
- Install accessories to move drawers;
- Fasten the handles to the drawers;
- By milling, prepare a place for the installation of doors, and secure them;
- Fasten the top panel at the end of the assembly.
Computer table
The computer, after the refrigerator and the TV, is the most popular item in the house. For this reason, the table at which we work should be appropriate. A computer table is a piece of furniture with various fixtures and parts that can be adjusted if necessary. In addition, a self-made version will cost much less than in a store.
In the manufacture of the table, you can simplify the work and limited to its design with straight lines. Additional shelves, holes for wiring, a place for the system unit can be made as you want.
There are a huge number of designs of such tables, there are special tables used for a netbook or laptop. In small apartments, comfortable tables are transformers. A narrow object does not require a lot of space, and if necessary, turns into a normal computer table, with all the necessary elements.
For independent execution it is better to choose a simple model, rectangular shape. Having completed the drawing and having cut all the details using a circular saw or a jigsaw, you can proceed to the assembly:
- In the central and side walls, holes are prepared for attaching the lower shelf. After that, fix it with confirmations;
- Also fasten the upper shelf;
- After that, the back wall is installed. It is on a par with the upper parts of the central and side walls;
- Now you need to screw the guide elements for the sliding console under the keyboard;
- The countertop is attached to the side walls with dowels. You can not make through holes in the countertop;
- If you plan to make shelves on top of countertops, they are also mounted on dowels.
Safety Finishing Rules
- Particleboard needs to be cut to pieces slowly, for this a saw with a small tooth is better suited - so you get an even cut line. You need to drill smoothly, using only a sharp drill and turning on the high speed of the drill. It is necessary to control the perpendicularity of the entry of the drill into the material, otherwise you can make a chip in a noticeable place. To remove irregularities, a rasp and a planer are necessary, the tool is moved from the outside of the workpiece to the inside. It is important to prevent tearing of the fibers - so the cut of the part will be neat;
- Laminated chipboard does not need to be further processed, it is only necessary to smooth the edge. The rest of the surface is painted, varnished or glued with a special film. Adhesive tape is used to protect the surface from splitting during sawing. If you are cutting by hand, the saw must be tilted. The edge of the part covered with teeth is an unpleasant sight, this is especially noticeable on white fiberboard plates. Saw the material slowly, excess rush will cause an ugly joint between furniture elements;
- Dull or slowly rotating drills, in most cases, break out the edges of the hole. Only with the help of a sharp and high-quality drill, you can make a flat hole. With a good cut, no additional processing is required.Circular saw at work, leaves on the edge of the bumps that are removed by a plane. It is carefully guided along the edge, to the inside, so that the edge becomes neat. For laminated boards, do not use a rasp;
- It is possible to finish the furniture surface from fiberboard in 2 ways - how to paint the furniture from chipboard, and to revet it with decorative material or varnish;
- Often the cladding is carried out with a special film, which has an adhesive coating on one side, which simplifies the decoration of furniture. It is unusually thin, for this reason the surface before gluing must be well sanded. You can stick laminated plastic, it is stronger and noticeably thicker. It is glued with special glue, this coating makes the chipboard furniture beautiful and at the same time protects the surface from external influences;
- Usually, wood products are varnished, particle boards are very rarely varnished, only if it is necessary to “ennoble” the unattractive appearance of a conventional plate. Before varnishing, the surface must be leveled with putty. Even after factory processing (without lamination) it needs to be leveled. The smallest defects will be noticeable under the varnish film, and this greatly affects the appearance of the furniture. After filling the chipboard, a very smooth surface should be obtained, and one layer of varnish should be enough for it. If, after varnishing, defects are noticeable, then it will be necessary to sand the surface again with sandpaper and varnish again;
- The layer of protective varnish must be thick, it prevents harmful fumes. It is necessary to pay attention to the joints - they need to be made as dense as possible. Wallpaper and fabric are not suitable for finishing chipboard, these are porous materials that are not able to serve as protection. Carpet can also pass harmful substances;
- The edges of the fiberboard, can be trimmed with thin wooden planks. The wood is selected suitable in color, the material should be in harmony with the coating of the piece of furniture. When you glue the right number of wood planks, you need to cover them, like the entire surface, with varnish, or completely repaint the furniture. Even 5 mm thick strips will protect the edges of the slab well. If you stick a wide bar, then it will prevent the bending of the countertop.
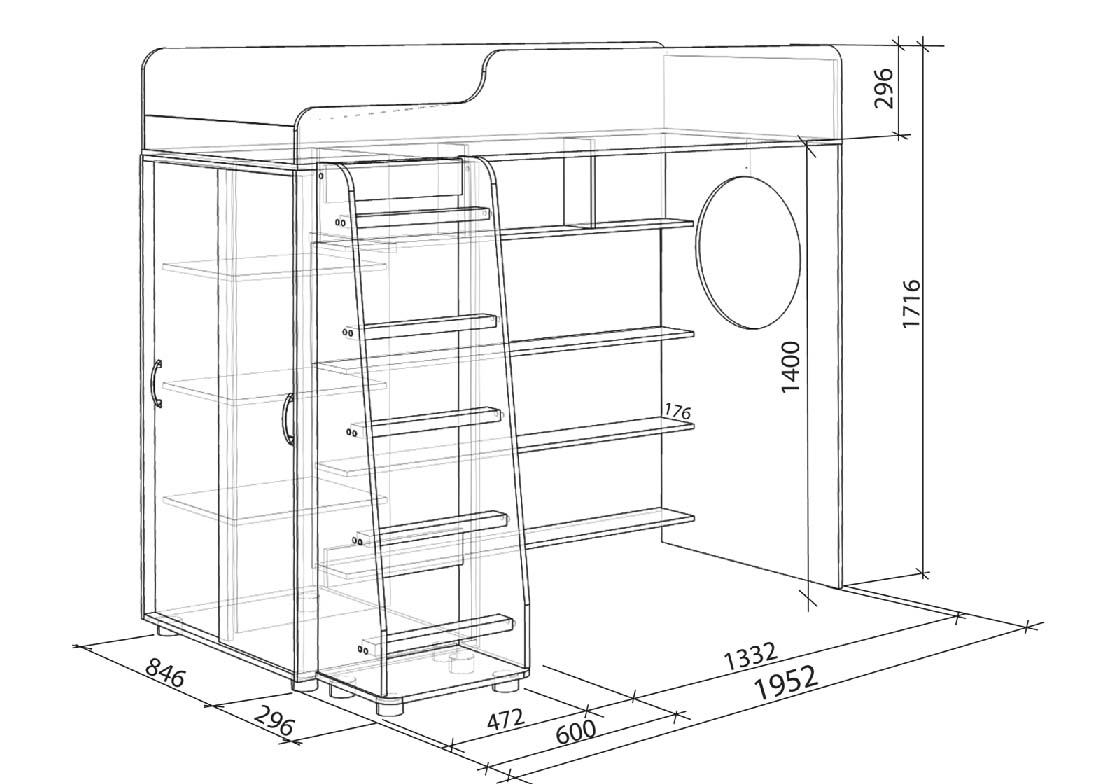
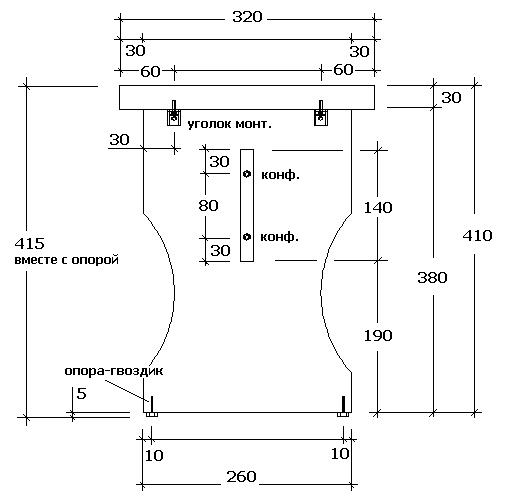
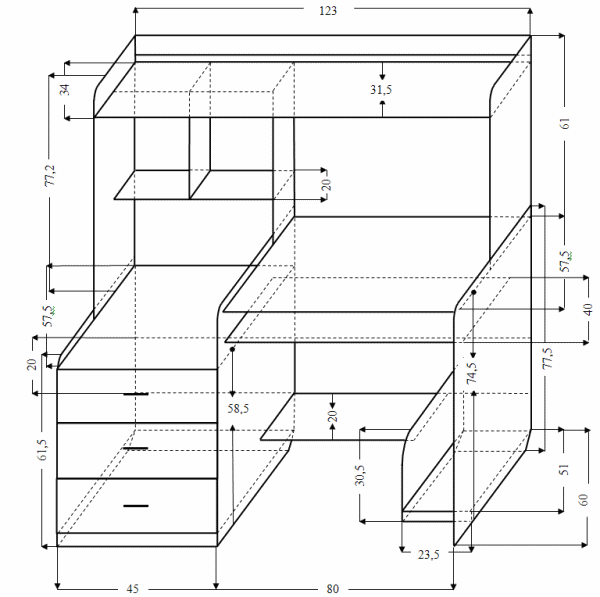
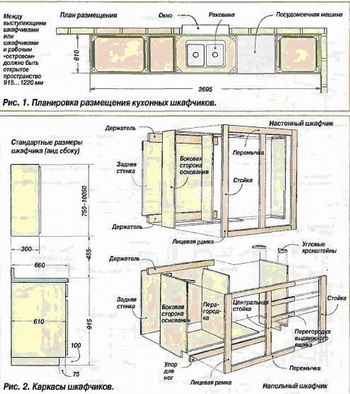
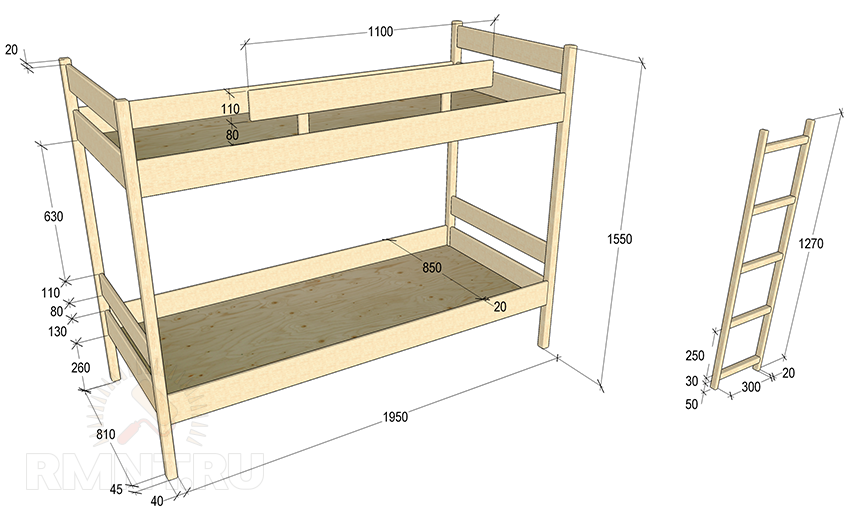
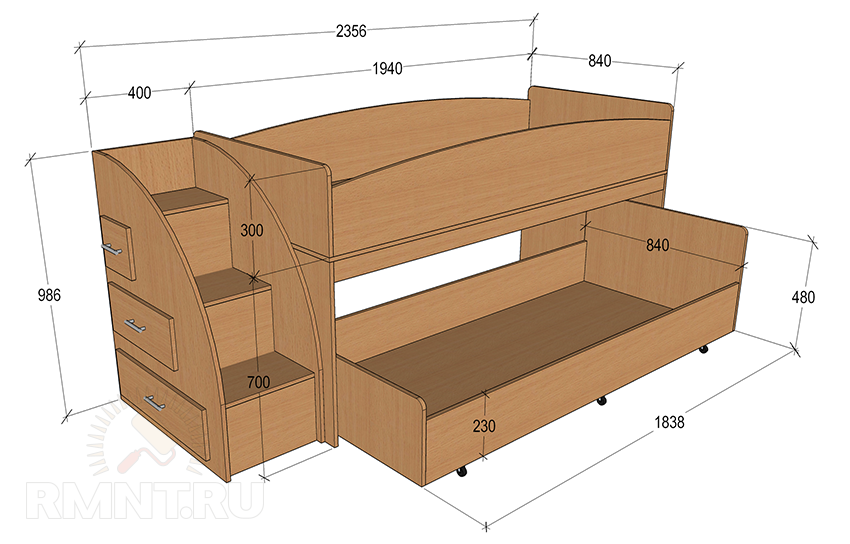
Drawings and schemes


Video

 (votes: 5, average rating: 4,00 out of 5)