How to make a good wardrobe with your own hands, useful tips
The presence of a niche and the desire to correctly utilize the available space of many makes one think of making a sliding wardrobe with their own hands, which it is quite possible to make yourself. There are craftsmen who convert shields from old furniture into a cabinet. We offer you to learn more about what is necessary for a solid sliding wardrobe to appear in the house and whether it is really possible to do everything yourself without the involvement of furniture makers.
Content
Design and Detailing
Practice shows that for those who are not engaged in carpentry on a permanent basis, it may be advantageous to contact specialists for cutting parts, drawing up an accurate drawing, since poor-quality work at these stages can entail significant additional costs that will negate all attempts to save.
Before proceeding with the manufacture of sliding wardrobes for the attractive parts of your home, you need to decide what the selected type of design will be:
- cabinet, which can be located both in the corner and throughout the wall;
- built-in, for which the place is in a niche, or part of a narrow room, for example, a corner.
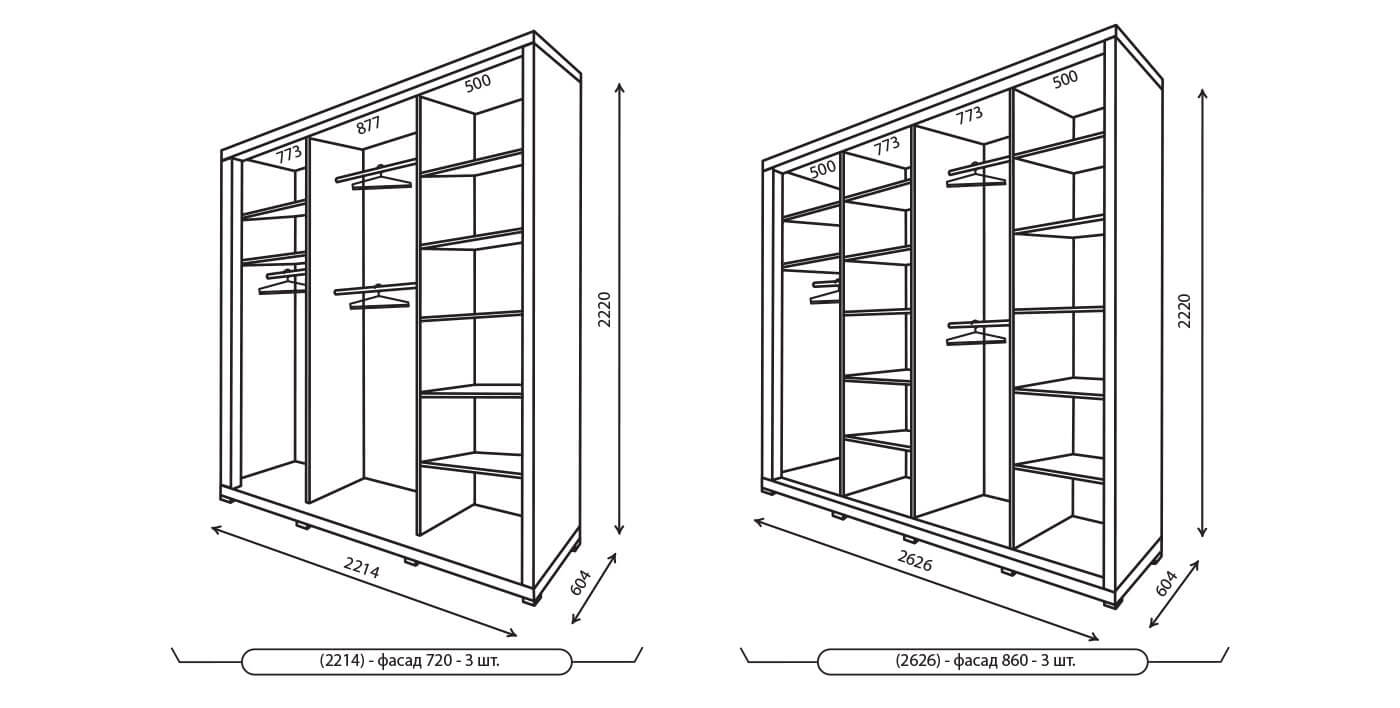
For someone who has already been engaged in manufacturing a cabinet, has experience working with tools, or has built a house with his own hands, making a cabinet will not be difficult. When choosing a simple design, the main thing is to correctly determine the dimensions of the product.
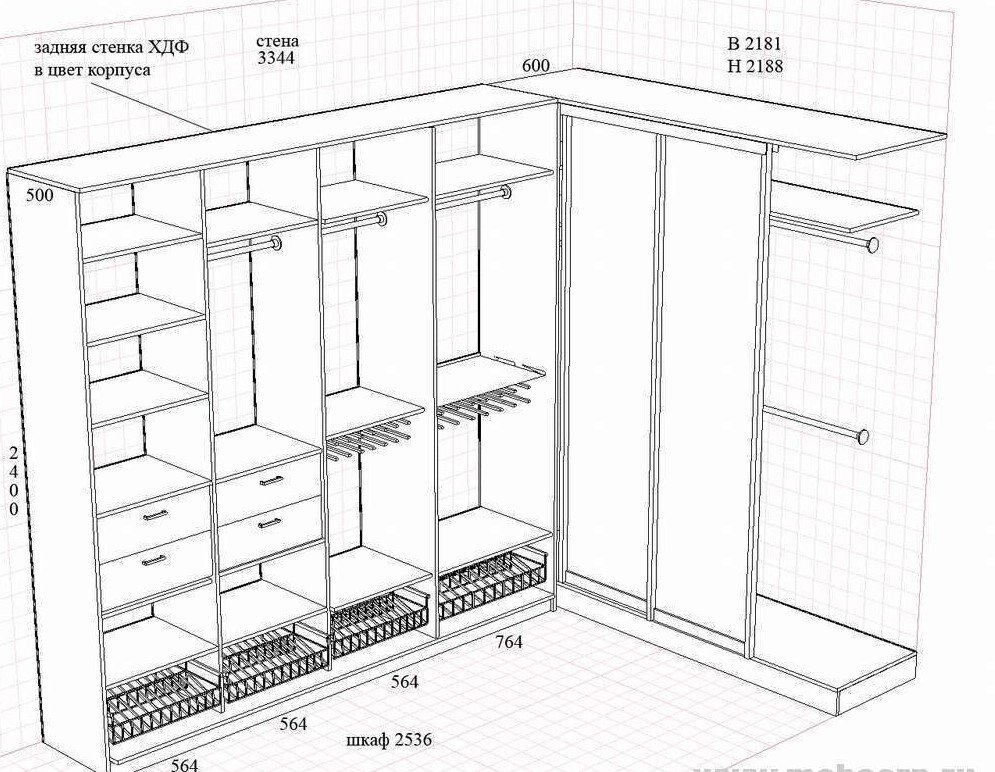
Ideally, if you own programs that allow you to create drawings and diagrams, but most often enthusiasts, in order to correctly plan the layout of a sliding wardrobe with their own hands, the drawings are performed on graph paper, the same one that is used in drawing lessons. This helps to perform high-quality scaling at home without special devices, software.
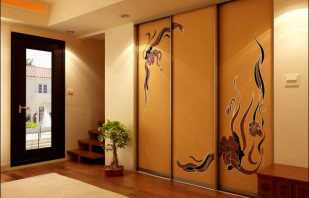
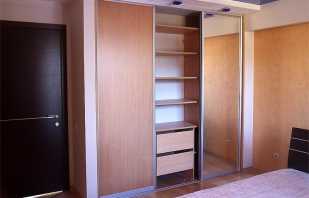
To choose the most successful design option, you can first take a photo of the place where you plan to install the cabinet or the installation of the built-in cabinet, and experiment with painting the piece of furniture taking into account the perspective of space. If you plan to make a home-made built-in wardrobe in the country, remember that a wooden structure undergoes seasonal deformation during the year, which is associated with an increase or decrease in humidity and air temperature. The material of the built-in cabinet will deform after the walls on which it is fixed, which can cause difficulties when opening and closing the cabinet; therefore, in country houses, cabinet furniture is preferable.
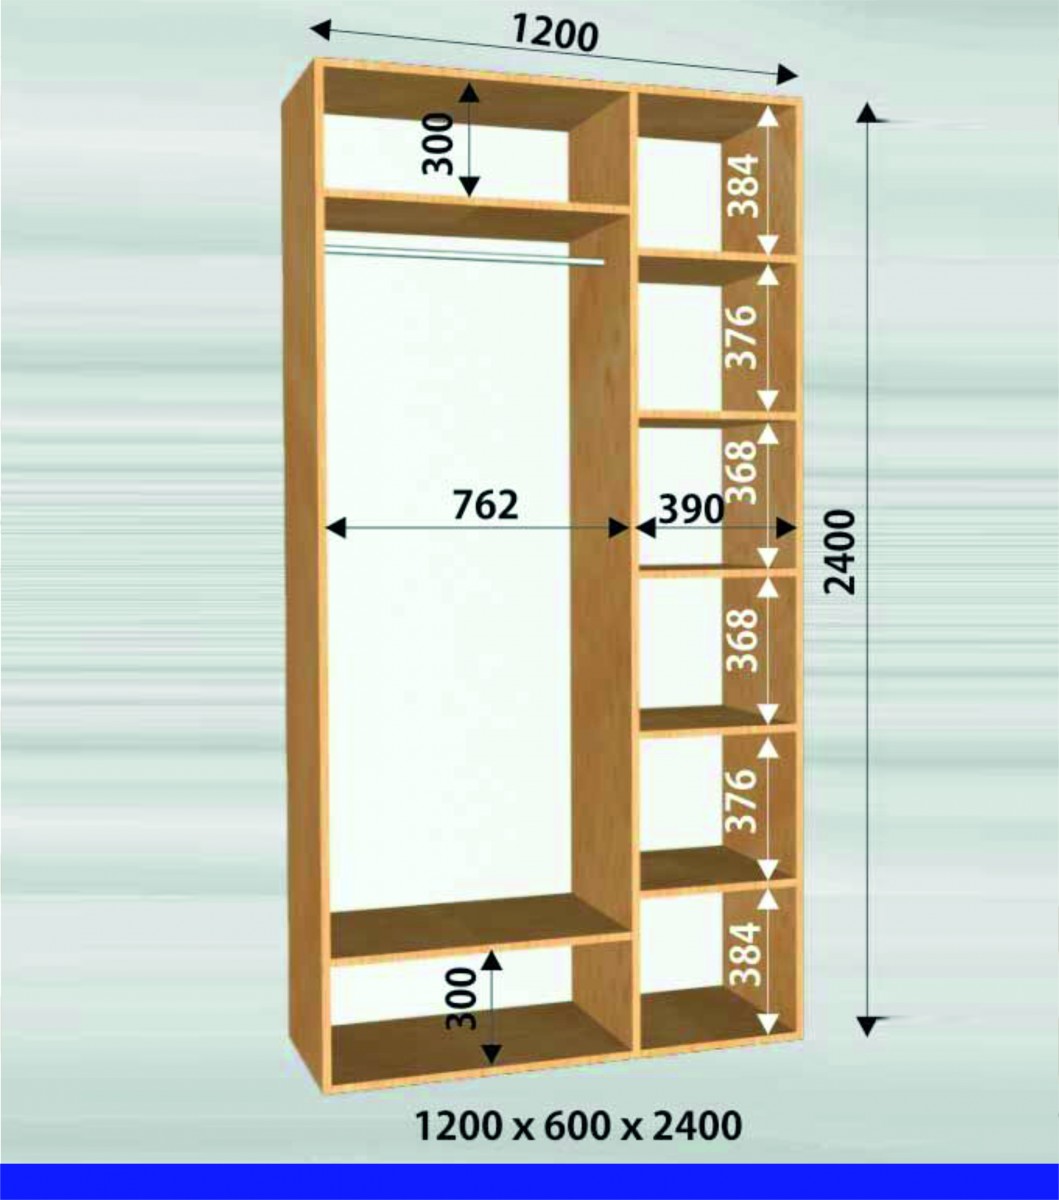
When designing the internal filling, the actual and working dimensions are taken into account:
- thickness of shelves, panels;
- the space occupied by the sliding rail system;
- working depth of shelves;
- hung mounting height;
- static, retractable sections.
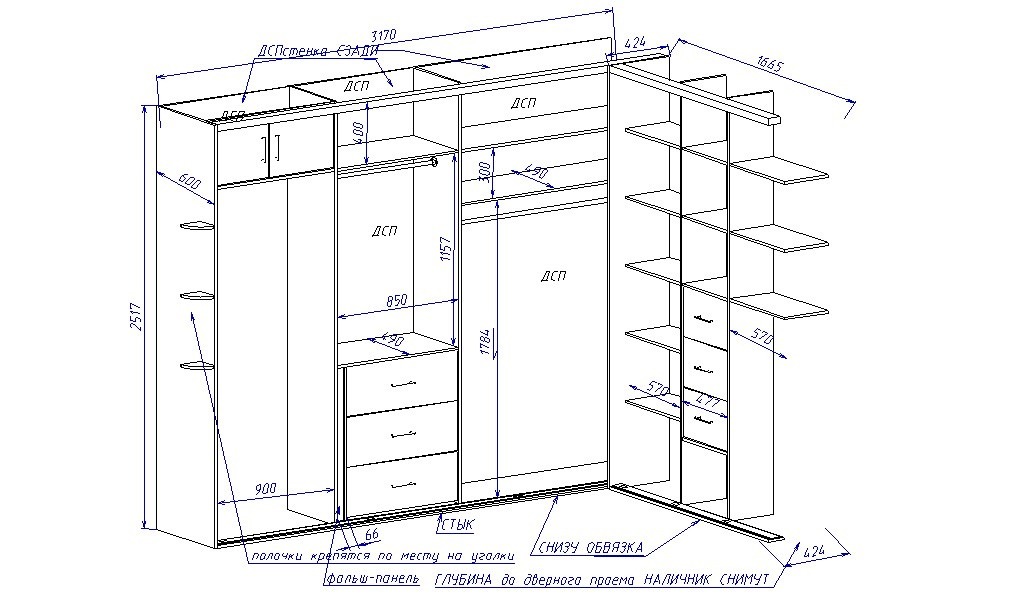
Depending on the location in the room, configuration (straight, angular), “dead zones” can be formed in the cabinet — hard-to-reach, uncomfortable places to use. When designing, consider this feature and either equip a compartment for rarely used things in such a zone, or modify it due to competent internal filling to make the space as functional as possible - a rack, built-in chest of drawers, and the system is hung.
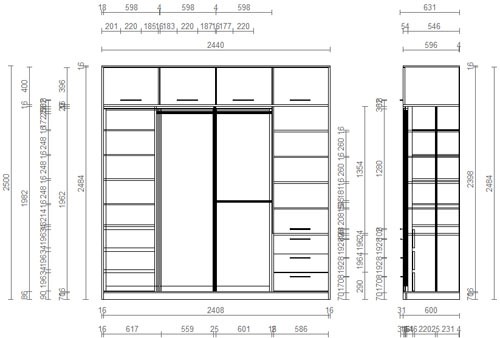
Having made a preliminary drawing of the cabinet, it is better to give it to the designer, who will make a thorough study in the program. When checking, pop-up flaws, unaccounted parameters can be identified, corrected. Do not make the cabinet too deep, otherwise it will be very difficult for you to get things from under the wall. The width of the shelves should not exceed the length of the outstretched arm. In addition, when planning the placement of hung in the closet, you can not allow clothes to rub when the doors move.
Materials and Tools
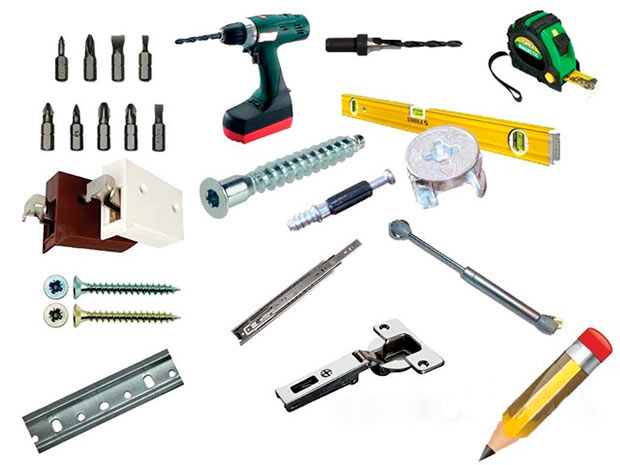
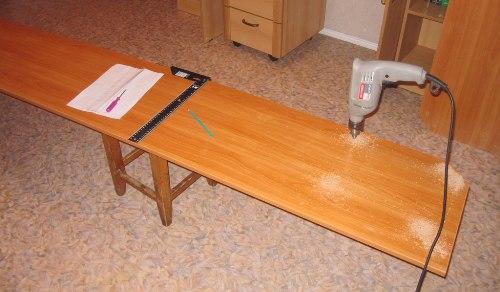
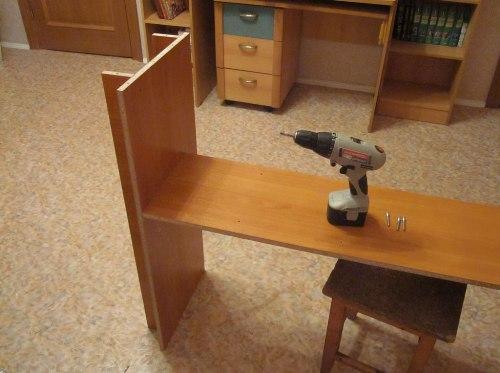
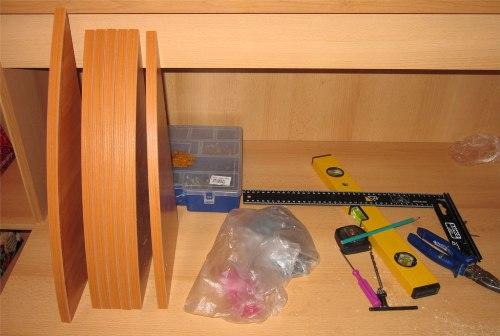
To make a sliding wardrobe yourself, you need to purchase material and make sure that the necessary tools are available:
- electric drill, screwdriver;
- screwdriver, drills for working on wood, plywood, MDF or chipboard;
- knives - a jamb and clerical;
- retainer for parts, clamps, rubber mallet;
- for confirmation - a hex key, bit;
- tape measure, awl, pencil, square;
- iron, fine-grained sanding paper for edging.
This set is enough for you to assemble the structure. To work with the iron, also take care of hand protection, stock up on gloves. It is best to wear 2 immediately on the control arm to avoid burns.
When assembling the housing, it is recommended to use a guide device and clamps to achieve a connection with an angle of 90 °. You can see how to use the guides in the training videos, where the assembly sequence is clearly demonstrated.
Now move on to the materials. It is often tempting to make a new cupboard out of an old one. You can borrow individual parts from the old cabinet — for example, drawers or shelves for the indoor unit. Remaking a cabinet completely without buying new materials can be a problem in terms of comparing parts and materials. In addition, the material of the old cabinet could be deformed during operation and subsequently distort the new product.
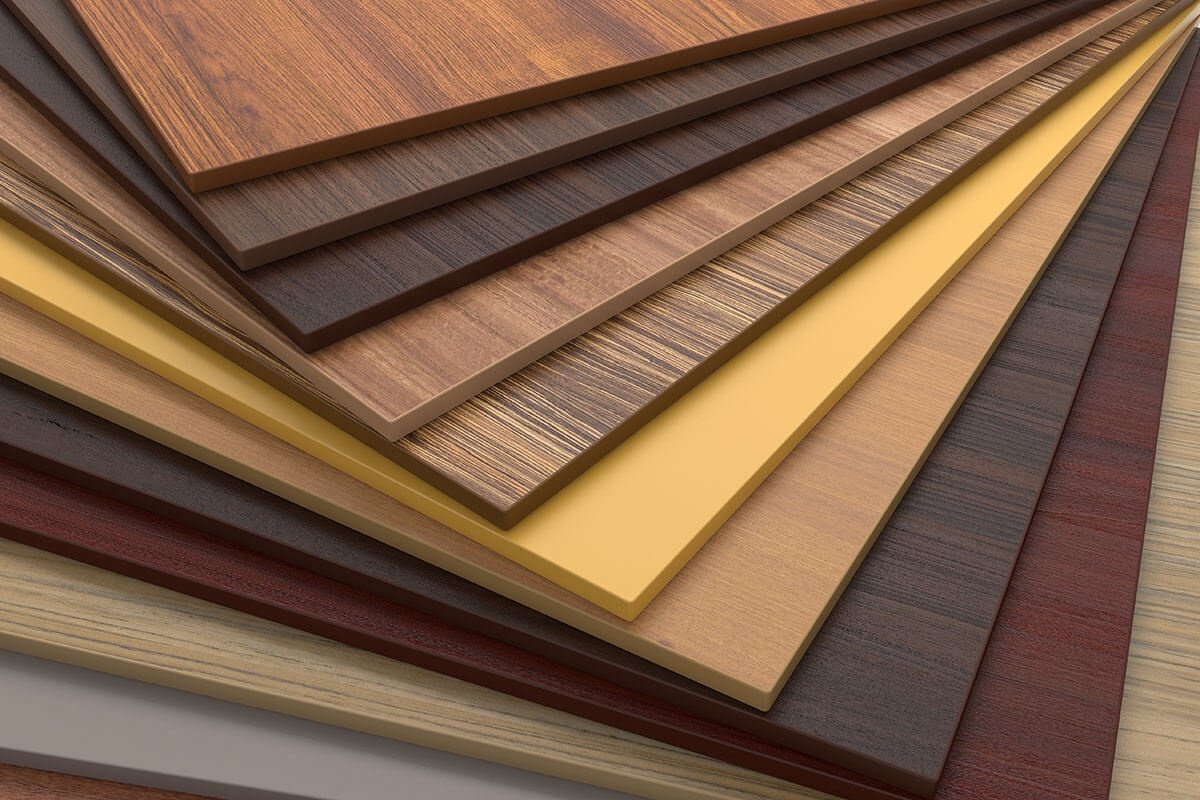
The best option is to purchase new materials for the manufacture of parts. Wooden cabinet can be made of chipboard, MDF, solid wood.
| Material | Benefits | Features |
| Particleboard, chipboard | Relatively low cost, a large selection of textures and colors. High strength, great for facades. | Suitable for simple structures, poorly refined. |
| MDF | Practical, affordable material, easy to process. Large selection of solutions in shades and texture. | The cost is more expensive than that of chipboard and particleboard. |
| Solid wood | Eco-friendly, natural material that guarantees a long service life. | The high cost of the material, difficulties in processing, if the material has defects on the surface. Wood is sensitive to changes in humidity, can swell and dry without proper care. |
A wooden coupe will become a real decoration of the house, if you have carpentry skills. Do not dare to make wooden furniture with your own hands, since the material requires understanding. Most often, cabinets are made of furniture board - a specially made wood board that has undergone the necessary processing in production. Making a sliding wardrobe from plywood is not recommended. The material is cheap, but not strong enough and very thin. If you have pieces of plywood with your own hands, you can cut out the back wall or the bottoms for the inner boxes.
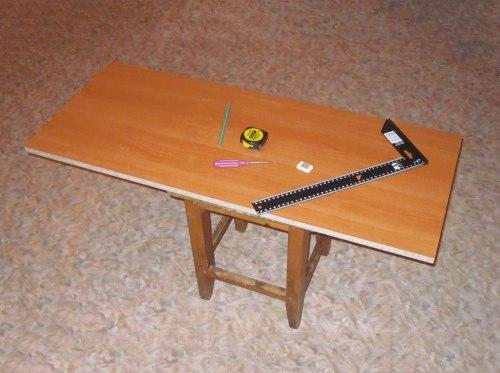
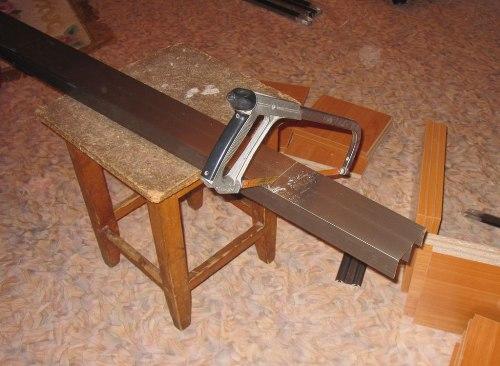
Parts preparation
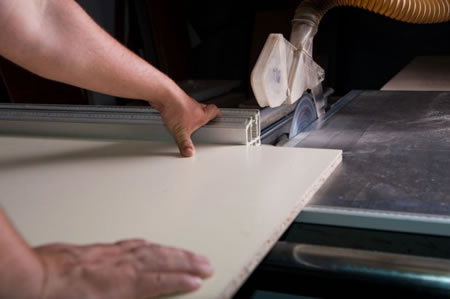
If you previously looked at the photo on the preparation of parts, then you understand that in the case of such large-scale structures it is very important to clearly follow the drawing. Mandatory do preliminary marking of parts. When cutting, do not forget to take into account the fact that the cut can take the required millimeters and then the shelf or other part will be less than necessary, step back a bit from the edge.
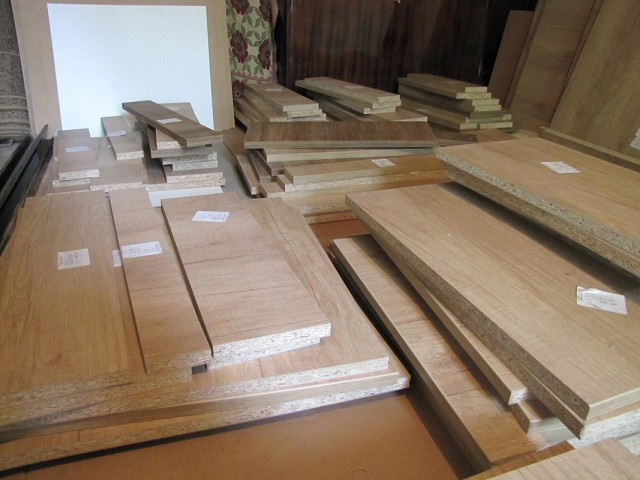
With an ideal development of events, cutting is done on high-precision machines in a furniture workshop. To order the cutting of the canvas is the best solution that will save time and money, because in case of an error, you will have to additionally buy the material. After picking up the details, number them in accordance with the drawing, so that the assembly of the sliding door wardrobe with your own hands is organized as the description of the algorithm requires - horizontal or vertical.
We make the whole set of parts. In addition, some masters recommend making a guide with an angle of strictly 90 degrees for assembly. Further, with the help of it, it is possible to quickly connect the case parts so that there is no skew, which is especially important if you have chosen the horizontal type of cabinet assembly, that is, assemble it on the floor, and then lift and install it.
The guide and clamps will become indispensable assistants in the summer cottage, as in suburban wooden houses it can be difficult to find a perfectly flat surface for work.
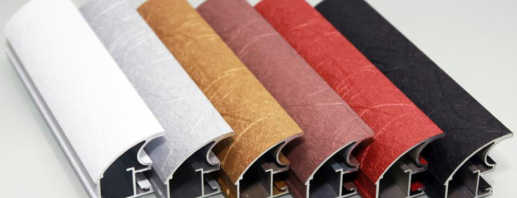
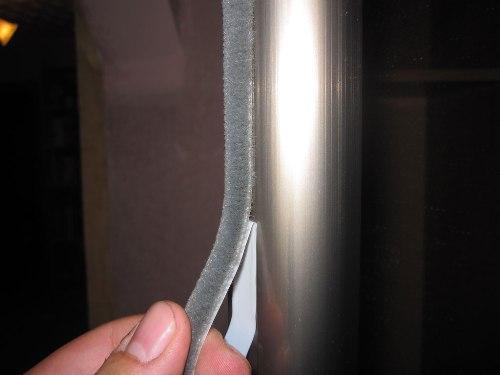
Edge application
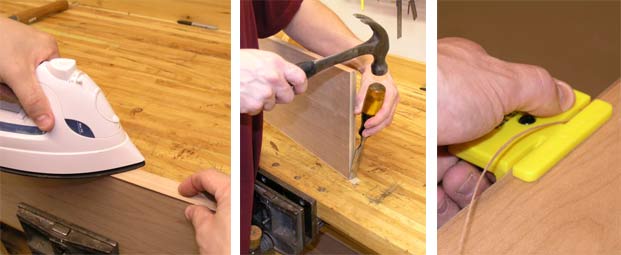
If you've never done hemming, then first look at the lesson. Thanks to a special tape, the edge, that is, the place of cut, is easy to process yourself. A detailed step-by-step instruction is attached to the material. There are craftsmen who recommend edging on parts involved in the visible zone. But on the other hand, the edge protects the cut from moisture and dust.
It is easy to stick the tape on your own, fixing the adhesive side and warming it up to fit with a hot iron. Please note that this is not a professional tool - an ordinary household iron. It is recommended to heat the material in the “2” mode. Be sure to wear gloves so as not to burn your hands. After cooling, excess tape is cut and cleaned with fine-grained sandpaper or a special bar that has a soft side and low abrasion. Trim all the details of the structure around the perimeter.
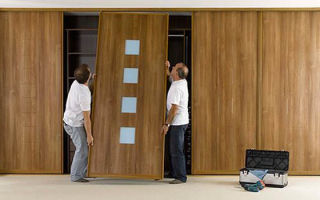
Body assembly
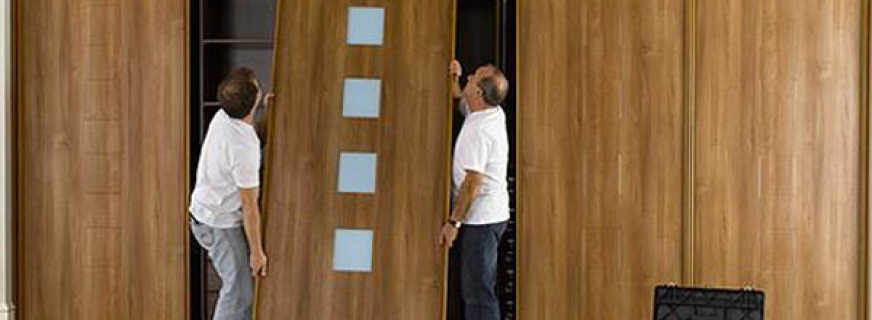
For those who did not leave the idea to assemble a do-it-yourself wardrobe, a video with the participation of professional furniture assemblers will be a very useful tool. Masters tell in detail and in simple language how to start and in what sequence to move forward.
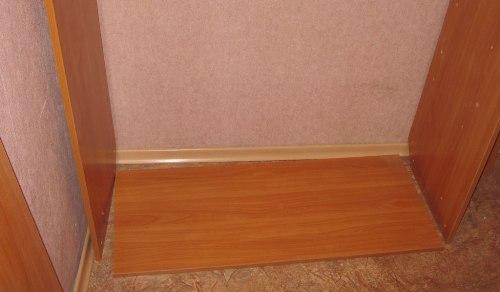
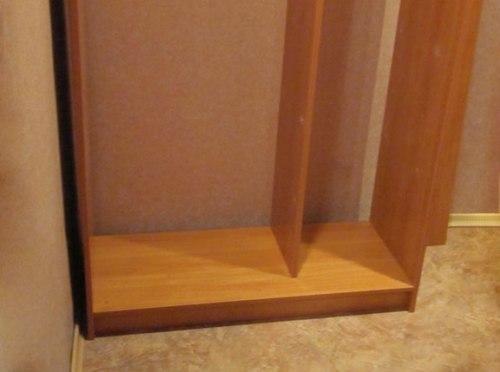
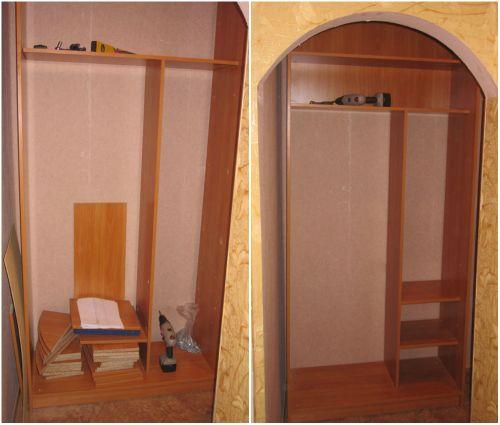
Built-in wardrobes are often mounted vertically, starting from the basement, then there is the fastening of false panels, the installation of internal sections and shelves. The last mounted rails on which the facade is installed in the form of sliding doors. Unlike kitchen cabinets, there will be no back wall and housing, because the built-in design is mounted directly to the wall, floor and ceiling of the niche.
For the cabinet, assembly will be carried out, starting with the box of the case, then fastening the back wall, shelves. Next, the structure is lifted, installing vertically, and already in this position the facade is mounted. Sometimes the dimensions of the room do not allow you to assemble the cabinet horizontally, then you have to work in the vertical direction.
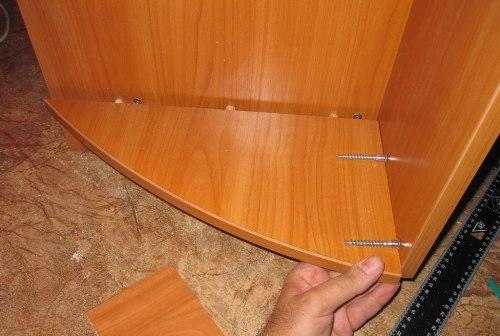
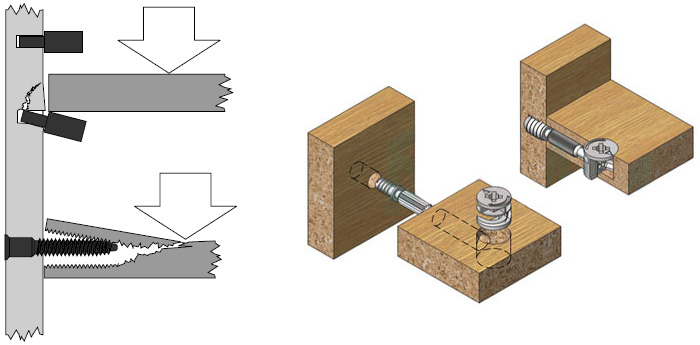
Hardware Mounting
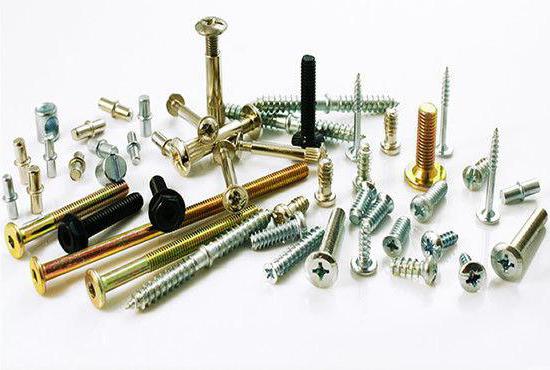
When assembling a wardrobe with your own hands, do not forget that high-quality fittings can seriously extend the life of any piece of furniture. Modern fasteners guarantee high weight retention and the absence of sharp corners that could further damage things or clothes.
The hardware is fastened using self-tapping screws, the protruding parts are closed with plugs that hide surface defects and smooth the surface that has been drilled. Purchase accessories in trusted furniture stores. This is very important, since due to the guides and fasteners, the interior of the sliding wardrobe is used.
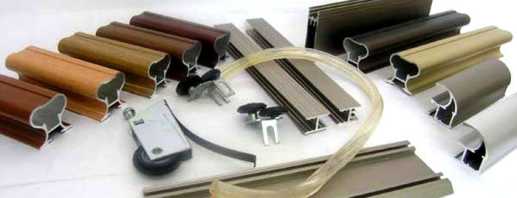
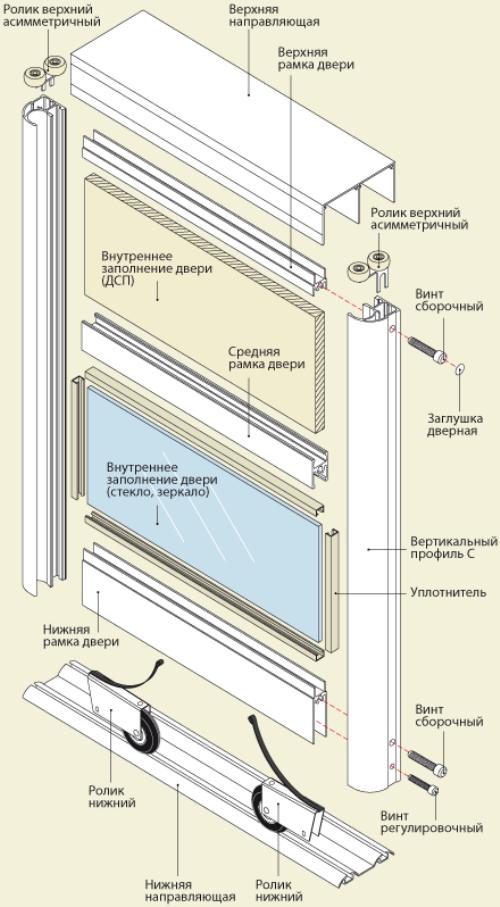
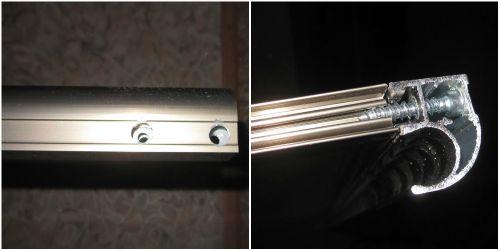
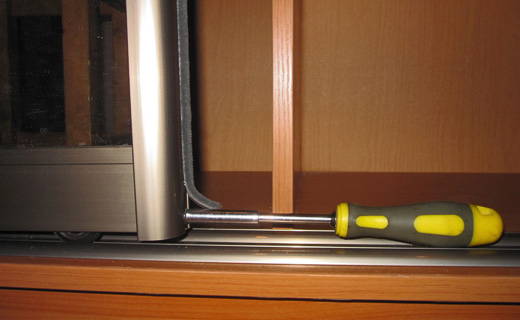
Installation of a sliding system
A distinctive feature of the coupe is precisely the sliding door system. Since making a sliding wardrobe with your own hands will be a little more complicated than just a wardrobe, be sure to figure out the specifics of fastening the guide rails.
Coupe systems can differ in two main characteristics:
- material - steel or modern aluminum alloys is taken as a basis;
- principle of separation.
The material of the guides is the same as in the door frame. Although steel structures are distinguished by lower cost, preference is given to aluminum to its greater degree for its lightness and strength.
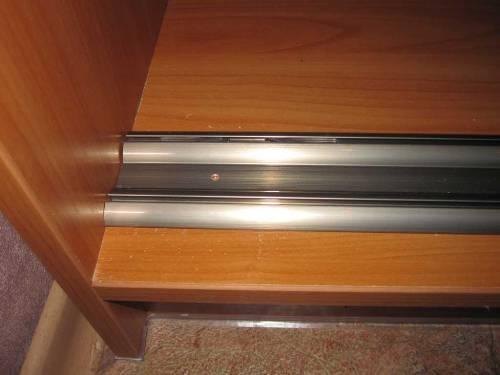
The manufacture of sliding wardrobes involves the use of 2 types of systems:
- upper - the directing mechanism suspends a door;
- lower support - rails can be mounted directly on the floor.
It is very important to properly and evenly strengthen the rails so that the rollers move freely in the process. The proof that everything is installed correctly will be a smooth and silent movement of the mechanism. Do not forget to take care of the guide system - they must be cleaned, lubricated. When reinforcing the rails along the bottom, they must be regularly cleaned of dust and garbage removed, which can hamper the movement of the mechanism.
Video