How to make a rocking chair with your own hands from wood, rattan, metal
After a working day, any person wants to relax, relax properly. Comfortable furniture helps. A home-made rocking chair with your own hands will help to save significant financial resources, create comfortable and practical furniture that meets personal needs. For many masters, an important opportunity is to show their skills and boast abilities in front of guests.
Content
Design features
Before starting work, it is necessary to familiarize yourself with possible design options, operation features, evaluate your strength in carpentry or plumbing.
Signs by which you can divide your own made rocking chairs:
- For apartments, private houses, street. The option for apartment buildings should be silent, small in size, traces on the floor from the rocking chair are unacceptable. In this case, you can make a pendulum rocking chair with your own hands. In private houses, any sizes that are suitable for the overall design of the room are permissible. The main requirement for a garden view is weather resistance.
- Production material: classic wood, metal avant-garde or plastic for the street.
- Allowed mass, which must correspond to the weight of the user.
- Structural solutions.
The first three points are easy to determine, and the fourth should be examined in more detail.
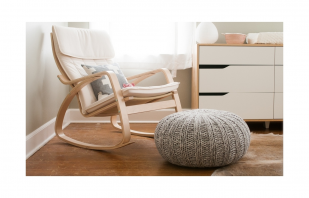
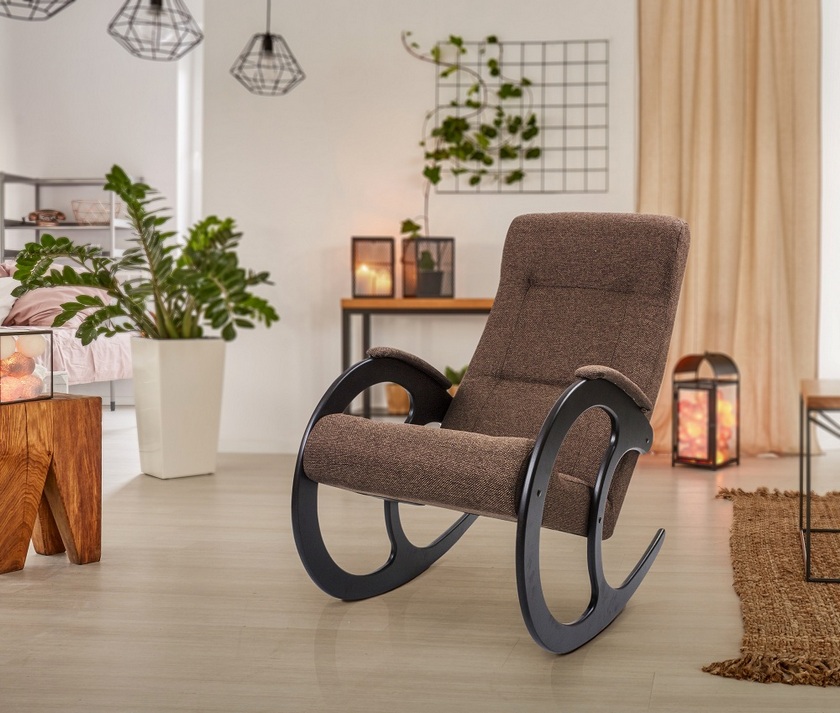
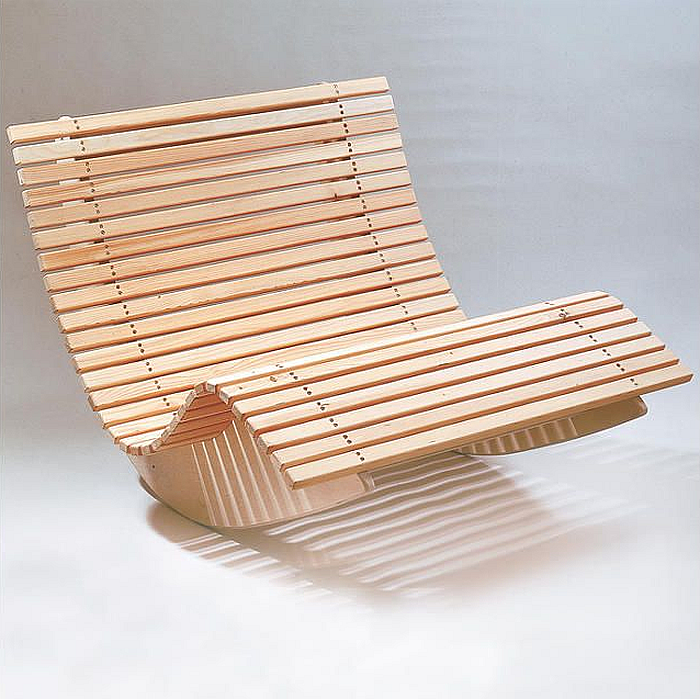
Rocking chairs made of wood on radius runners are the easiest option to manufacture. The simplicity of the profile of arcs (skis, rocker arms) makes the wiggle smooth, but in this case you will not get a large amplitude. Tipping is eliminated by the low center of gravity of the seat, the installation of restrictive cross members or cutouts along the edges of the runners.
A rocking chair from a profile pipe often has skis of variable curvature - with a smaller radius in the center and large at the edges. This design eliminates tipping at large amplitudes. A “nirvana” type profile promotes a smooth lift from the chair, which is especially important for older people.
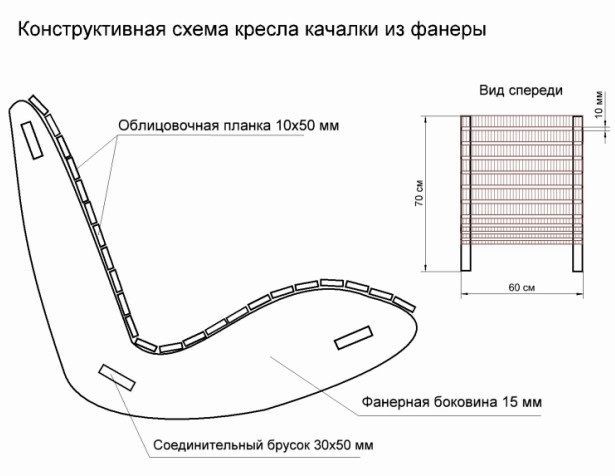
Do-it-yourself plywood rocking chair can be made with elliptical sidewalls, which contributes to smoothness, but does not protect against tipping over at maximum deflection. To prevent "accidents" on the models set limiters-cross members, the front of which serves as a support for the legs.
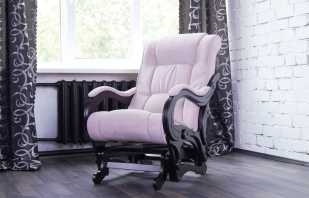
Bearing pendulum designs are characterized by a fixed base - only the seat is swinging. The option is optimal for apartments, since there is no noise of skids rubbing on the floor, which do not spoil the coating. Drawing a chair with a pendulum mechanism for self-production is easy to find.
Multifunctional “3 in 1” models are suitable for large rooms, they allow you to use the chair as a fixed chair, swing with a small amplitude or lie in a hammock. Designs are difficult to manufacture and bulky, so such models are often purchased ready-made.

DIY materials and tools
Which material to make for making a homemade rocking chair depends on the skills and experience of the master with the materials. Round or shaped metal pipes are used for the manufacture of furniture frames that will be used outdoors: steel treated from rust will last for decades under the open sky. There are several drawbacks to such options:
- an impressive mass will require a couple of people to move the chair;
- the floor covering must be super-resistant or it will be necessary to solve the problem of finding softening pads for runners;
- for apartments use a thin-walled small-diameter pipe, which is difficult to weld without special semi-automatic equipment.
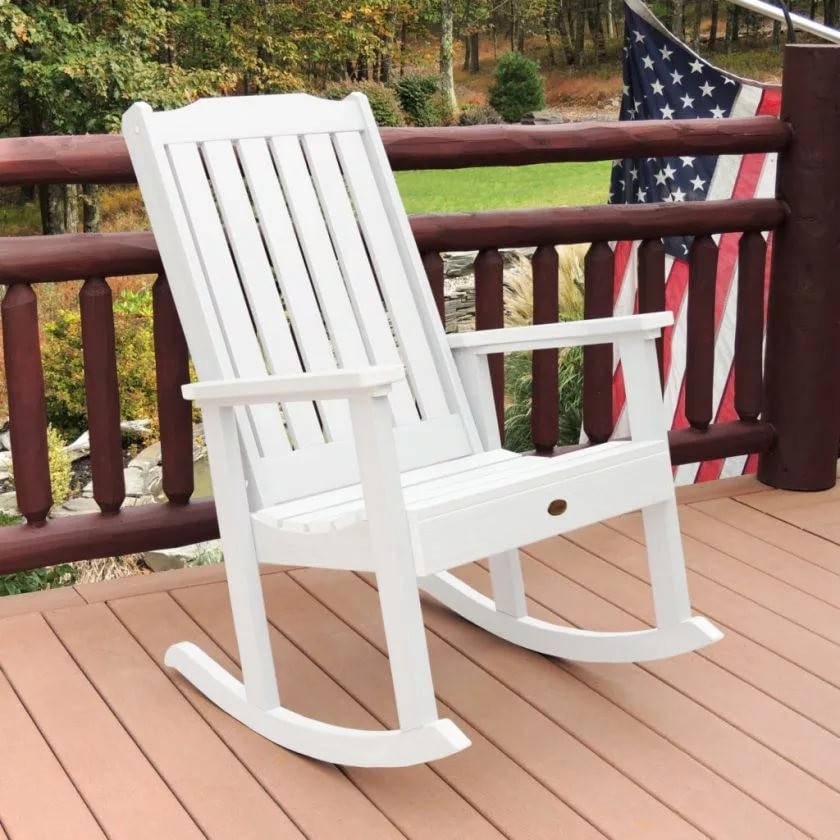
Wood is great for home furniture options. If you have certain skills in the workpiece, you can bend, getting the exclusive outline of the frame. An outdoor installation will require the use of antiseptic and paint coatings of special strength, otherwise the age of the chair will be short-lived.
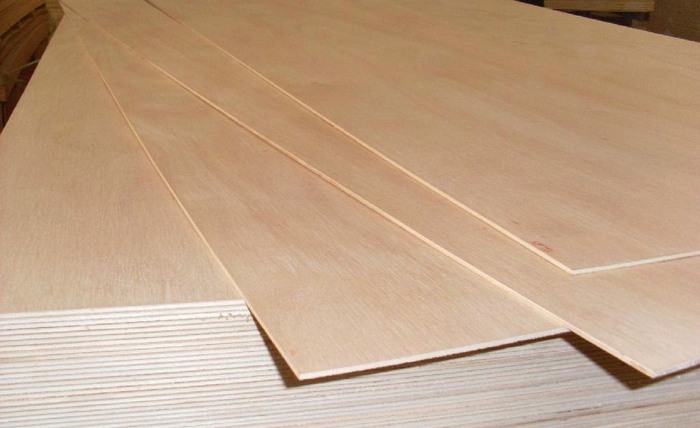
Plywood is the best and least expensive option for a first experience. In the manufacture of using a minimum set of tools and fixtures, the finished product is easy to decorate. Moisture-resistant plywood can withstand a short stay in the sun, rain.
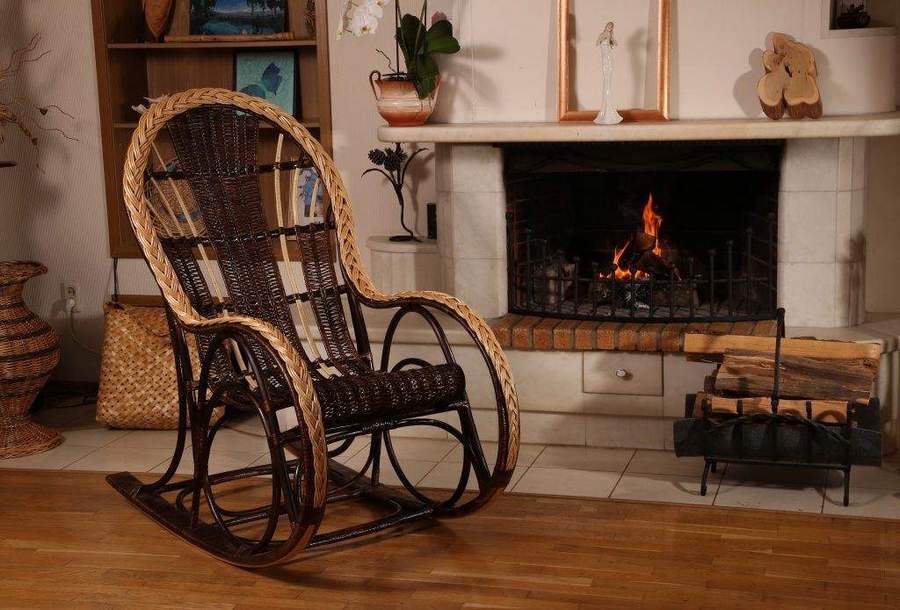
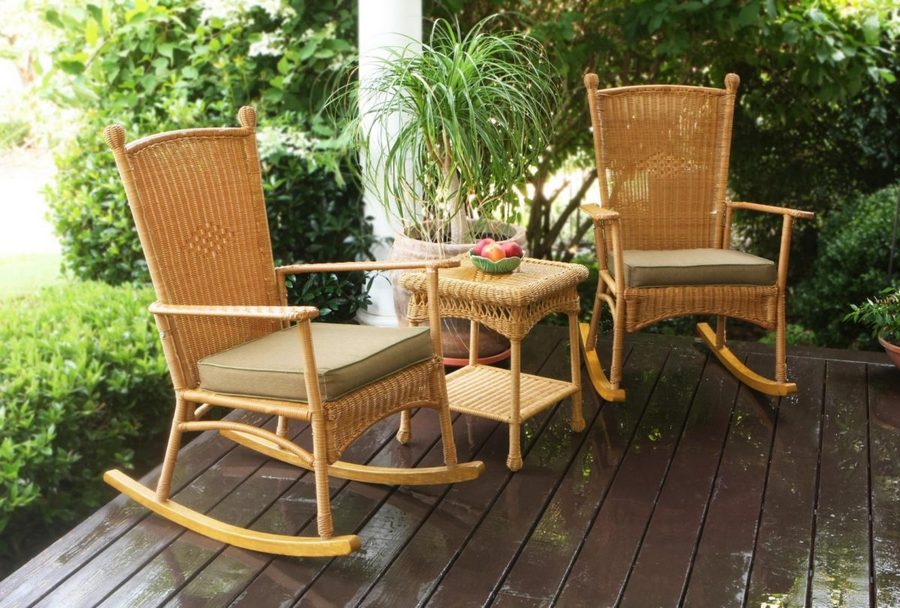
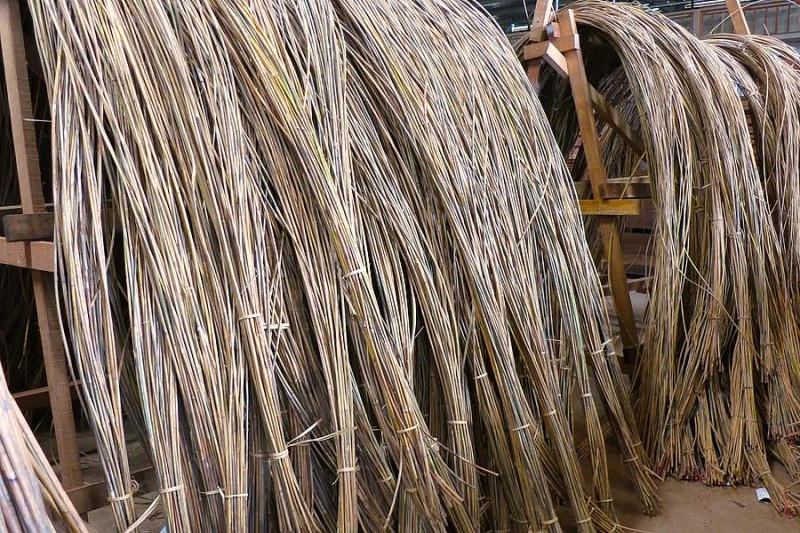
Rattan, bamboo, willow branches and reeds - these materials make wicker furniture. Billets are acquired in the building materials store, willow can be assembled independently, but for weaving it will be necessary to study the technology and develop skills.
Polypropylene pipes are able to support the weight of a person, being used for the manufacture of runners or as a frame. The appearance of such a product is unusual.
Plastic bottles are exotic in furniture, but such designs exist. Most often, bottles are used to create a seat and back, and the base is made of more durable materials - wood or plywood.

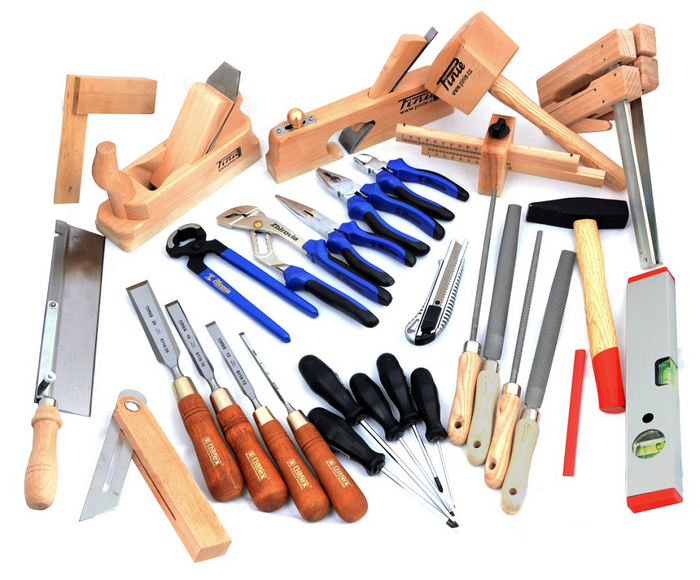
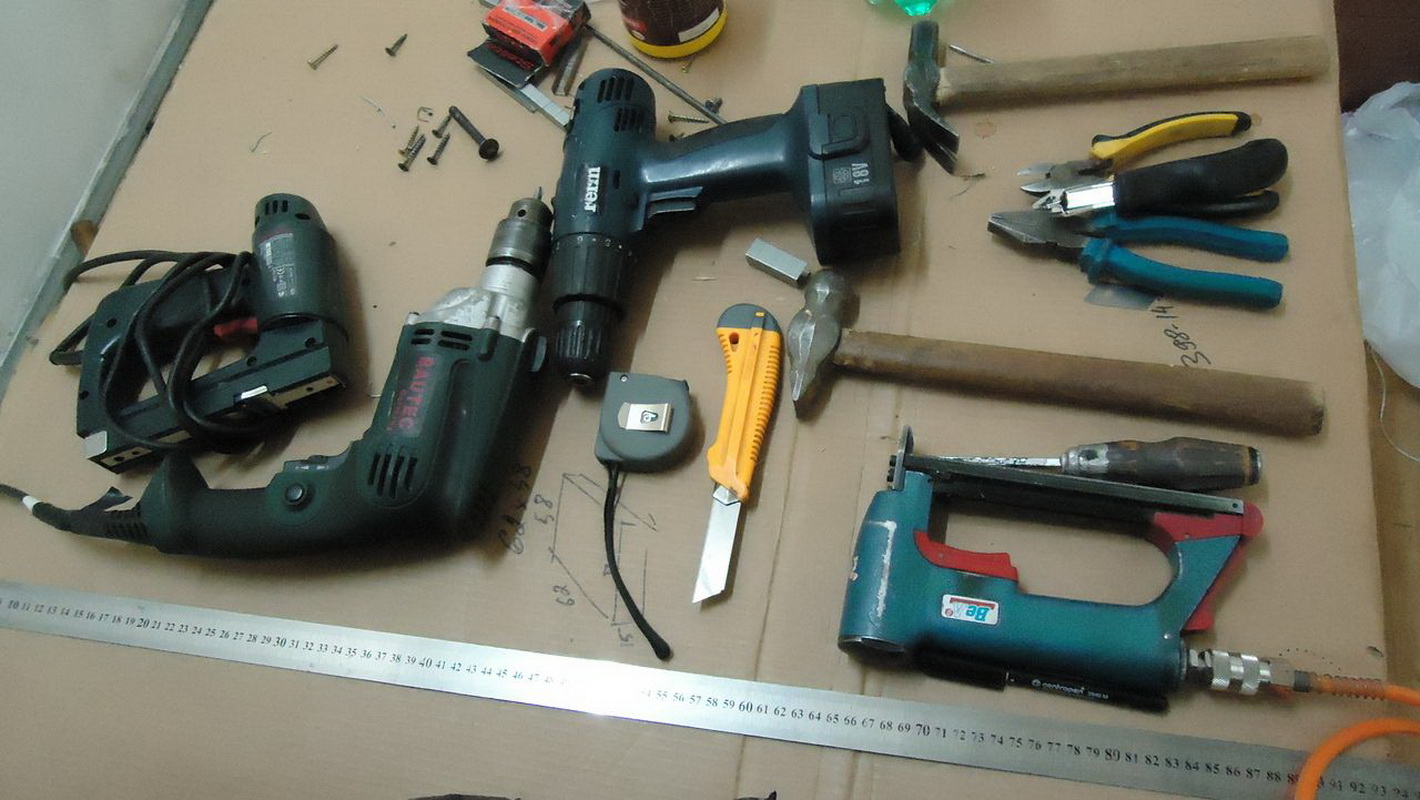
In preparation for work, an audit of the available tools is carried out, if necessary, they purchase, rent or borrow the missing ones:
- For metal structures, a welding machine, mask, angle grinder are required. The master cannot do without a pipe bender. Make it easy with your own hands - it will be cheaper than contacting the metalworking workshop. The cost of the purchased device is comparable to the price of a factory chair.
- To work with wood you will need: an electric jigsaw or a hacksaw with narrow interchangeable blades. We'll have to saw wood up and down, and for this we use different tooth configurations on the saw part. An angle grinder with a special nozzle will help polish the surface faster. The same can be done with a drill, which is required. For decor, you need to prepare brushes and containers for varnish, stain, paint.
- The frame of plastic pipes is welded with a special tool - “ironing”, a soldering iron, welding.
- For rattan weaving, special hooks are acquired.
- They also prepare a standard set of joiners - a chisel, a hammer, a rubber or wooden mallet.
It is difficult to say what is primary is the choice of material for furniture or the preparation of a tool. More often, they proceed from the inventory available - it is impractical to buy electric devices for one-time use.
Step-by-step instruction
The manufacturing scheme of a rocking chair from any material always consists of the following sequence of actions:
- The choice of design and development of drawings.
- Procurement of materials and preparation of tools.
- Assembly of the frame.
- Mounting the seat and backrest.
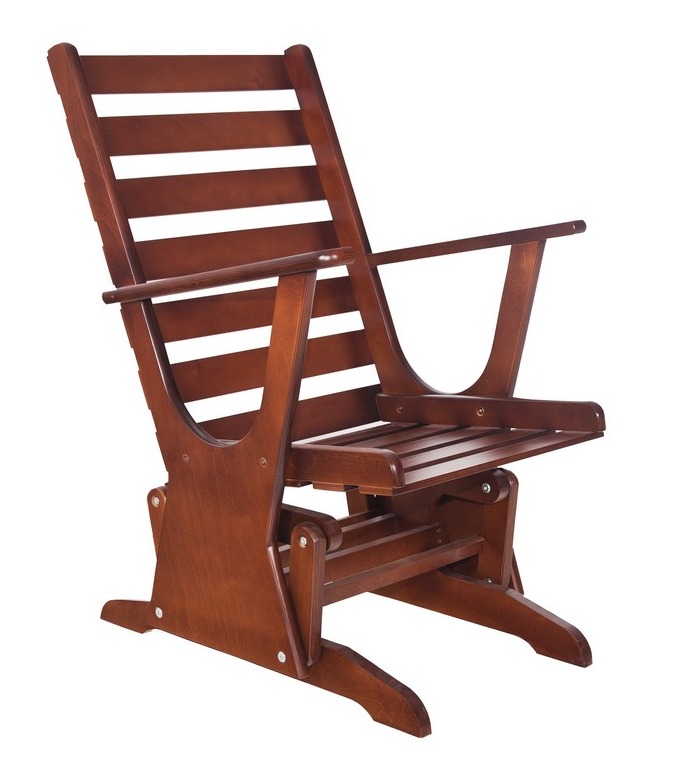
Do-it-yourself wooden rocking chair is created according to the following algorithm.
Design
Designing swinging furniture on your own without experience is difficult. When calculating the curvature of the runners and the geometric dimensions of the parts for assembly take into account:
- mass and anthropometry of the user;
- the center of gravity of the finished product, which affects the smoothness of the "stroke";
- body tilt angles in different modes of use;
- radii of curvature for comfortable rocking and preventing tipping.
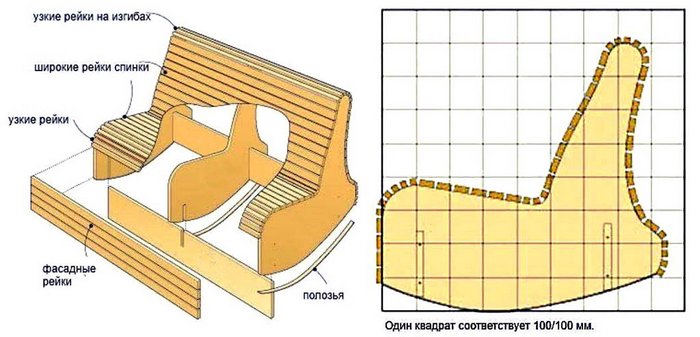
For the first experience, it is better to find ready-made drawings of rocking chairs made of plywood. This will help to avoid mistakes, waste of time and materials.
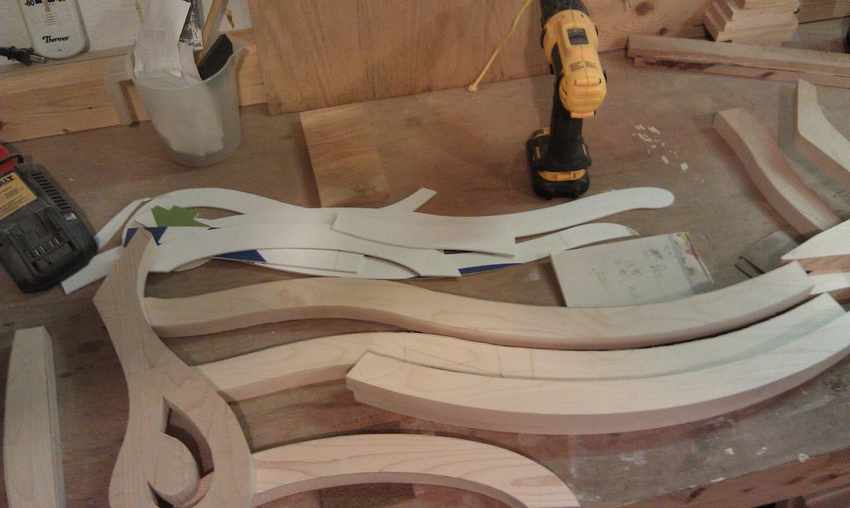
Having decided on the design, life-size drawings are transferred to a sheet of paper of a suitable size, for example, whatman paper. Cutting out the configuration of the side walls, runners, jumpers, other details, get templates for applying to prepared materials.


Production of the base and runners
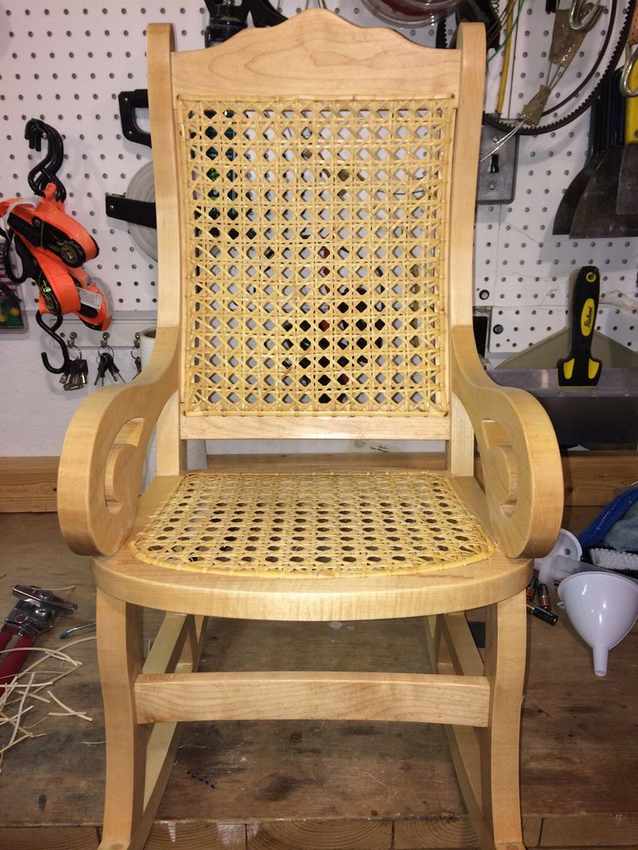
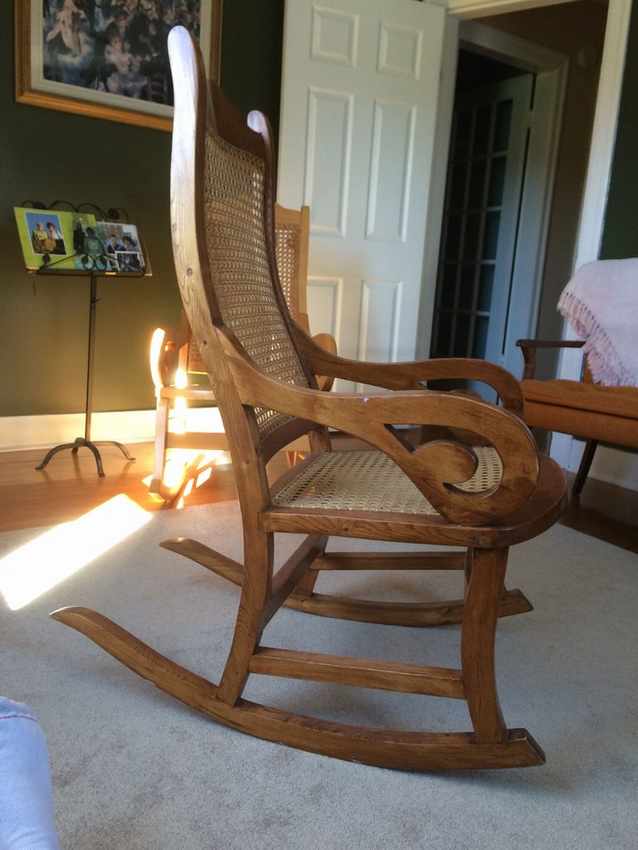
Using an old frame is an example of how easy it is to make a rocking chair with your own hands. In this case, you will need:
- restore the surface of the tree, cleaning it with sandpaper and covering it with paint and varnish material;
- stitch and secure the new seat.
One of the options for the manufacture of runners is to cut the sides of plywood. To give strength, each wall is made of 3 layers: the inner of a sheet with a thickness of 10-12 mm, the outer ones of 8 mm of material.
The sequence is as follows:
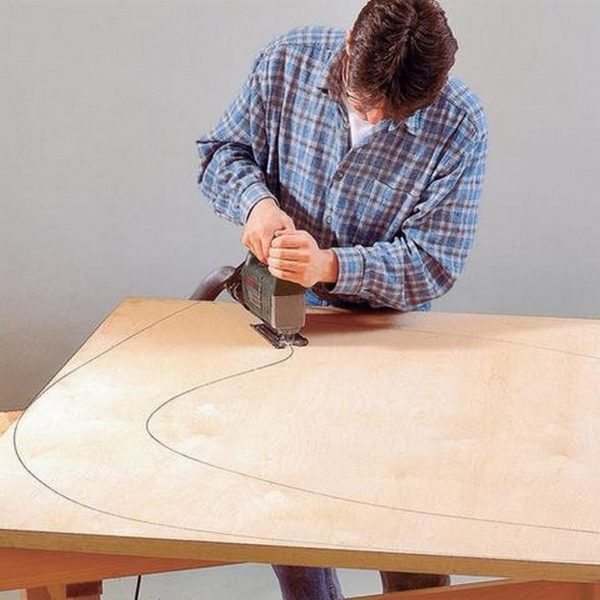
- using the template, transfer all the drawing elements of the rocking chair to the prepared plywood sheets;
- saw out the details with an electric jigsaw;
- fasten sheets with bolts through holes or with screws;
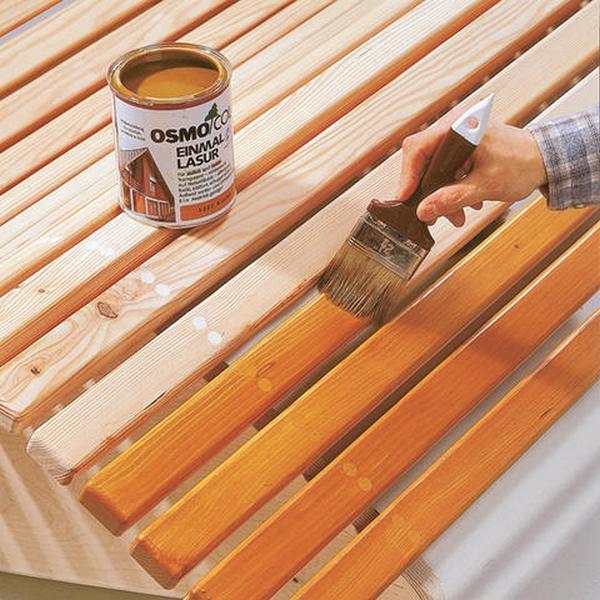
- to clean, polish parts from all sides;
- to cover blanks with varnish or paint;
- install protective pads made of rubber or plastic on the contact points of runners and the floor.
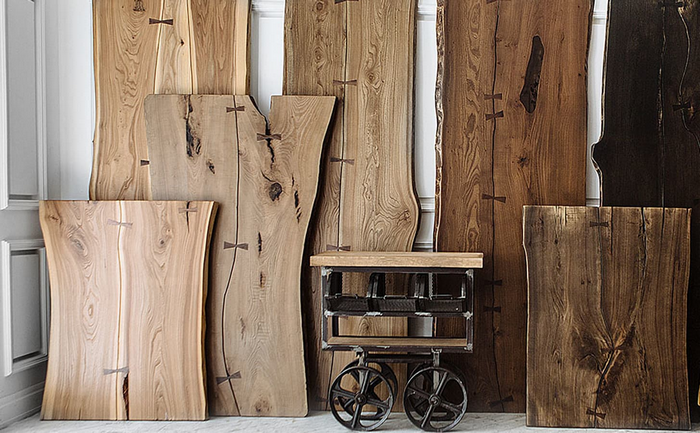
For runners, you can use boards whose width is sufficient for cutting curved parts. Thickness of boards is from 40 mm.
For another option for producing curved parts, the bars soaked in water are bent according to the pattern. This process is time-consuming; powerful clamps will be required to complete it. This method is not suitable for making a chair with your own hands, it is better not to use it without experience.
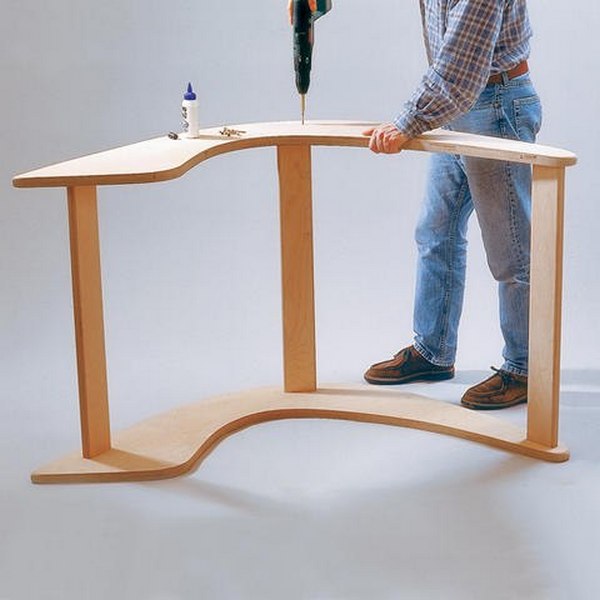
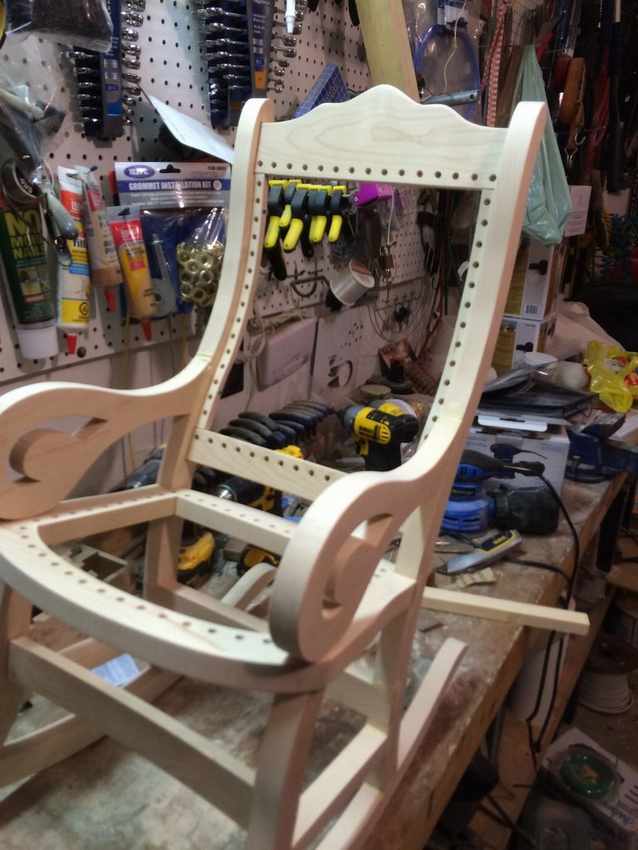
Assembly
The final assembly of plywood models involves the manufacture of cuts in parts and fastening to them reciprocal strips for self-tapping screws, glue or using metal corners and screws. Parts in solid wood products are fixed with glue using a spike-to-groove joint. Protruding glue is immediately removed with a clean rag so that no traces remain.

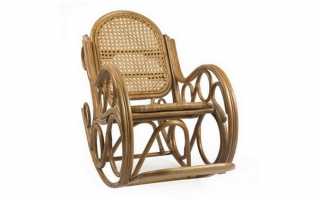
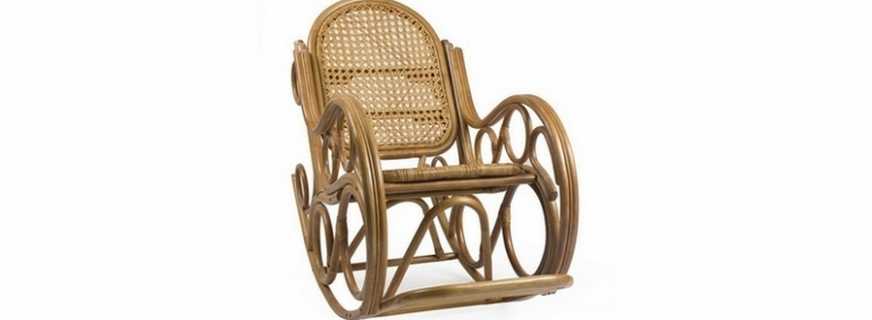
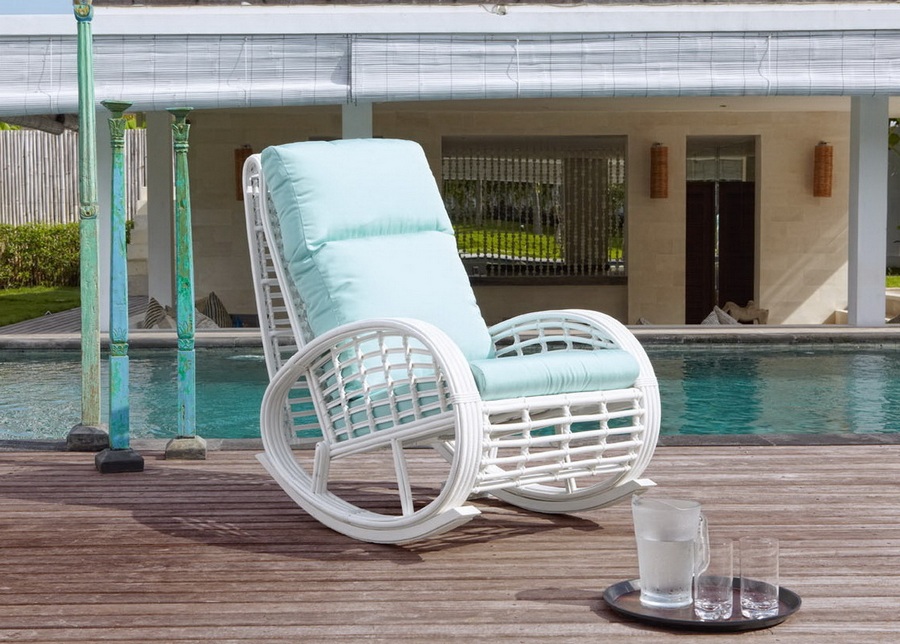
Features of the manufacture of rattan products
The main advantage of rattan furniture is the ease of construction, which is why the material is popular in the manufacture of DIY rocking chairs. The child will be able to independently move the piece of furniture.
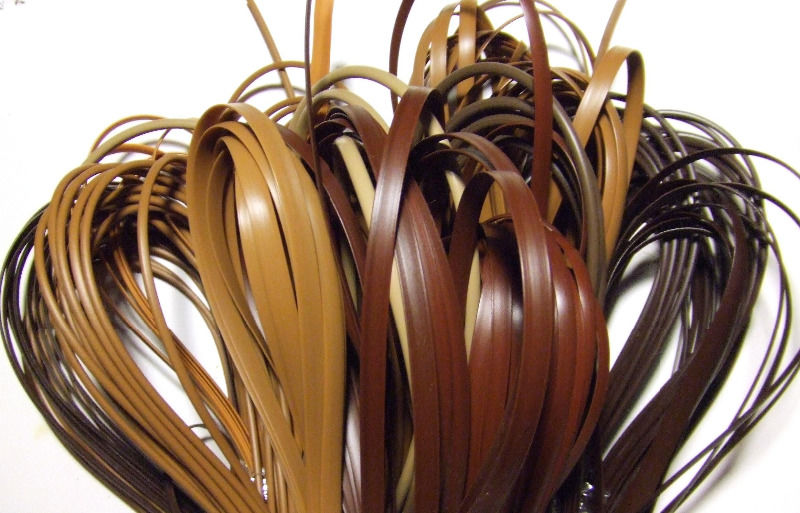
Another advantage is that the material is completely ready for use, calibrated by the thickness and length of the rods, in contrast to willow branches, which will require long processing. However, it is often used not natural, but artificial rattan. It is a tape that is easy to cut to the desired length, thereby reducing the amount of waste material. In addition, such an artificial analogue of rattan is malleable, convenient for work, and easily bends, which allows even a master with insufficient weaving experience to create an interesting and high-quality version of a rocking chair.
For work you will need:
- a screwdriver with a set of bits, screws, thin drills;
- awl, tape measure, marking pencil;
- scissors;
- hacksaw;
- jigsaw;
- furniture stapler and staples;
- grinder for processing wooden structures;
- furniture fasteners, screws.
Materials for manufacturing are selected depending on the model. For the frame, you may need plywood, a wooden beam, furniture fasteners, screws, artificial rattan tape, furniture glue.
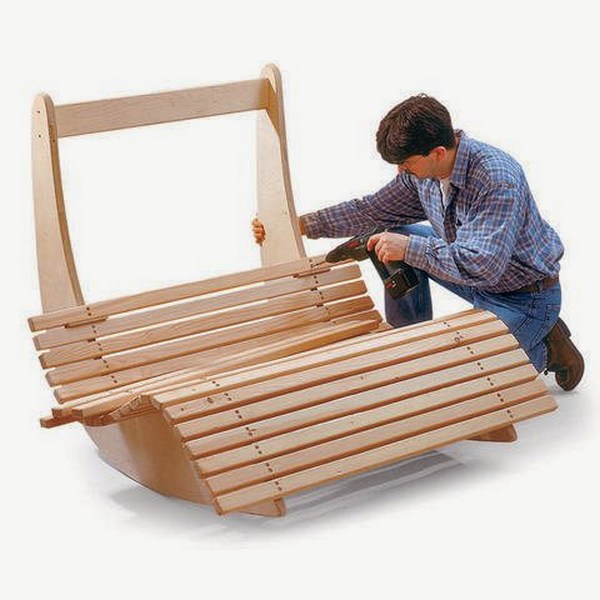
The process of creating a wooden chair consists of several main stages. First of all, it is necessary to choose the shape of the future chair and create patterns on which the main details of the frame will be sawn:
- seat base;
- back;
- handrails;
- runners.
All these elements are made of wood, so the next step is to transfer the patterns to the material, and then cut out all the details. For beginners, the easiest option is to purchase a finished frame in furniture stores or workshops or use a finished chair as a basis for rocking, to which you need to attach the skids.
Since the rocking chair should be braided with an artificial rattan, it makes sense to braid the parts first and only then proceed to the assembly of the elements.
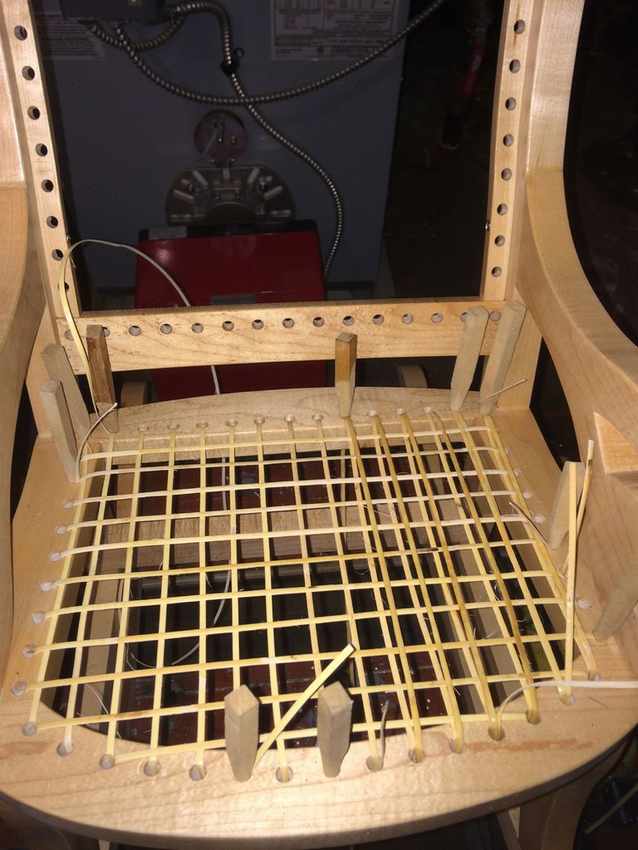
For the first experience, it is better to use the simplest version of chess weaving of bands.
- It is necessary to measure the length of the ribbons with which to create the basis for weaving. To do this, the beginning of the tape is located on the inner part of the frame, then it is thrown over the frame strip and displayed on the front of the braided structure, the end of the segment should be brought back into the inner part of the frame, where it will be fixed. For example, with the selected rectangular shape of the frame, the tapes will be stacked along its short side - the width of the structure.
- Having decided on the length of the segment, it is necessary to cut the number of strips that will fit tightly one against the other.
- Each tape is pulled over the frame, with the ends hidden in the inside and secured with a conventional furniture stapler. Tapes are stacked next to each other without gaps. The best option is to first attach all the cut tapes along one of the inner sides of the frame strip, and then engage in laying and fastening from the second side.
- Now you need to determine the size of the ribbons that will braid the laid base. In this case, it is necessary to weave across the fixed segments, placing the tapes on the long side of the frame. The fastening of the ends will be carried out in the same way as when preparing the base, from the inside of the frame planks.
- The required number of strips is cut, and the prepared segments are attached to one of the inner sides of the frame along its short side (width) as close as possible to each other with a furniture stapler.
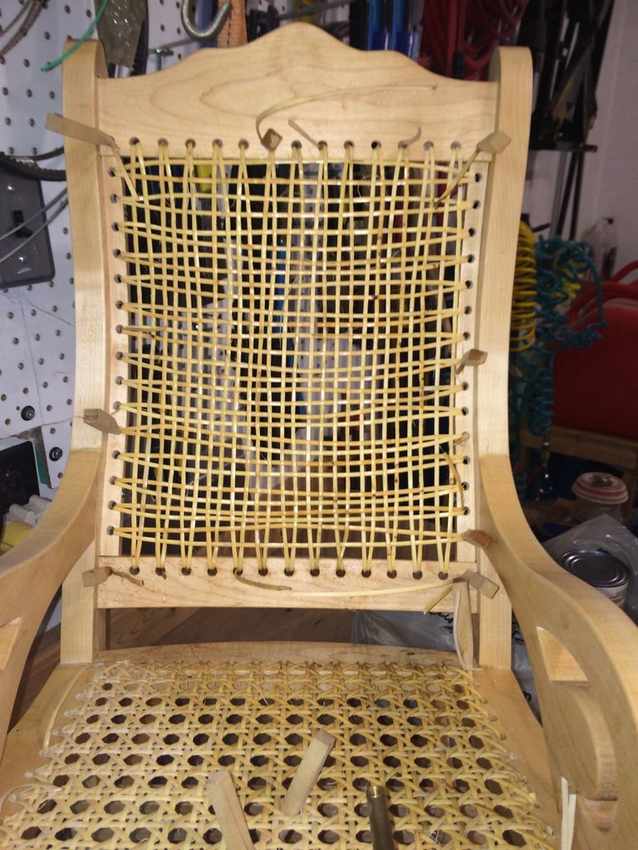
- The strips are passed through the stretched ribbons of the base in a checkerboard pattern. For example, in the first row you need to make a strip at the very beginning under the first ribbon of the base, and in the second row the tape will have to go above the first strip of the base. Further, each strip is woven through one base tape, and the end is always fixed with a furniture stapler inside the frame. At the end of the work of weaving each tape, it is necessary to align the rows, knocking them out as the masters engaged in making rugs usually do.To do this, align the rows with a flat tool (for example, a screwdriver), trying to ensure that each new row is placed as tightly as possible to the previous one.
- The side parts are braided in a similar way.
- As a result of the work performed, not a single connection of the tape with the frame will be visible, since all ends are fixed inside the frame strip.
Similarly, the back of the chair is braided. If desired, you can decorate the legs of the man-made model. The easiest way is circular braiding, in which the tape is laid in a circle, and each new turn is located as close as possible to the previous one, so that the texture of the tree is not visible at all. If the master would like to use more sophisticated options, you will either have to find and see several master classes, or study special literature with diagrams and explanations for them.
Now that all the elements are decorated, the design of the chair is assembled, the parts are interconnected using furniture fasteners. When connecting the elements, you can additionally use glue, so that the design is even more durable. Lastly, runners are installed. The most common option for fastening them is a connection with furniture screws.
In order to prevent damage to the floor covering during operation of the chair, it is possible to install gaskets made of plastic or rubber on the runners. For this, strips are cut from the selected material to the lower part of the runners. Then the material is attached using furniture studs. Additionally, you can use glue so that the linings are more tightly attached to the wooden base.
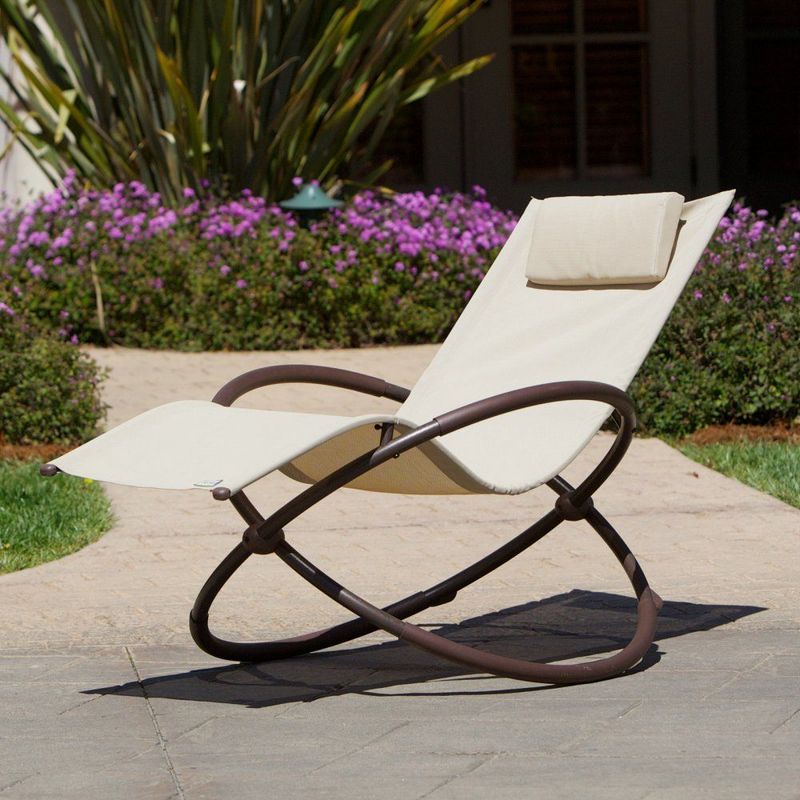
Features of models of plastic pipes
A rocking-chair made of plastic pipes is a great way to “attach” to the case the remaining material after making a drinking or watering water supply. Of the tools for creating a frame, you will need scissors for PVC pipes, a special soldering iron (welder).
For the side surfaces you will need a pipe with a diameter of 32 or 25 mm, for jumpers - 20 mm. By the number of connection points, tees acquire. It is better to foresee a purchase with a margin in order to practice soldering on individual parts. The price of tees starts at 5 rubles, so a stock of 4-5 parts will not be expensive.
To strengthen the structure, pieces of reinforcement with a diameter of 12-14 mm are inserted inside the pipes.
A template is prepared in advance, according to which pipe segments are cut, providing a margin for each part of 3-4 cm: when soldering, the tube is inserted into the tee by 1.5-2 cm.
If you work carefully, then the runners can be given a rounded shape without heating. If this cannot be done, then clean sand is poured into the tube, heated in the oven to 90–100 ° C. To prevent sand filling, a plug is welded on one side. It will remain on the parts even after the completion of work, so that moisture does not get inside. The same plugs are welded to all open ends of the pipes.
At the end of the assembly of the frame, a foam mattress is fixed on it, sheathed with raincoat fabric, if the chair is operated on the street. For fastening use strips of fabric sewn to the mattress (ties).


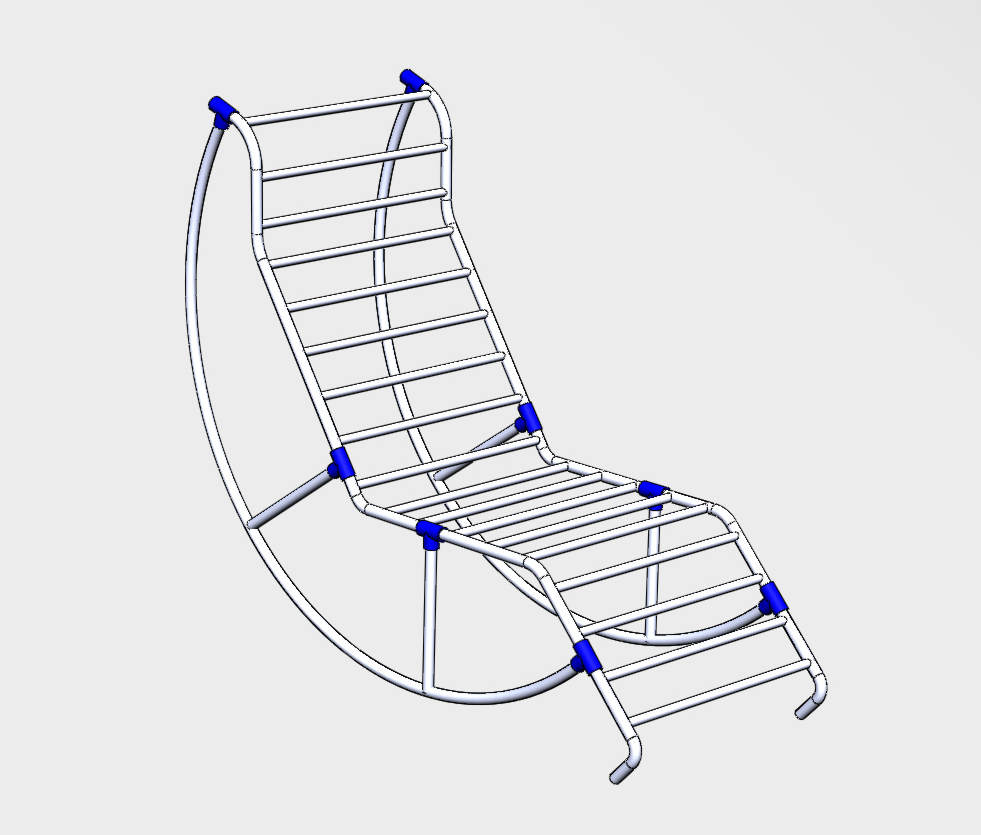
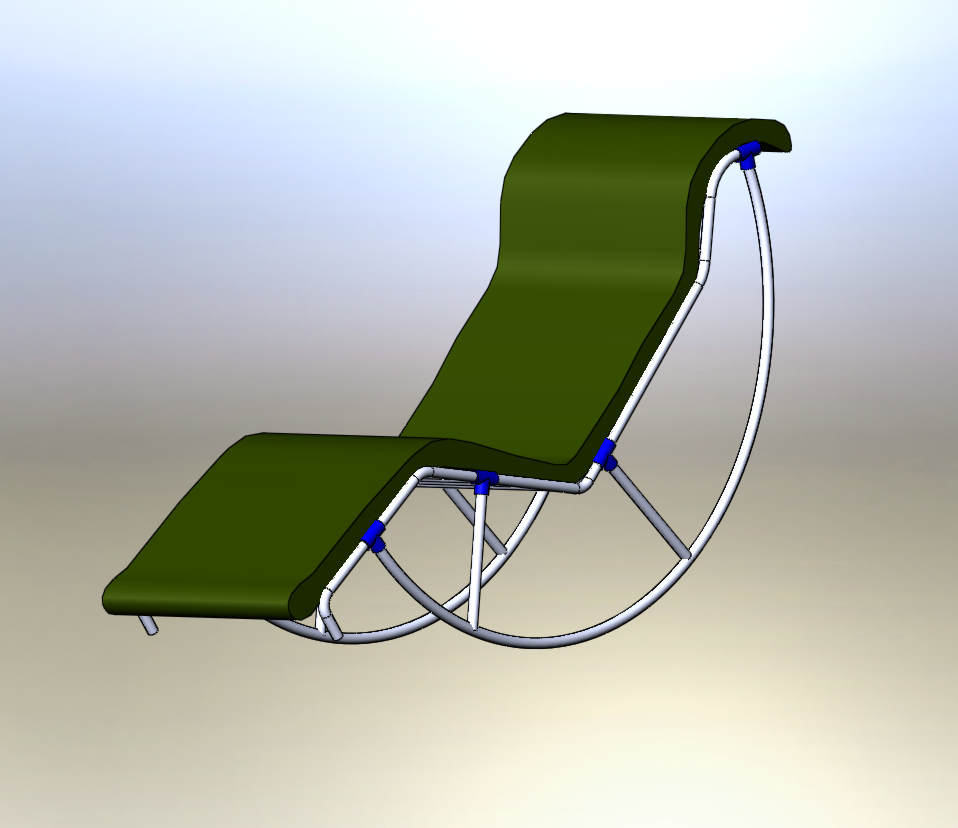
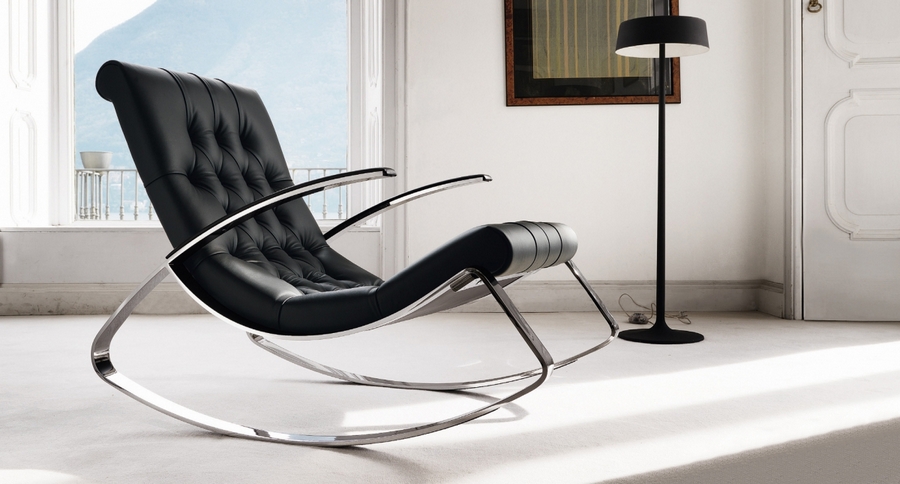
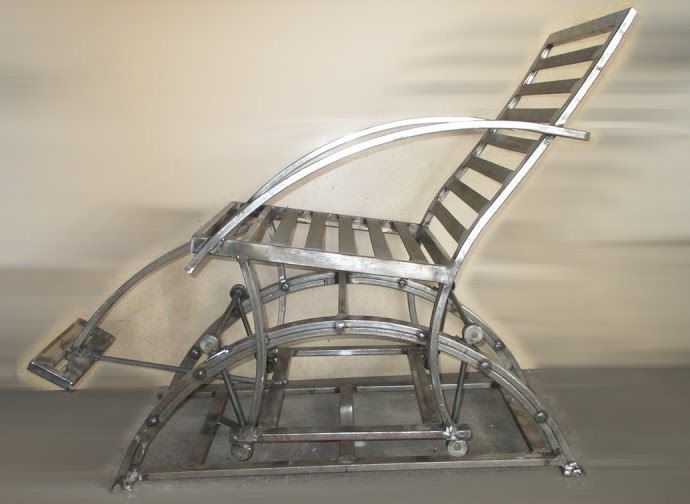
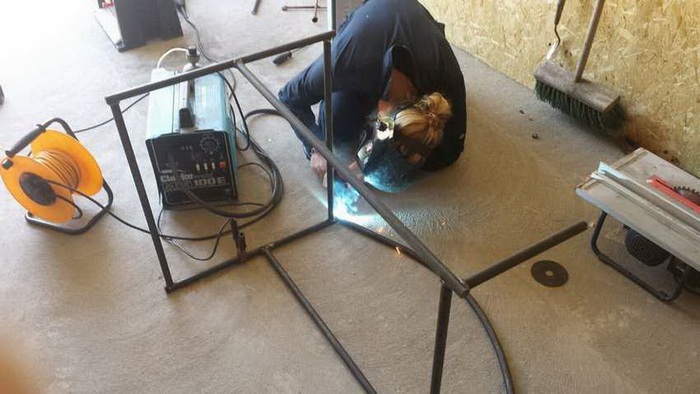
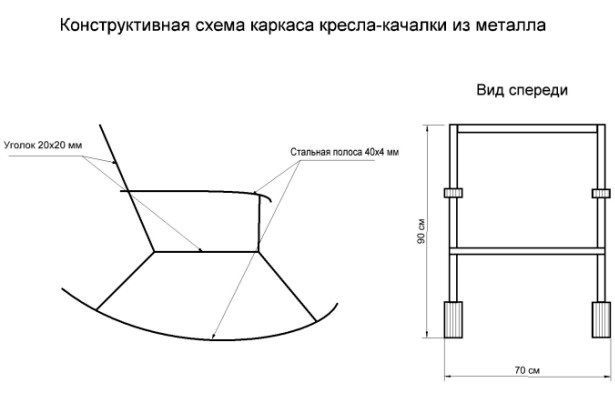
How to make a rocking chair from metal
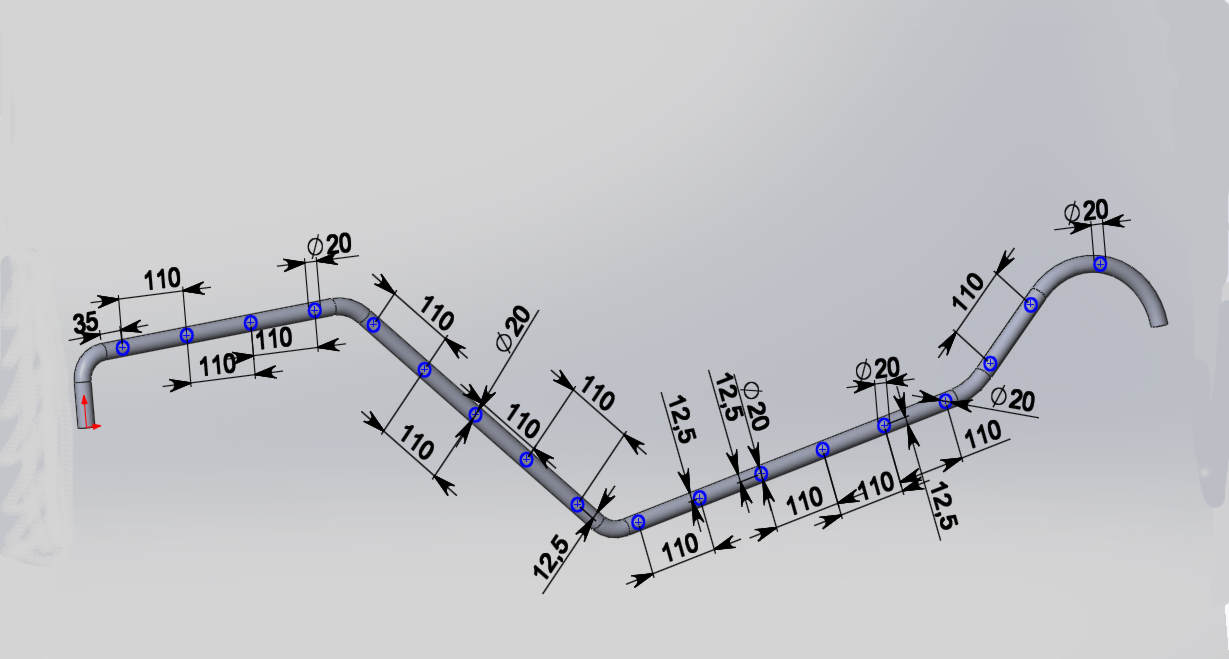
Making a metal rocking chair is up to the master with the skills of working with welding. In this case, you need a pipe bender for a round or profile pipe: bending it exactly without a special tool is not easy. You can use a template and clamps, and weld the ends of the metal bent and clamped with screeds with a jumper.
The step-by-step process differs little from the manufacture of a rocking chair made of wood or plastic pipes:
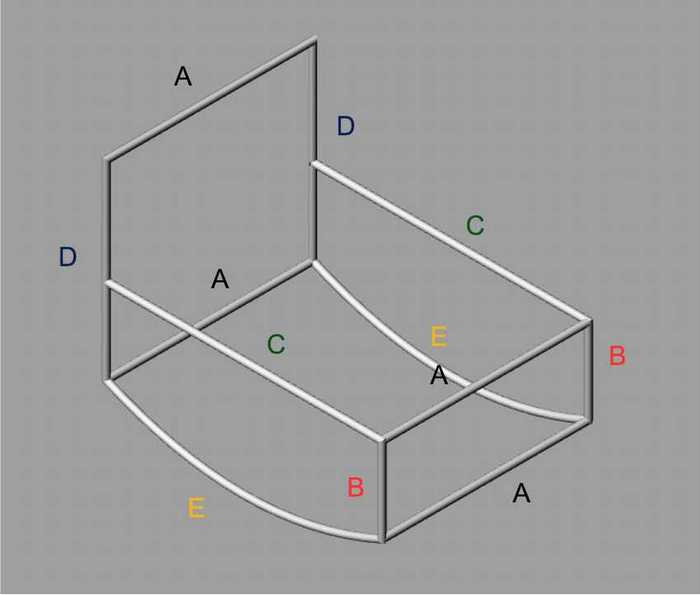
- They make or find finished drawings.
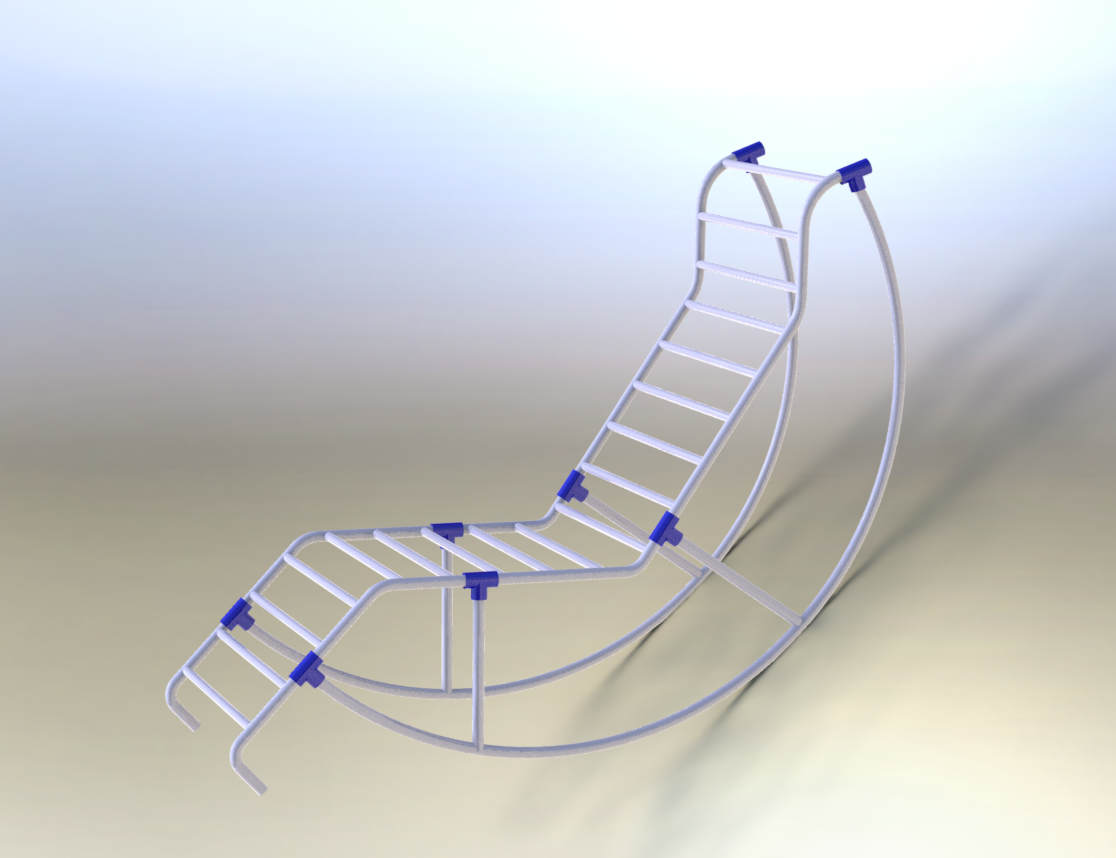
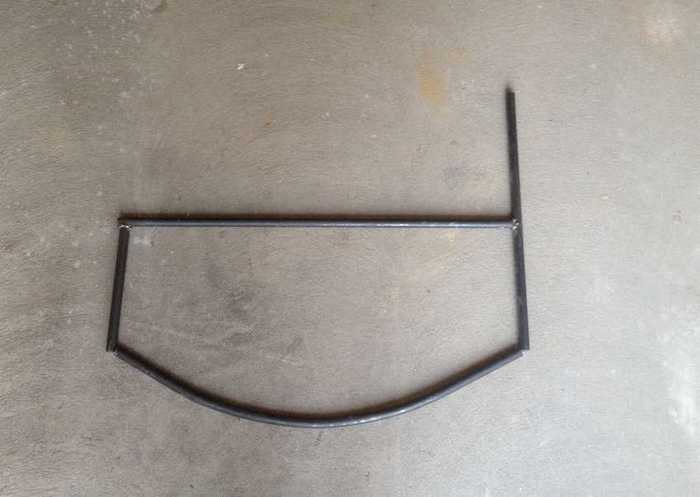
- Sidewalls are welded.
- The pipe is bent and secured by the weld of the runner.
- Assemble a single design for the right and left sides.
- Connect the sidewalls with jumpers.
- Process the seams with an angle grinder.
- The frame is covered with a moisture-proof primer and paint in 2-3 layers, following the instructions regarding the drying of the layers.
The work ends with the installation of wooden crossbars on the seat and back of the structure. And the material remaining after construction is an opportunity to realize unusual ideas for home decoration.
Making a rocking chair with your own hands is quite simple for people with skills in working with tools. A little patience, diligence, time spent, and now a new interior item has already appeared in the house that will make the rest comfortable and enjoyable.

Video